React Three Fiber for Beginners — Part 3: Lighting, Polish, and Performance
Finish the interactive desk with shadows, day and evening lighting, material controls, HTML labels, and on-demand rendering.
This is a connected three-part series for developers who already know React components, props, useState, and useRef. You do not need previous Three.js knowledge.
- Part 1: Your first 3D scene
- Part 2: Components, clicks, and animation
- Part 3: Lighting, customization, and performance
We build Little Desk, a small interactive workspace. Each part adds to the same project. The downloadable version has three lesson tabs; the code in each post lets you build the lesson step by step without first writing that navigation shell.
In Part 2, we built a desk and made its cube interactive. This final part improves the presentation without turning the project into an advanced shader course. We will add a plant and books, enable shadows, make the cube customizable, and give the idle scene a quieter rendering loop.
Keep your existing files. InteractiveBox.jsx already accepts the props we need. We will append two exports to DeskObjects.jsx, replace DeskScene.jsx, and update App.jsx.
Add two finishing objects
Append these components to src/lessons/DeskObjects.jsx:
export function Plant() {
  return (
    <group position={[-1.65, 1.12, -0.9]}>
      <mesh position={[0, 0.19, 0]} castShadow>
        <cylinderGeometry args={[0.28, 0.2, 0.38, 24]} />
        <meshStandardMaterial color="#b96347" roughness={0.85} />
      </mesh>
      {[0, 1, 2, 3, 4].map((leaf) => (
        <mesh key={leaf} position={[Math.sin(leaf * 1.26) * 0.17,
          0.6 + (leaf % 2) * 0.13, Math.cos(leaf * 1.26) * 0.17]}
          rotation={[0.35, leaf * 1.26, 0.45]} scale={[0.1, 0.36, 0.16]} castShadow>
          <sphereGeometry args={[1, 12, 8]} />
          <meshStandardMaterial color={leaf % 2 ? '#658753' : '#43654b'} roughness={0.8} />
        </mesh>
      ))}
    </group>
  );
}

export function Books() {
  return (
    <group position={[1.6, 1.12, 0.9]} rotation={[0, -0.2, 0]}>
      {['#b86f56', '#e6d7b9', '#6d9487'].map((color, index) => (
        <mesh key={color} position={[index * 0.04, 0.08 + index * 0.16, 0]}
          rotation={[0, index * 0.08, 0]} castShadow>
          <boxGeometry args={[0.75, 0.14, 0.65]} />
          <meshStandardMaterial color={color} roughness={0.9} />
        </mesh>
      ))}
    </group>
  );
}
The plant uses a cylinder pot and stretched spheres for leaves. Scaling a sphere differently on each axis produces an ellipsoid. This is enough to suggest a small houseplant without a downloaded asset.
The books are three flattened boxes. Slight offsets and rotations keep the stack from looking mathematically perfect. All positions are relative to their parent group, so the whole stack can be moved with one prop.
This approach is useful for learning and small stylized scenes. For a realistic chair or a detailed character, an authored GLB model would be a better fit. Finish this scene first; model loading adds its own questions about loading states, asset size, materials, and reuse.
Understand the three shadow switches
A lit scene does not automatically have shadows. For real-time shadow mapping here, three settings must agree:
- The canvas enables shadow rendering.
- The directional light has
castShadowenabled. - Objects cast or receive shadows as appropriate.
The desk and cube cast shadows; the tabletop and floor receive them. A visible light that does not cast a shadow still contributes illumination.
A shadow map is rendered from the light's point of view. Its camera bounds must cover the subject. Very large bounds spread the available pixels over too much space, making edges less defined. Our small desk fits into a roughly ten-unit square.
The 1024-by-1024 map is a modest starting point. Doubling each dimension means four times as many map pixels, not twice. We add a small negative bias to reduce self-shadowing artifacts, but do not treat that value as universal: scene scale and light direction affect the result.
Replace the scene with the polished version
Replace src/lessons/DeskScene.jsx with this complete file:
import { Canvas, useThree } from '@react-three/fiber';
import { Html, OrbitControls } from '@react-three/drei';
import { useEffect, useRef } from 'react';
import InteractiveBox from './InteractiveBox';
import { Desk, Mug, Laptop, Plant, Books } from './DeskObjects';

function ViewControls({ cameraVersion }) {
  const controls = useRef(null);
  const camera = useThree((state) => state.camera);
  const invalidate = useThree((state) => state.invalidate);
  useEffect(() => {
    camera.position.set(6, 4.8, 7);
    if (controls.current) {
      controls.current.target.set(0, 1, 0);
      controls.current.update();
    }
    invalidate();
  }, [cameraVersion, camera, invalidate]);
  return <OrbitControls ref={controls} makeDefault target={[0, 1, 0]}
    enablePan={false} minDistance={5} maxDistance={14}
    minPolarAngle={0.3} maxPolarAngle={Math.PI / 2.1} />;
}

export default function DeskScene({ polished = false, selected, onSelect,
  spinning = true, night = false, color = '#ea875a', roughness = 0.4,
  x = 0, cameraVersion = 0 }) {
  const background = night ? '#182b32' : '#edf1ed';

  return (
    <Canvas shadows={polished} dpr={[1, 1.5]}
      frameloop={spinning ? 'always' : 'demand'}
      camera={{ position: [6, 4.8, 7], fov: 40 }}
      fallback={<p>Your browser needs WebGL to display this scene.</p>}
      onPointerMissed={(event) => { if (event.type === 'click') onSelect(false); }}>
      <color attach="background" args={[background]} />
      <ambientLight intensity={night ? 0.45 : 0.9} />
      <directionalLight position={[3, 7, 5]} intensity={night ? 1 : 2.5}
        color={night ? '#a4caff' : '#fff3de'} castShadow={polished}
        shadow-mapSize={[1024, 1024]} shadow-bias={-0.0005}
        shadow-camera-left={-5} shadow-camera-right={5}
        shadow-camera-top={5} shadow-camera-bottom={-5} />
      {polished && <pointLight position={[-3, 3, -2]} intensity={night ? 12 : 3}
        color={night ? '#ffc083' : '#b8d8cc'} />}
      <Desk /><Mug /><Laptop />
      <InteractiveBox selected={selected} onSelect={() => onSelect(!selected)}
        spinning={spinning} color={color} roughness={roughness} x={x} />
      {polished && <><Plant /><Books /></>}
      <mesh rotation={[-Math.PI / 2, 0, 0]} position={[0, -0.02, 0]} receiveShadow>
        <planeGeometry args={[200, 200]} />
        <meshStandardMaterial color={background} roughness={1} />
      </mesh>
      {polished && selected && <Html position={[x, 2.25, 0.15]} center>
        <div className="object-label">Your first interactive mesh</div>
      </Html>}
      <ViewControls cameraVersion={cameraVersion} />
    </Canvas>
  );
}
The default polished value is false so the downloadable workshop can reuse this scene for lesson 2. Our final App will pass polished explicitly.
We use an ambient light plus a directional light as the main illumination. A small point light adds a warm accent in evening mode. Only the directional light casts shadows; enabling them on every light would add unnecessary work for this small project.
The floor is intentionally large so camera orbiting does not reveal its edge. The styling is a miniature desk in a studio, rather than a complete room with walls and a ceiling.
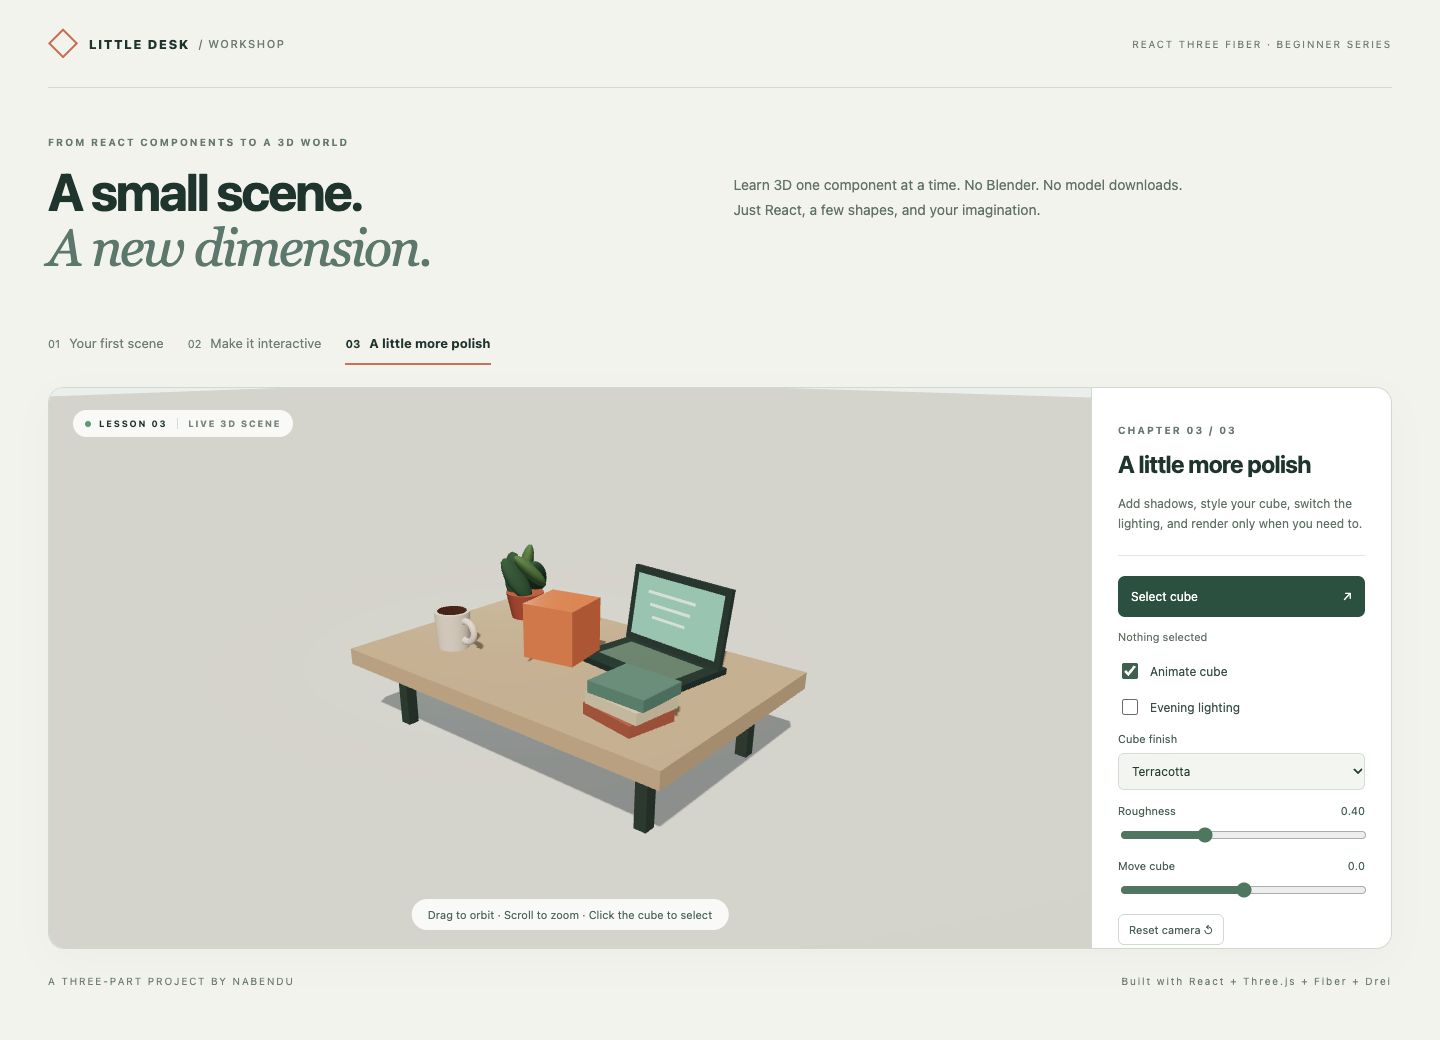
Here is the day version with the plant, books, and desktop shadows:
Let React state customize a 3D object
Replace src/App.jsx with a small control panel:
import { useState } from 'react';
import DeskScene from './lessons/DeskScene';

export default function App() {
  const [selected, setSelected] = useState(false);
  const [spinning, setSpinning] = useState(true);
  const [night, setNight] = useState(false);
  const [color, setColor] = useState('#ea875a');
  const [roughness, setRoughness] = useState(0.4);
  const [x, setX] = useState(0);
  const [cameraVersion, setCameraVersion] = useState(0);

  return (
    <main>
      <h1>Little Desk: lighting and polish</h1>
      <div className="viewport">
        <DeskScene polished selected={selected} onSelect={setSelected}
          spinning={spinning} night={night} color={color}
          roughness={roughness} x={x} cameraVersion={cameraVersion} />
      </div>
      <button onClick={() => setSelected(!selected)}>
        {selected ? 'Deselect cube' : 'Select cube'}
      </button>
      <p role="status">{selected ? 'Cube selected' : 'Nothing selected'}</p>
      <label>
        <input type="checkbox" checked={spinning}
          onChange={(event) => setSpinning(event.target.checked)} />
        Animate cube
      </label>
      <label>
        <input type="checkbox" checked={night}
          onChange={(event) => setNight(event.target.checked)} />
        Evening lighting
      </label>
      <label>Cube finish
        <select value={color} onChange={(event) => setColor(event.target.value)}>
          <option value="#ea875a">Terracotta</option>
          <option value="#689f9a">Sea glass</option>
          <option value="#aa92ca">Lavender</option>
        </select>
      </label>
      <label>Roughness: {roughness.toFixed(2)}
        <input type="range" min="0.1" max="1" step="0.05" value={roughness}
          onChange={(event) => setRoughness(Number(event.target.value))} />
      </label>
      <label>Move cube: {x.toFixed(1)}
        <input type="range" min="-0.6" max="0.6" step="0.1" value={x}
          onChange={(event) => setX(Number(event.target.value))} />
      </label>
      <button onClick={() => setCameraVersion((value) => value + 1)}>
        Reset camera
      </button>
      <p>{spinning ? 'Continuous rendering' : 'On-demand rendering'}</p>
    </main>
  );
}
Native input values are strings. Number(event.target.value) keeps roughness and position numeric. Those values flow through props into the same mesh created in Part 2. You are using normal React state to configure a 3D object.
The color options are stylistic names, not physically accurate glass or ceramic simulations. The cube remains a nonmetallic standard material. Changing roughness affects its surface response; it does not add transparency or refraction.
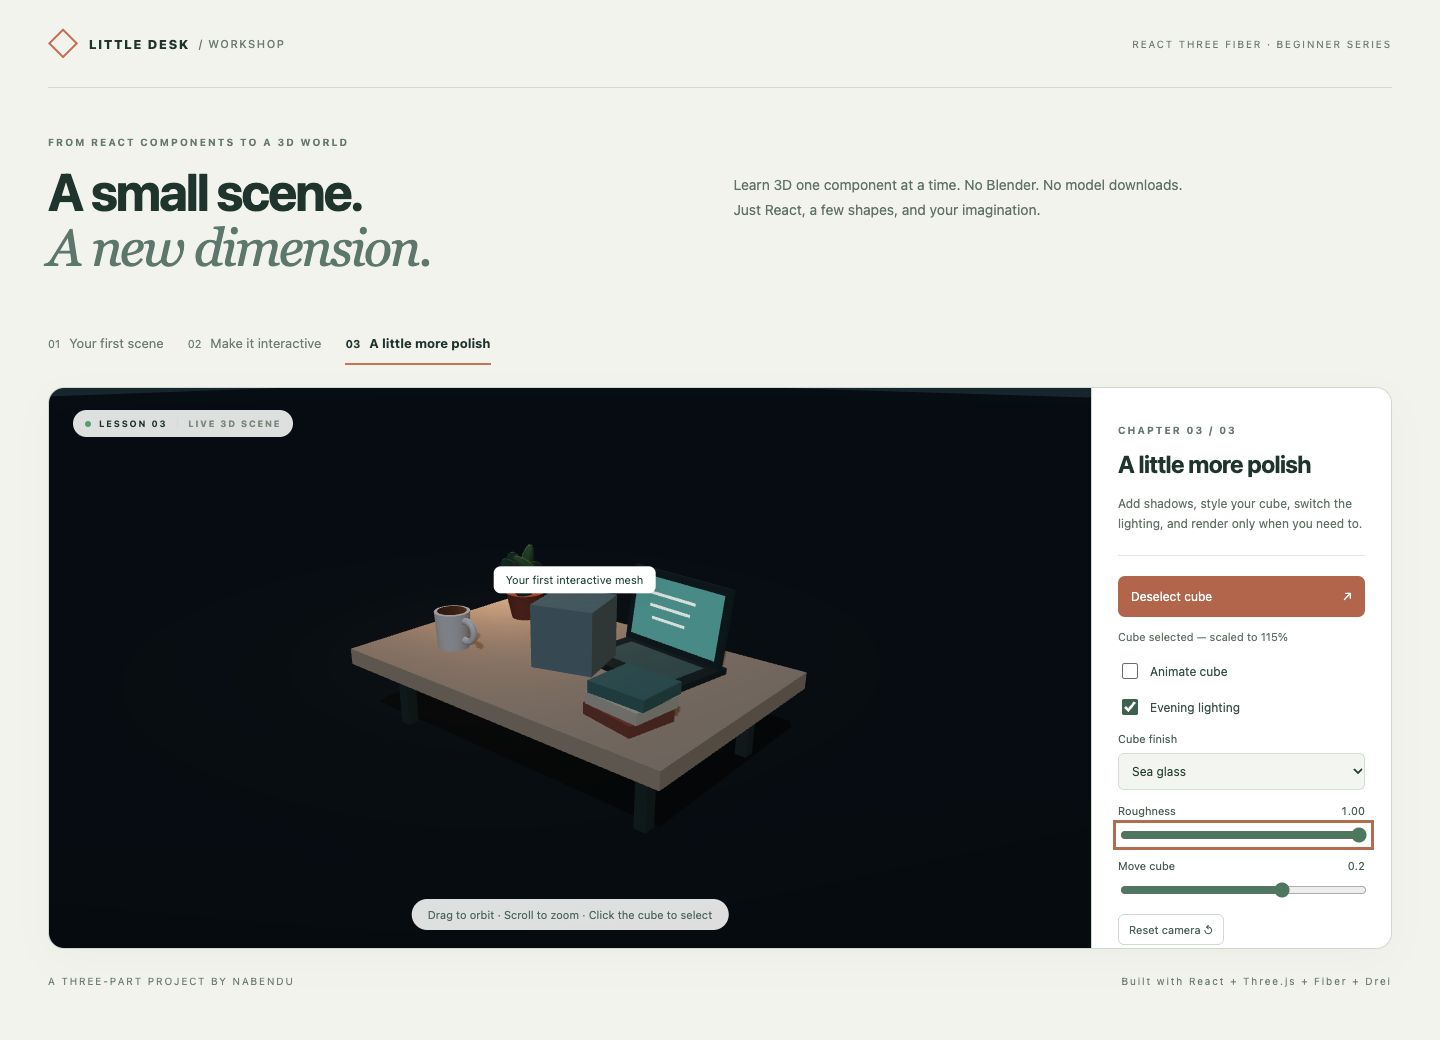
Move the cube a little to either side and try a matte finish. The screenshot comes from the equivalent controls in the workshop shell:
Anchor an HTML label in the scene
Drei's Html bridges scene positions and normal HTML. The label has a 3D anchor at [x, 2.25, 0.15], but the content is rendered as DOM. This lets you use familiar CSS and readable text without creating letter geometry.
center centers the label around that screen position. The x value tracks the cube, and selection controls whether the label exists. The .object-label rule from Part 1 styles it.
Our label is informational, so pointer-events: none prevents it from intercepting clicks intended for the scene. It does not automatically hide behind other objects; this example uses a simple overlay. If your UI needs geometric occlusion, investigate Drei's Html occlusion options as a separate step.
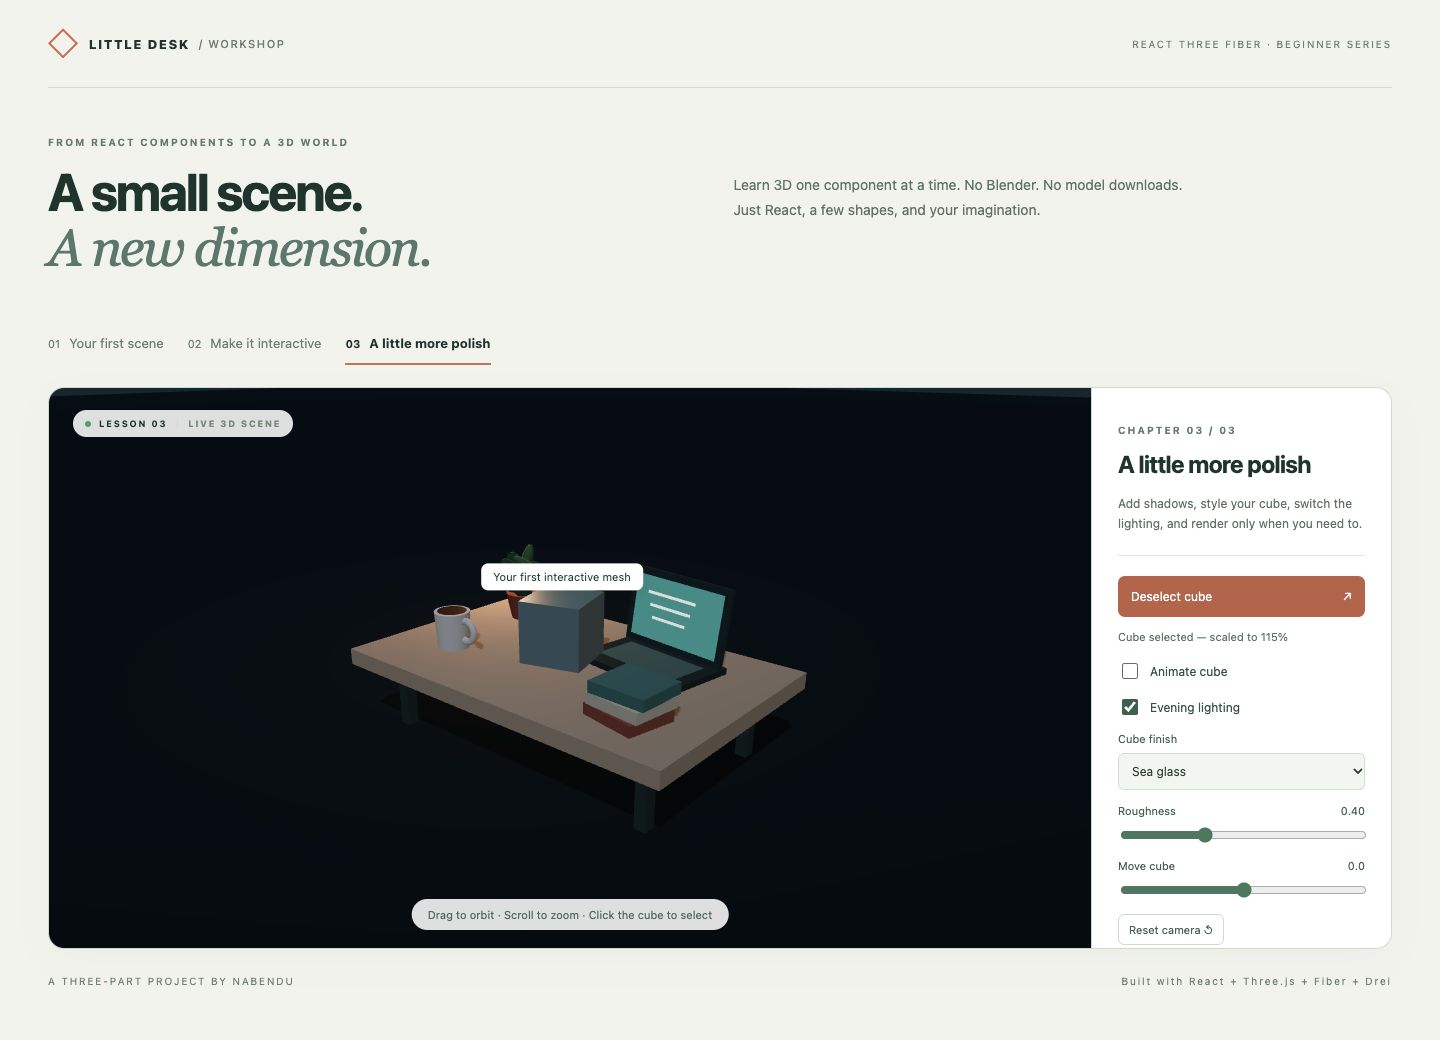
Turn on evening lighting and select the cube:
Reset the camera with useThree
Moving an object and moving a camera are separate actions. We provide a reset button because a beginner can orbit into an awkward angle even with distance limits.
The HTML button increments cameraVersion. Inside Canvas, ViewControls reads the active camera through useThree. Its effect restores the position, resets the controls' target, updates the controls, and calls invalidate().
This effect is a synchronization step: an external Three.js object needs to match a user request held in React state. The dependency list includes the camera and invalidation function, as well as the reset counter.
We do not change the entire canvas key to reset the view. That would recreate the scene and lose other state. The control helper updates the existing camera in place.
Let an idle scene stop drawing
By default, an animated Fiber canvas draws continuously. That is reasonable while our cube rotates, but wasteful once it is paused and nothing else moves.
The scene chooses its rendering mode with:
frameloop={spinning ? 'always' : 'demand'}When animation is on, the frame loop keeps running. When animation is off, demand mode draws when it is asked to. React prop changes request updates, and Drei's OrbitControls requests frames while the camera changes, including its damping updates. Our reset effect explicitly invalidates after mutating the camera.
invalidate() requests a future frame; it is not an immediate draw command. This distinction matters if you later write custom animations. Directly mutating an object in demand mode without requesting a frame can leave the display stale. The official performance guide covers this rendering policy.
Do not use demand mode alone while expecting an ordinary useFrame animation to continue forever. Our prop switches back to continuous rendering when the animation checkbox is enabled.
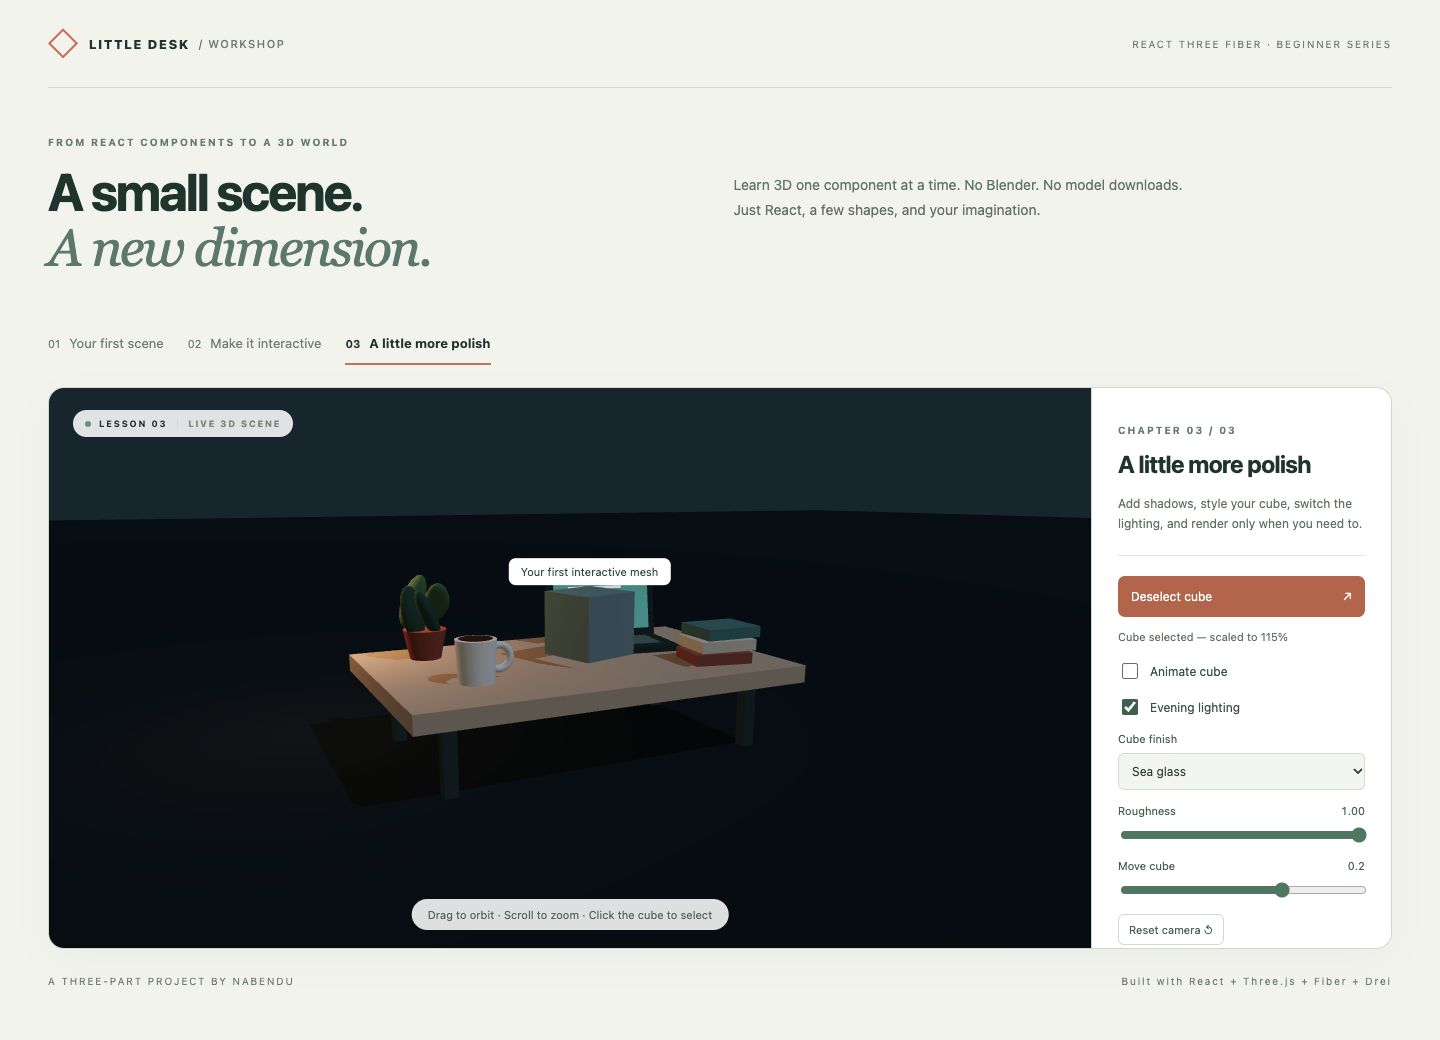
Pause the cube, then change its finish and orbit the camera. Those interactions should still update the view. The cube should keep its current rotation while paused.
Keep performance choices modest and measurable
dpr={[1, 1.5]} caps the canvas pixel ratio. At pixel ratio 2, a canvas draws about four times as many pixels as ratio 1 at the same CSS dimensions. More pixels can improve sharpness, but they also cost GPU work. Our cap is a compromise for a learning project.
Keep geometries appropriate to their visible size. The plant's small leaves do not need hundreds of segments. Avoid allocating new vectors and materials inside frame callbacks. Keep React state updates tied to user decisions rather than every rendered frame.
This project has a small number of objects, so instancing would add complexity without teaching a necessary lesson. If you later add thousands of identical plants, shared geometry and instancing become relevant.
The demo also avoids remotely loaded fonts, HDR environments, and model files. You get a repeatable scene without depending on those asset downloads. That does not make a Three.js bundle tiny: the production build still contains a real 3D renderer. Vite may report a large-chunk warning. Build success is different from proving the best loading strategy for every production site.
Test the finished project
Run this short checklist in the browser:
- Select and deselect the cube using both the mesh and the HTML button.
- Pause animation, then change lighting, color, roughness, and X position.
- Orbit the camera while paused, then reset it.
- Re-enable animation and confirm that rotation resumes.
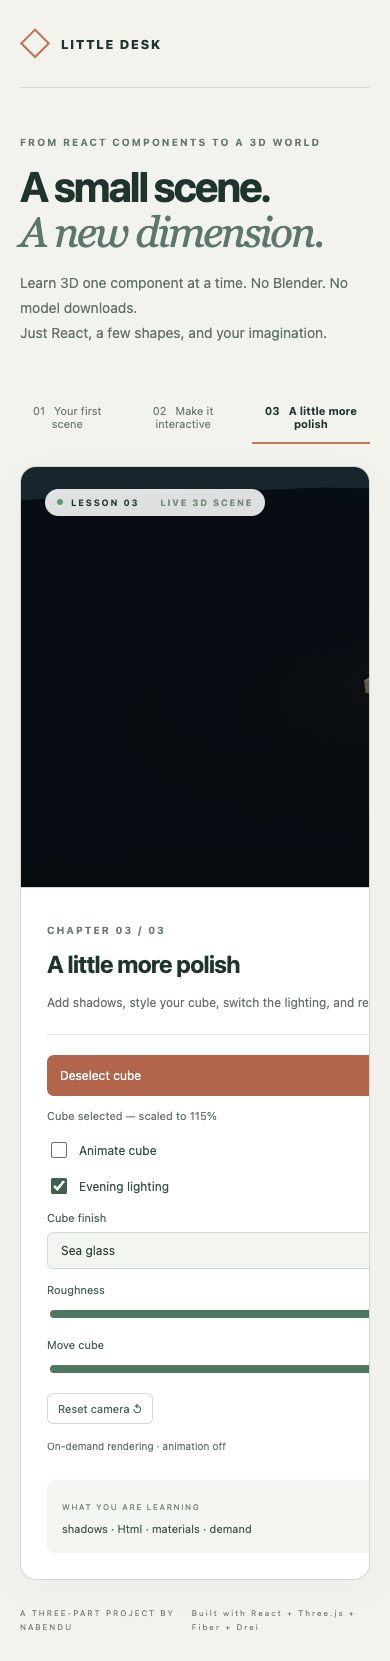
- Check a narrow viewport: the scene should retain a height and the HTML controls should remain reachable.
The downloadable workshop switches its sidebar below the canvas on narrow screens:
 Build the production version and inspect it locally:
npm run build
npm run preview -- --port 5191
preview serves the built files for local checking. It is not a deployment service. For a static host, the build output is dist/.
Where to go from here
You have built a small 3D interface using the React skills you already knew: composition, props, state, refs, effects, and conditional rendering. The new concepts were geometry, local transforms, materials, cameras, raycasting, and the render loop.
A good next exercise is a fourth finish option and a reset-object button that restores color, roughness, and position without resetting the camera. Then try loading one small GLB model with a loading fallback. Keep each new concept isolated so you can see what it changes.
Download the complete Little Desk workshop. The full app keeps all three lessons available, includes the styled controls in the screenshots, and has no external 3D assets to configure.
Return to Part 1 for the scene basics or Part 2 for interaction and animation.
You can get the code from this github link.