React Three Fiber for Beginners — Part 2: Components, Clicks, and Animation
Build a small 3D desk with reusable components, pointer events, selection state, and frame-based animation.
This is a connected three-part series for developers who already know React components, props, useState, and useRef. You do not need previous Three.js knowledge.
- Part 1: Your first 3D scene
- Part 2: Components, clicks, and animation
- Part 3: Lighting, customization, and performance
We build Little Desk, a small interactive workspace. Each part adds to the same project. The downloadable version has three lesson tabs; the code in each post lets you build the lesson step by step without first writing that navigation shell.
In Part 1, we created a cube and learned what makes it visible. Now we will reuse that knowledge to build a desk, a mug, and a laptop. We will also make the cube respond to hover and clicks, then rotate it using the frame loop.
Keep the same project and dependencies. This part assumes that src/main.jsx, the CSS, and the Vite configuration from Part 1 are already in place.
Think in components and local coordinates
A desk is not one complicated object. It is a tabletop and four legs. A laptop is a base, a screen, and a few decorative lines. A mug is a cylinder with a handle and a coffee-colored top.
<group> is a transform container. Moving the group moves its children together. Child positions are local to the group, so you can design a mug around [0, 0, 0] and place the finished mug anywhere on the desk.
This resembles composing React UI, with one extra rule: nested transforms accumulate. A child at [0, 0.25, 0] inside a group at [-1.5, 1.12, 0.65] sits a quarter unit above the group's origin. If the group is rotated, its children's local axes rotate with it.
Build the desk, mug, and laptop
Create src/lessons/DeskObjects.jsx:
// Local positions are relative to their parent group. No model downloads required.
export function Desk() {
  return (
    <group>
      <mesh position={[0, 1, 0]} castShadow receiveShadow>
        <boxGeometry args={[5, 0.22, 3.2]} />
        <meshStandardMaterial color="#cfb697" roughness={0.8} />
      </mesh>
      {[-2, 2].flatMap((x) => [-1.1, 1.1].map((z) => (
        <mesh key={`${x}-${z}`} position={[x, 0.45, z]} castShadow>
          <boxGeometry args={[0.16, 0.9, 0.16]} />
          <meshStandardMaterial color="#465850" roughness={0.65} />
        </mesh>
      )))}
    </group>
  );
}

export function Mug() {
  return (
    <group position={[-1.5, 1.12, 0.65]}>
      <mesh position={[0, 0.25, 0]} castShadow>
        <cylinderGeometry args={[0.24, 0.21, 0.5, 32]} />
        <meshStandardMaterial color="#f8ecdb" roughness={0.25} />
      </mesh>
      <mesh position={[0, 0.505, 0]} rotation={[-Math.PI / 2, 0, 0]}>
        <circleGeometry args={[0.195, 32]} />
        <meshStandardMaterial color="#5a3523" roughness={0.5} />
      </mesh>
      <mesh position={[0.27, 0.27, 0]} castShadow>
        <torusGeometry args={[0.14, 0.045, 12, 24]} />
        <meshStandardMaterial color="#f8ecdb" roughness={0.25} />
      </mesh>
    </group>
  );
}

export function Laptop() {
  return (
    <group position={[0.9, 1.15, -0.5]} rotation={[0, -0.15, 0]}>
      <mesh castShadow><boxGeometry args={[1.6, 0.08, 1.05]} />
        <meshStandardMaterial color="#3e514d" roughness={0.5} /></mesh>
      <group position={[0, 0.54, -0.47]} rotation={[-0.15, 0, 0]}>
        <mesh castShadow><boxGeometry args={[1.6, 1, 0.06]} />
          <meshStandardMaterial color="#3e514d" /></mesh>
        <mesh position={[0, 0, 0.035]}><planeGeometry args={[1.43, 0.82]} />
          <meshStandardMaterial color="#90d8c2" emissive="#376b59" emissiveIntensity={0.45} /></mesh>
        {[0, 1, 2].map((line) => (
          <mesh key={line} position={[-0.1, 0.2 - line * 0.16, 0.04]}>
            <planeGeometry args={[0.8 - line * 0.12, 0.04]} />
            <meshBasicMaterial color="#e6fff1" />
          </mesh>
        ))}
      </group>
      <mesh position={[0, 0.045, 0]} rotation={[-Math.PI / 2, 0, 0]}>
        <planeGeometry args={[1.25, 0.6]} /><meshStandardMaterial color="#708a7d" />
      </mesh>
    </group>
  );
}
The desk's top is centered at Y = 1 and is 0.22 units thick. Its upper surface is therefore Y = 1.11. The objects start at about 1.12, just above that surface.
The legs come from two arrays of X and Z coordinates. flatMap builds four meshes and their stable keys. This is normal React list rendering applied to 3D objects.
Our mug is stylized rather than physically hollow. The dark circle is a visible coffee surface. This shortcut keeps the first project small and avoids needing a custom mesh or a Boolean modeling operation.
The laptop screen is a child group. Its planes face the positive local Z axis; a tiny positive offset places the display and lines in front of the frame. If two surfaces occupy exactly the same plane, you can get flickering called z-fighting. Small separation avoids that here.
The screen's lines use meshBasicMaterial because they are decorative marks that should remain readable. Most other objects use lit standard materials.
Make the cube interactive
Create src/lessons/InteractiveBox.jsx:
import { useRef, useState } from 'react';
import { useFrame } from '@react-three/fiber';

export default function InteractiveBox({ selected, onSelect, spinning = true,
  color = '#ea875a', roughness = 0.4, x = 0 }) {
  const mesh = useRef(null);
  const [hovered, setHovered] = useState(false);

  useFrame((_, delta) => {
    if (spinning && mesh.current) {
      mesh.current.rotation.y += Math.min(delta, 0.05) * 0.6;
    }
  });

  return (
    <mesh ref={mesh} position={[x, 1.6, 0.15]} scale={selected ? 1.15 : 1}
      castShadow receiveShadow
      onClick={(event) => { event.stopPropagation(); onSelect(); }}
      onPointerOver={(event) => { event.stopPropagation(); setHovered(true); }}
      onPointerOut={() => setHovered(false)}>
      <boxGeometry args={[0.7, 0.7, 0.7]} />
      <meshStandardMaterial color={hovered ? '#f7b68c' : color} roughness={roughness}
        emissive={selected ? '#7e2b0e' : '#000000'} emissiveIntensity={0.15} />
    </mesh>
  );
}
The cube is intentionally suspended a little above the desktop: its center is at 1.6 and its unscaled half-height is 0.35. This is a decorative animated object, not a physics simulation.
Do not worry about color, roughness, and x yet. They have sensible defaults and will become controls in Part 3. castShadow and receiveShadow also prepare the object for that lesson; shadows still need to be enabled at the canvas and light levels.
There are two kinds of state here. The parent owns selection, because the HTML interface needs to know which object is selected. The mesh owns hover, because that is a temporary visual detail. This is the same state-ownership decision you would make for a reusable button or card.
onSelect is a callback prop. The component does not know whether the parent displays a details panel, a label, or a status message. It simply reports a click.
How a 3D click finds a mesh
The browser gives Fiber a pointer position. Fiber performs raycasting into the scene to find intersected objects. You can use familiar-looking handlers such as onClick and onPointerOver, but their event includes 3D information such as an intersection point.
Unlike DOM elements, several objects along the ray may receive an event. event.stopPropagation() prevents the click or hover from continuing through to objects behind the cube, as well as stopping bubbling through its ancestors. This behavior is covered in the official events documentation.
Our handler stops propagation before selecting the cube. Hover also stops propagation, then swaps the material color. Pointer-out restores the base color. We avoid changing the global browser cursor, so there is no document-level cursor effect to clean up when a lesson unmounts.
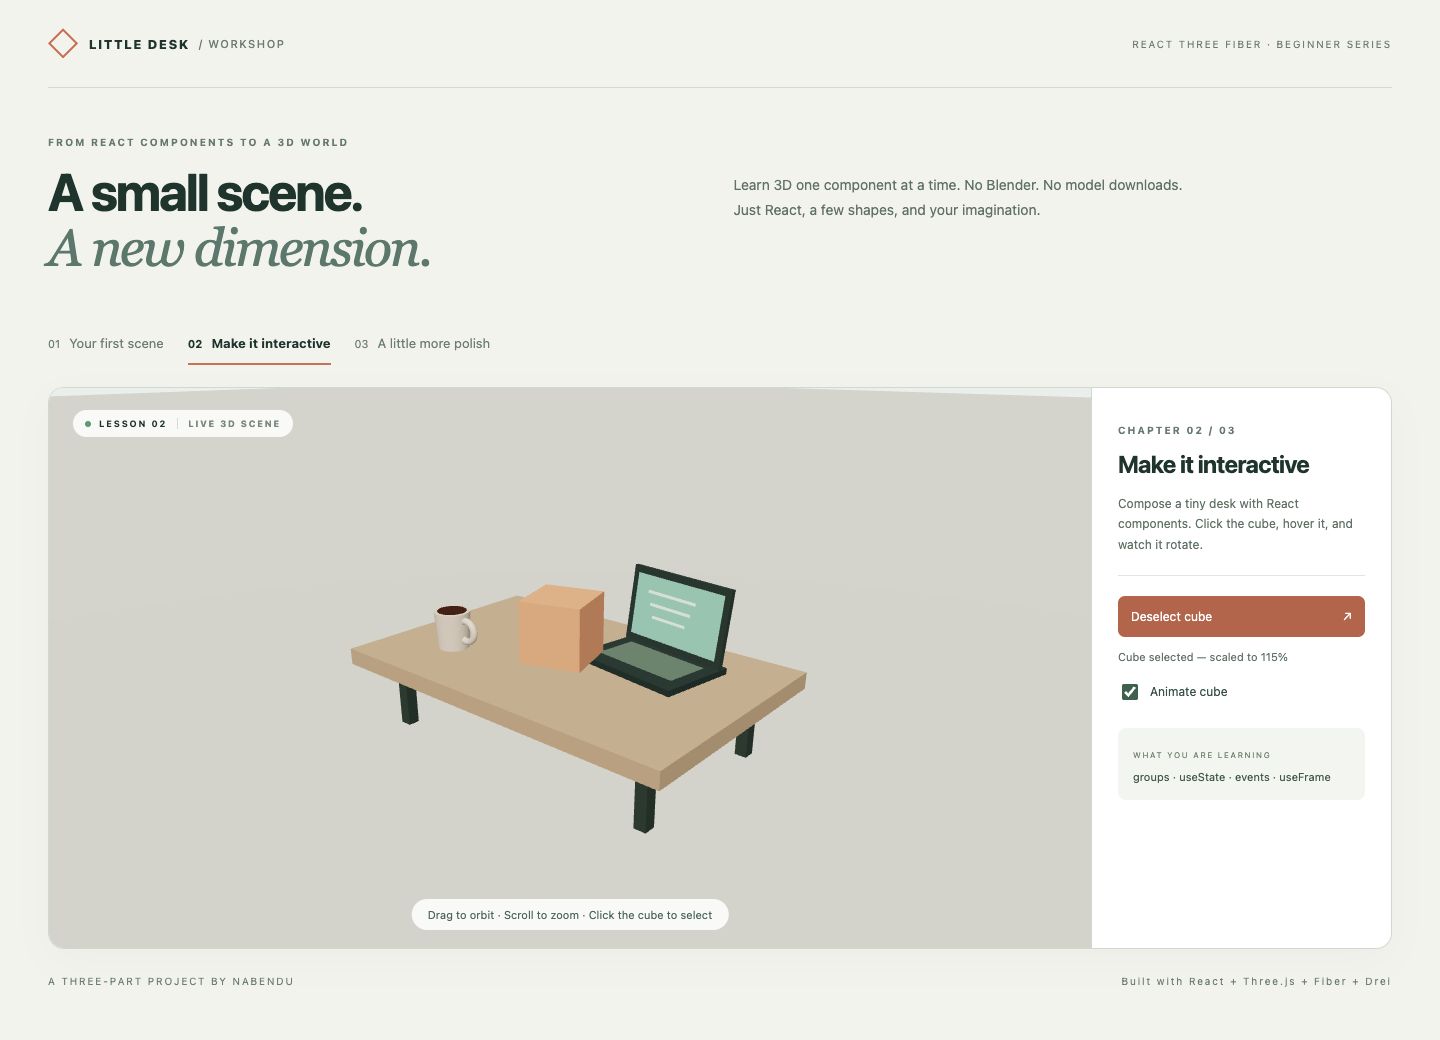
Selection increases the scale to 1.15 and adds a subtle emissive tint. Emissive makes the material appear self-lit; it does not automatically illuminate nearby objects.
Animate with a ref and useFrame
useRef holds the underlying Three.js mesh. useFrame runs its callback as part of Fiber's render loop, and the callback receives delta, the elapsed seconds since the previous frame.
The important line is:
mesh.current.rotation.y += Math.min(delta, 0.05) * 0.6;The speed is 0.6 radians per second during ordinary frames. Multiplying by delta avoids making the animation depend directly on frame count. A fixed increment such as += 0.01 runs at different speeds on 60 Hz and 120 Hz displays.
The small clamp intentionally limits large jumps after a stalled frame or a background tab. It trades catching up to wall-clock time for smoother visual motion. That is appropriate for a decorative cube, but it would need different reasoning for a simulation clock.
Do not store the rotation in React state and call a state setter every frame. React state is useful for discrete user decisions; refs let the animation update the Three.js object without rerendering the entire HTML interface. Fiber handles the drawing loop.
For the Fiber 9 used here, scene hooks such as useFrame and useThree belong in components rendered under Canvas. Putting useFrame in the outer HTML App is not equivalent. The Fiber source is the reference for the installed version; upcoming-version documentation may describe different APIs.
Assemble the scene
Create src/lessons/DeskScene.jsx with this Part 2 version:
import { Canvas } from '@react-three/fiber';
import { OrbitControls } from '@react-three/drei';
import InteractiveBox from './InteractiveBox';
import { Desk, Mug, Laptop } from './DeskObjects';

export default function DeskScene({ selected, onSelect, spinning = true }) {
  return (
    <Canvas camera={{ position: [6, 4.8, 7], fov: 40 }} dpr={[1, 1.5]}
      onPointerMissed={(event) => {
        if (event.type === 'click') onSelect(false);
      }}>
      <color attach="background" args={['#edf1ed']} />
      <ambientLight intensity={0.9} />
      <directionalLight position={[3, 7, 5]} intensity={2.5} color="#fff3de" />
      <Desk /><Mug /><Laptop />
      <InteractiveBox selected={selected} onSelect={() => onSelect(!selected)}
        spinning={spinning} />
      <mesh rotation={[-Math.PI / 2, 0, 0]} position={[0, -0.02, 0]}>
        <planeGeometry args={[200, 200]} />
        <meshStandardMaterial color="#edf1ed" roughness={1} />
      </mesh>
      <OrbitControls makeDefault target={[0, 1, 0]} enablePan={false}
        minDistance={5} maxDistance={14} minPolarAngle={0.3}
        maxPolarAngle={Math.PI / 2.1} />
    </Canvas>
  );
}
The camera has moved farther away because our desk is wider than the original cube. Its target is now the center of the desktop rather than the center of the grid.
A plane geometry lies in the XY plane initially. Rotating it by -Math.PI / 2 around X makes it horizontal. Its Y coordinate is slightly below the leg bottoms, so it behaves as a floor without hiding them.
onPointerMissed clears selection when you click empty scene space. We check that this is a click event. Clicking another object on the desk is not guaranteed to count as a miss: a miss means the ray did not hit a tested scene object. The explicit deselect button remains available.
Connect the scene to an HTML interface
Replace src/App.jsx:
import { useState } from 'react';
import DeskScene from './lessons/DeskScene';

export default function App() {
  const [selected, setSelected] = useState(false);
  const [spinning, setSpinning] = useState(true);

  return (
    <main>
      <h1>Little Desk: make it interactive</h1>
      <div className="viewport">
        <DeskScene selected={selected} onSelect={setSelected} spinning={spinning} />
      </div>
      <button onClick={() => setSelected(!selected)}>
        {selected ? 'Deselect cube' : 'Select cube'}
      </button>
      <p role="status">{selected ? 'Cube selected' : 'Nothing selected'}</p>
      <label>
        <input type="checkbox" checked={spinning}
          onChange={(event) => setSpinning(event.target.checked)} />
        Animate cube
      </label>
    </main>
  );
}
The screenshot shows the same components inside the downloadable workshop's lesson-2 shell:
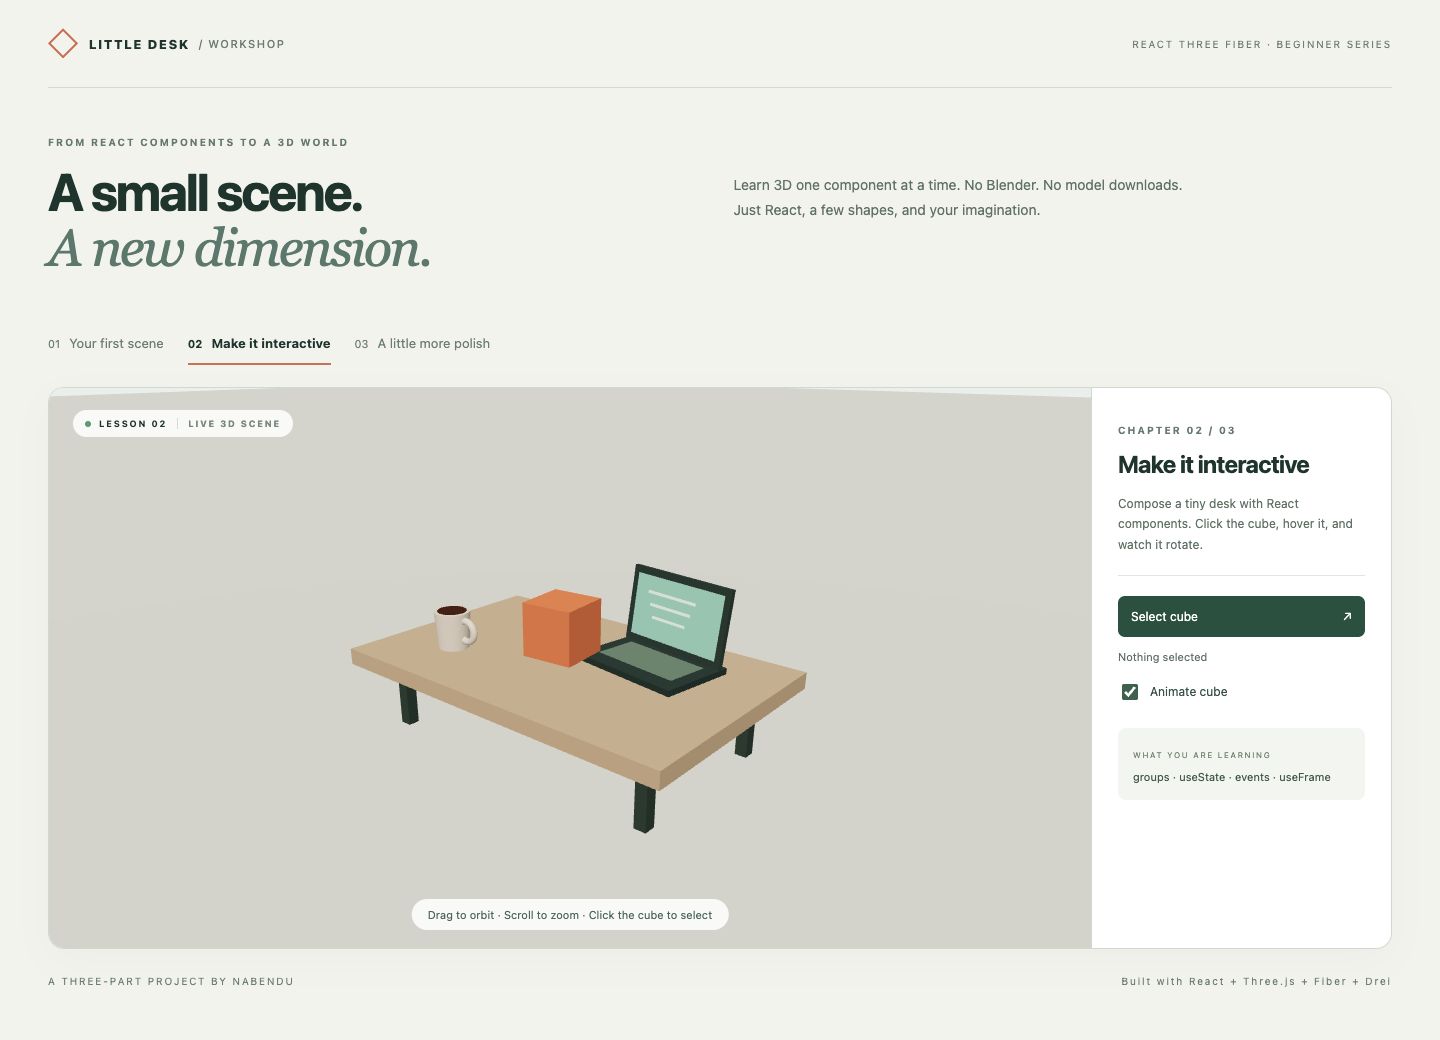 A native HTML button provides another way to select the cube. This is valuable because a mesh is not automatically a keyboard-focusable DOM control. A visually interactive 3D object should not be the only way to perform an important action.
Click the cube itself. The selected state updates the mesh scale and the HTML status together:
Pause the animation
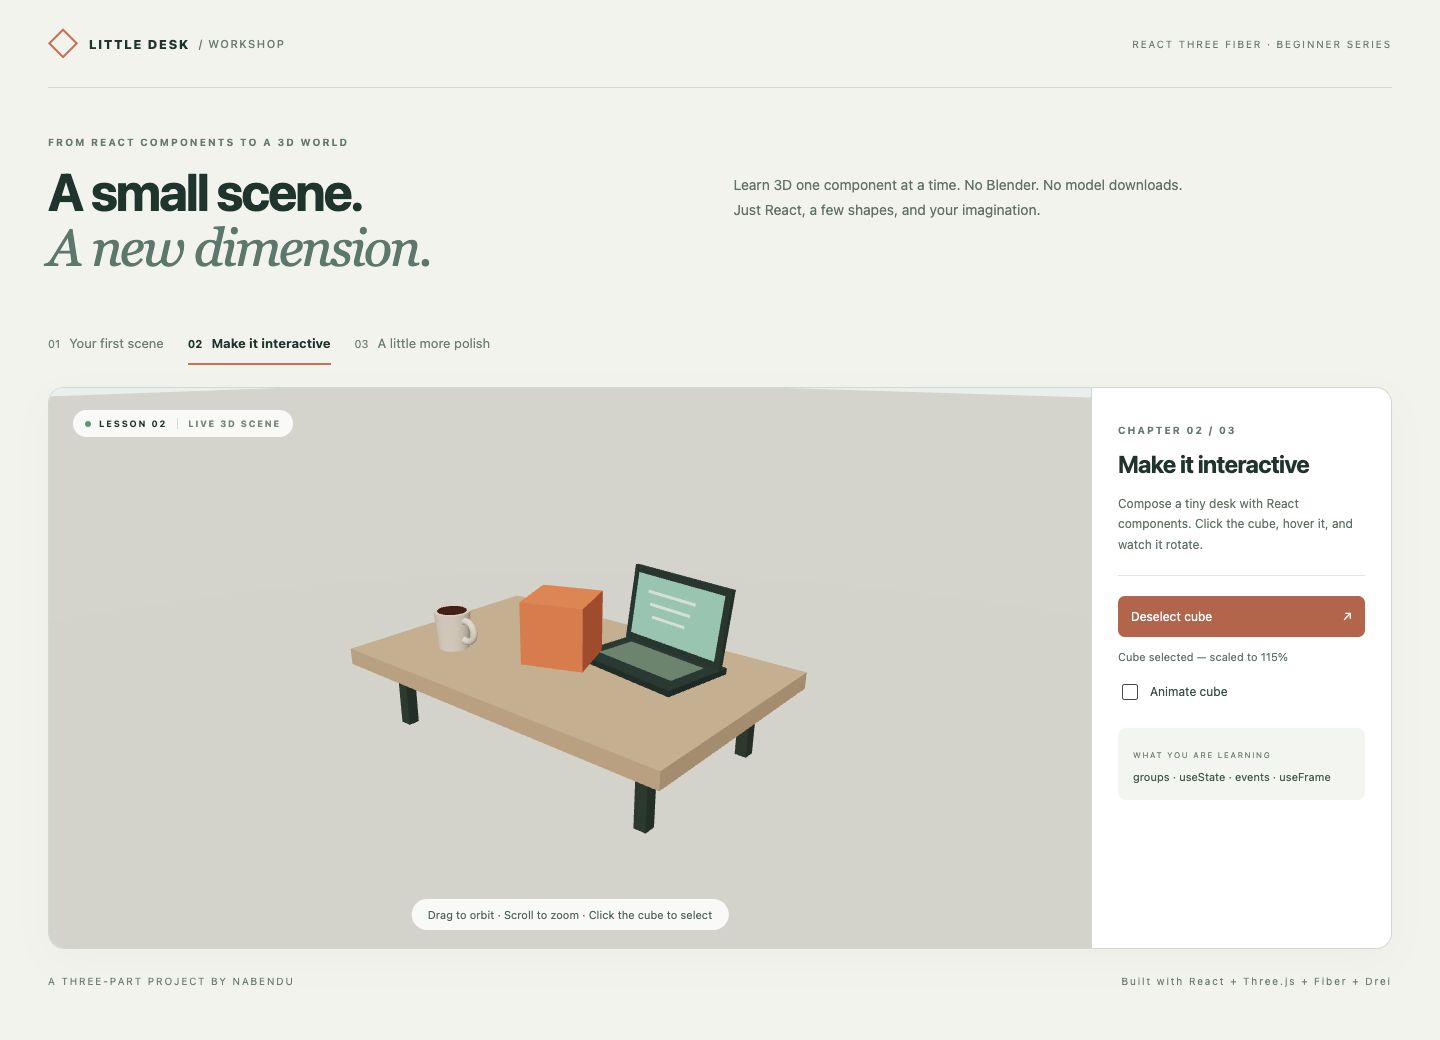
Uncheck Animate cube. useFrame still runs in the simple Part 2 scene, but its guarded callback no longer modifies the rotation. This is a visual pause, not yet a full rendering optimization. In Part 3, we will also stop drawing continuous frames while the scene is idle.
The downloadable workshop keeps this simpler version in DeskScenePart2.jsx for lesson 2. Its third lesson adds demand rendering. This separates the animation concept from the rendering policy.
Common mistakes at this stage
If the mug floats above the desk, calculate its local bottom and the desktop's upper surface instead of adjusting numbers at random. If a plane disappears, inspect its orientation: ordinary plane materials show the front face by default. If hover never fires, make sure the handler is on a mesh that has geometry and is actually visible to the camera.
If an object appears to rotate around an unexpected point, check which group owns the rotation. A mesh rotates around its local origin. Moving a mesh away from a rotating parent group's origin makes it travel around that parent, rather than just spin in place.
There is no physics engine in this scene. Objects can overlap if you place them badly. The cube's movement limits in the final lesson are deliberately modest so it stays on the desktop.
Checkpoint and next part
You now have a scene assembled from React components, pointer interaction, shared selection state, and a ref-based animation. Try changing the cube's speed to 0.3 and adding another book-shaped box to the desk.
Download the complete workshop if you want the styled UI. The archive also contains DeskScenePart2.jsx so you can compare the simpler stage with the polished one.
Continue to Part 3: Lighting, customization, and performance. We will add shadows and HTML labels, let the user customize the cube, and make the paused scene rest when nothing changes.