Employee Mgmt System in MERN - 2
ReactJS
In this post we will continue with our Employee Management System using MERN stack. This project and post have been inspired by this YouTube playlist. Part 1 can be found here.
We will start with the logout functionality. So, in Navbar.jsx file we will add the logout in useAuth hook. Also, in the Logout button we will call the logout function.

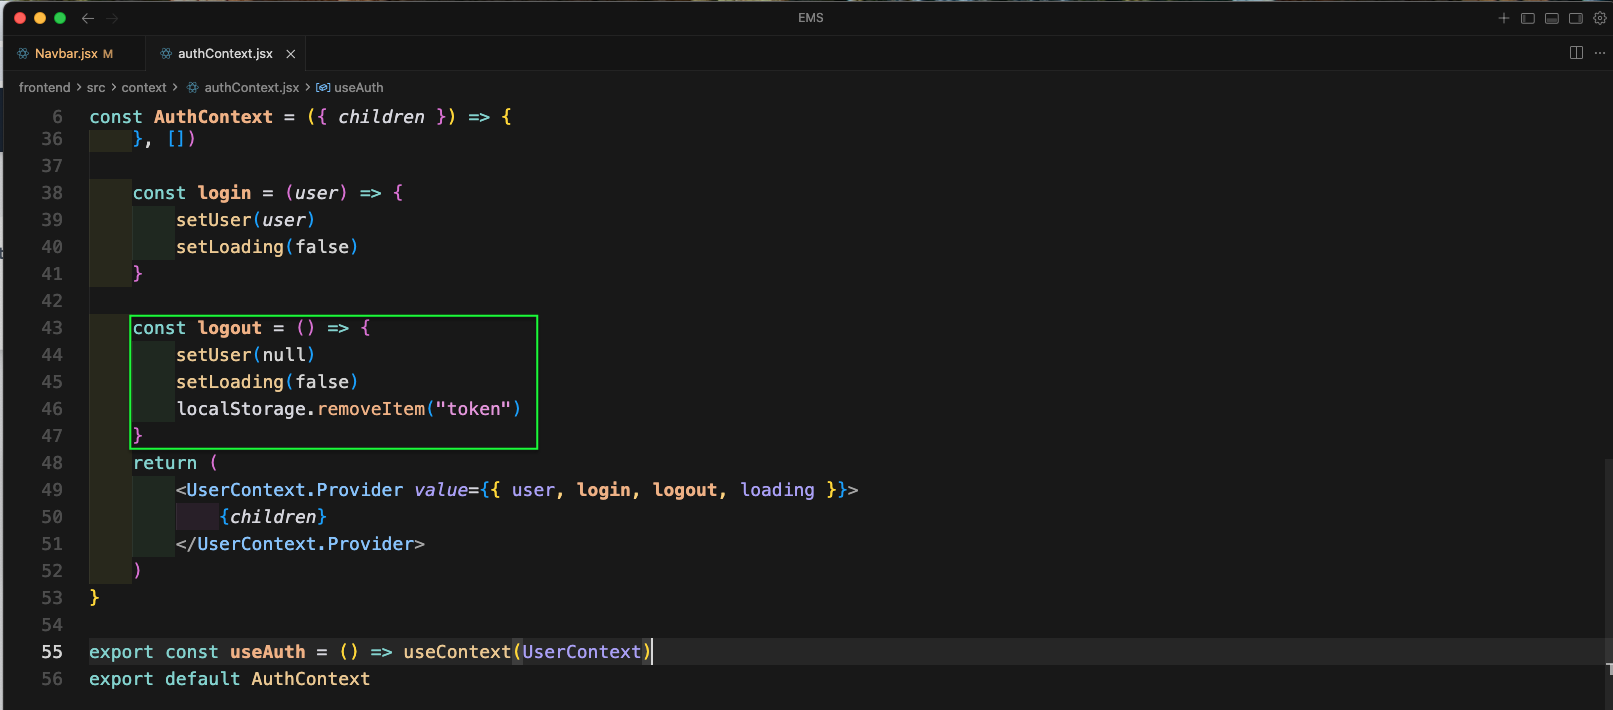
Next, in the authContext.jsx file we will add the logout function.. It will update the user and loading state. And also remove the token from localStorage.
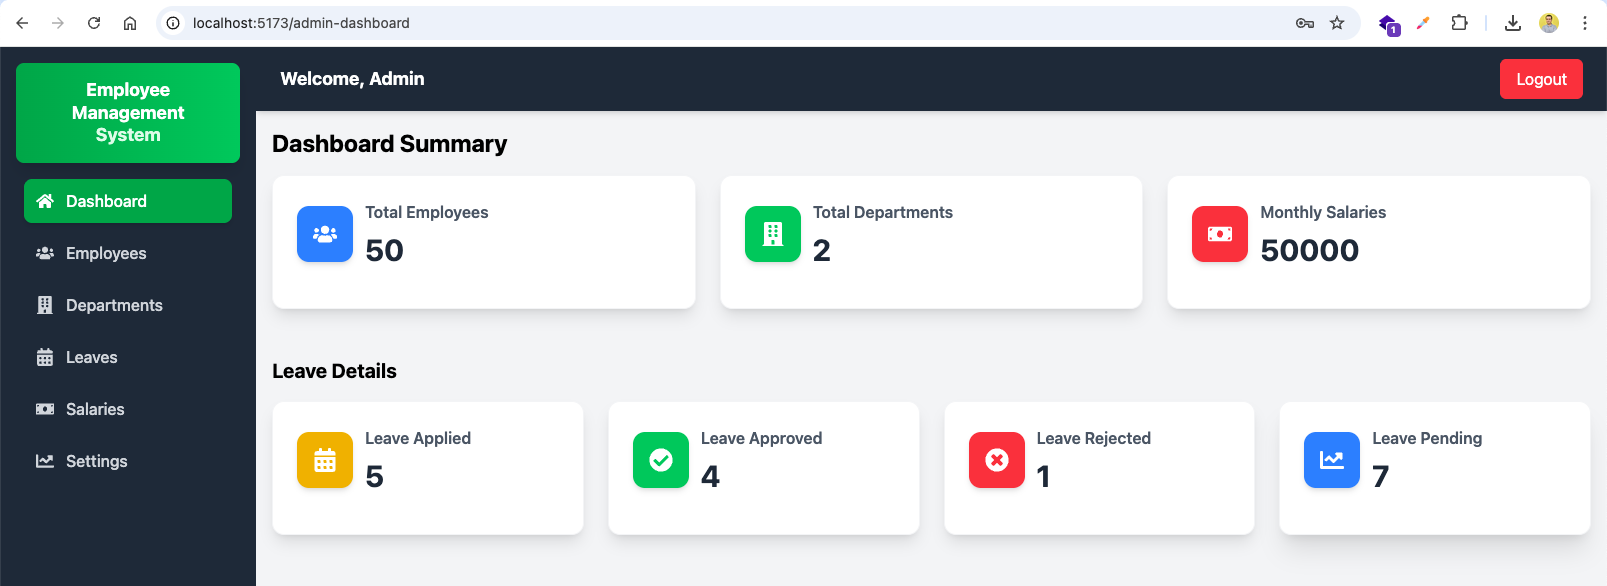
The from http://localhost:5173/admin-dashboard click on Logout button.
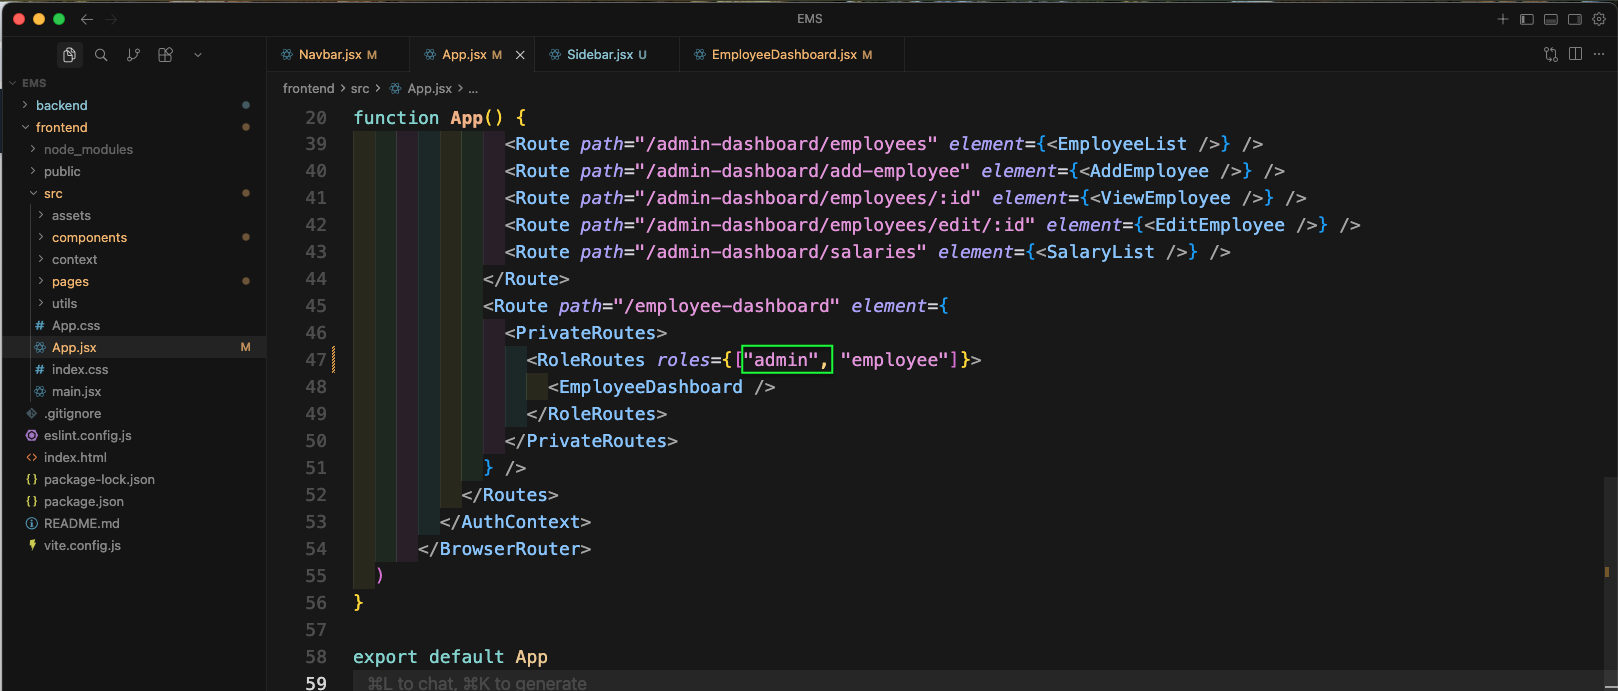
Now, in App.jsx in RoleRoutes add the admin in roles.
Now, create a new file Sidebar.jsx file inside components folder. Here, we will create a sidebar with the links for Employee. First we are doing the required imports. Then we have added the header of Employee Management System. After that the *NavLinK for Dashboard, then the NavLink for My Profile.

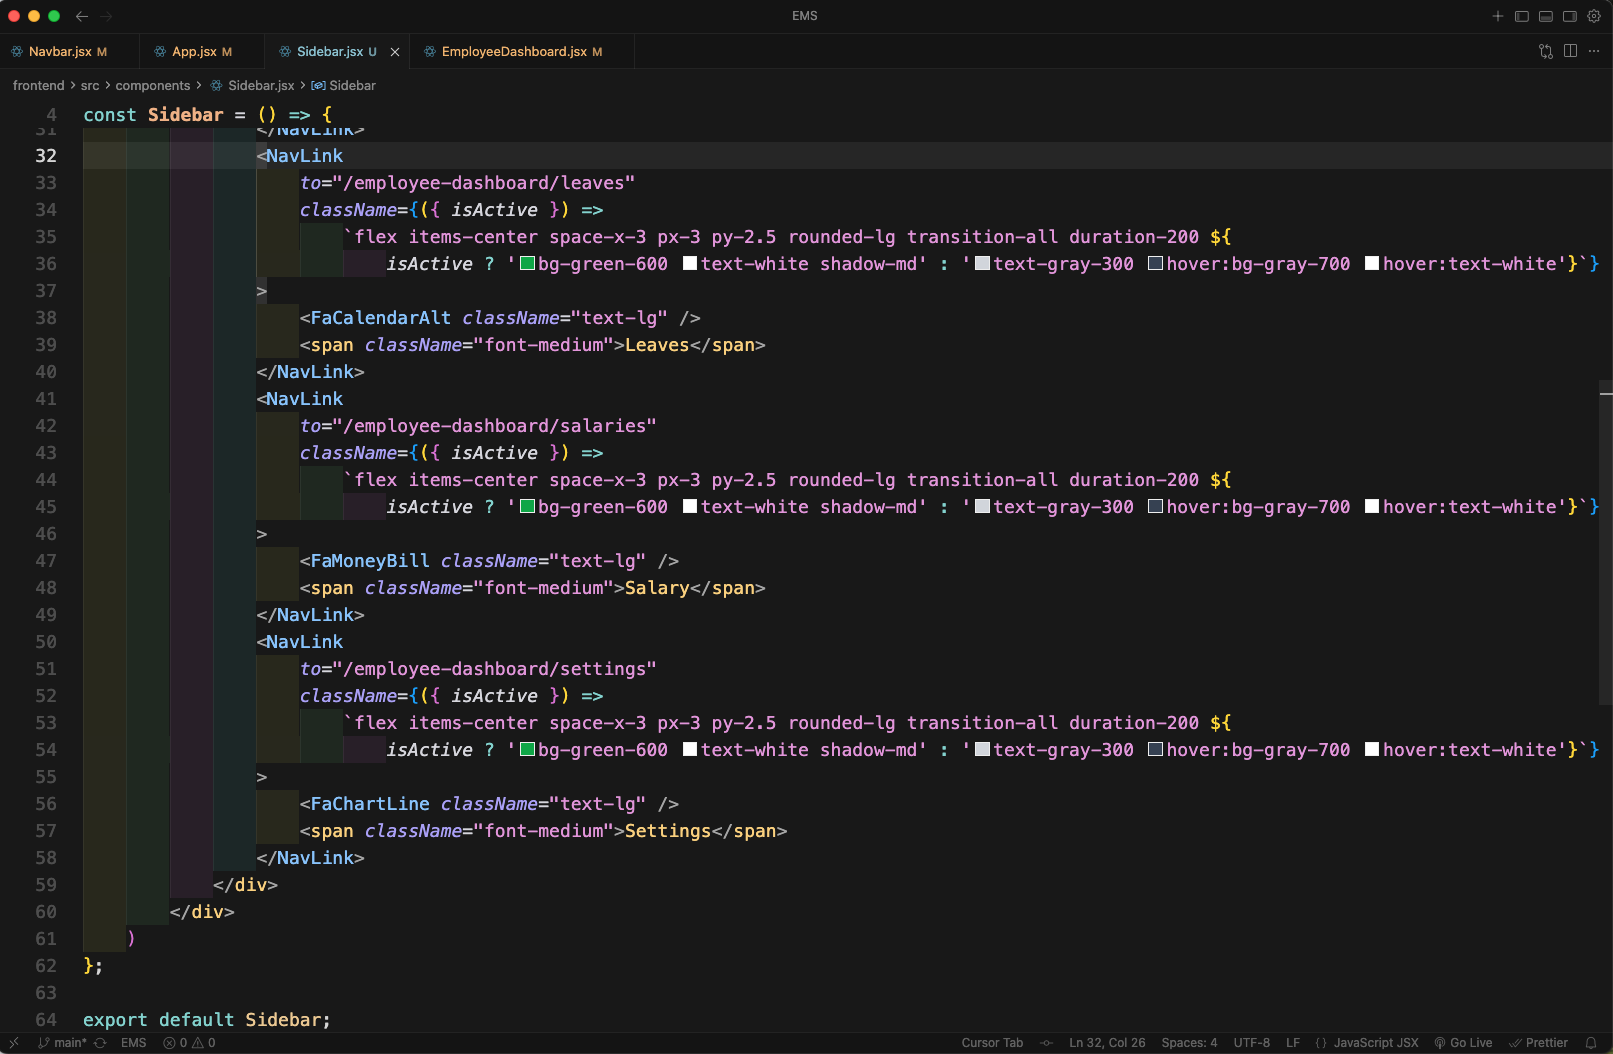
Next, we have created NavLink for Leaves, Salary andSettings in Sidebar.jsx file.
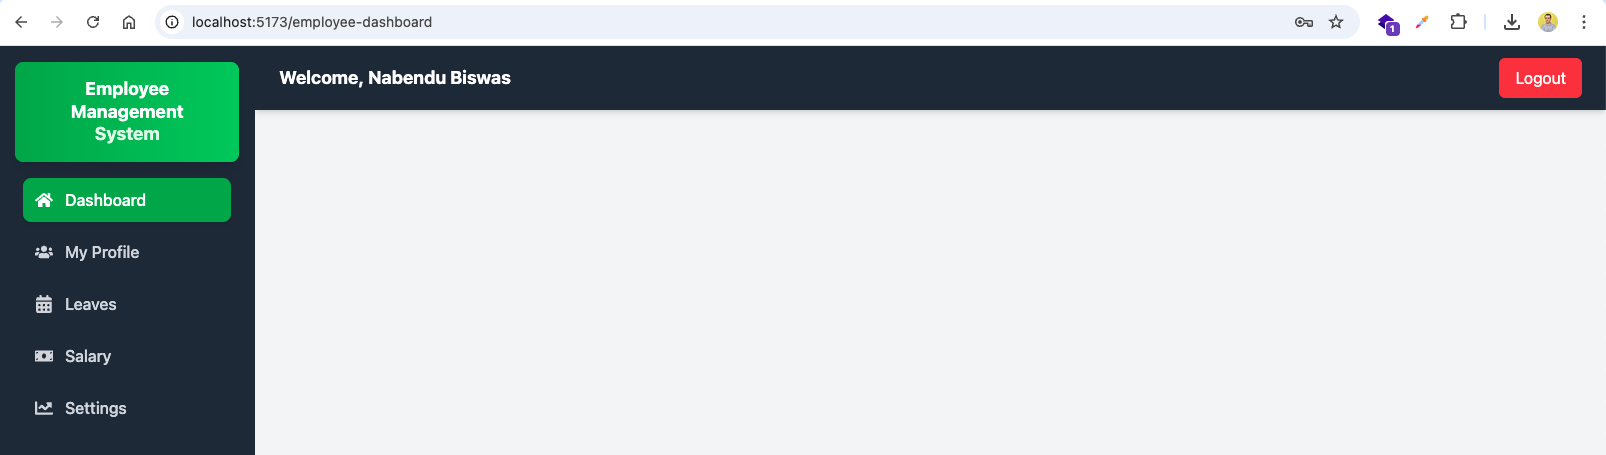
Next, in pages folder create a new file EmployeeDashboard.jsx file. Here, we will call the Sidebar component. And then the Navbar component and also Outlet from react-router-dom.

Now, go to http://localhost:5173/employee-dashboard and click on Dashboard
Now, in App.jsx file we will add the Route for Summary.

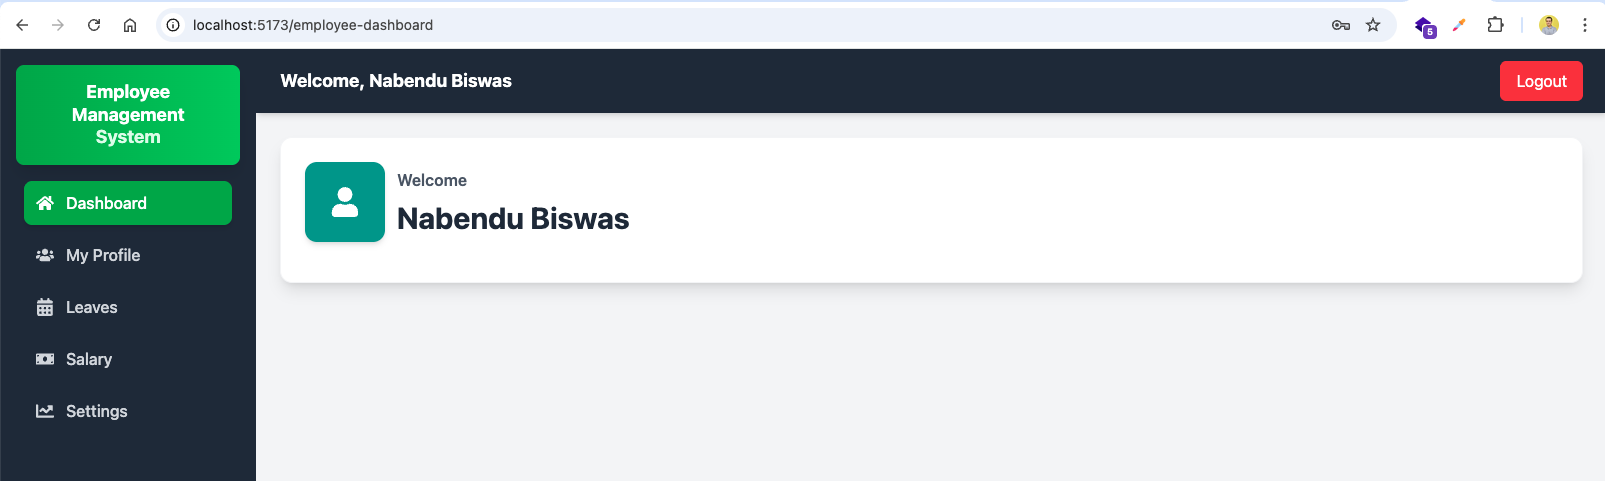
Now, create a new file Summary.jsx file inside components folder. Here, we will create a simple Summary component with some tailwind css.

Now, goto http://localhost:5173/employee-dashboard and it will show Welcome with user name.
Back in the Sidebar.jsx file, we are getting the user from the useAuth hook. And then updating the NavLink for My Profile to take the user._id.

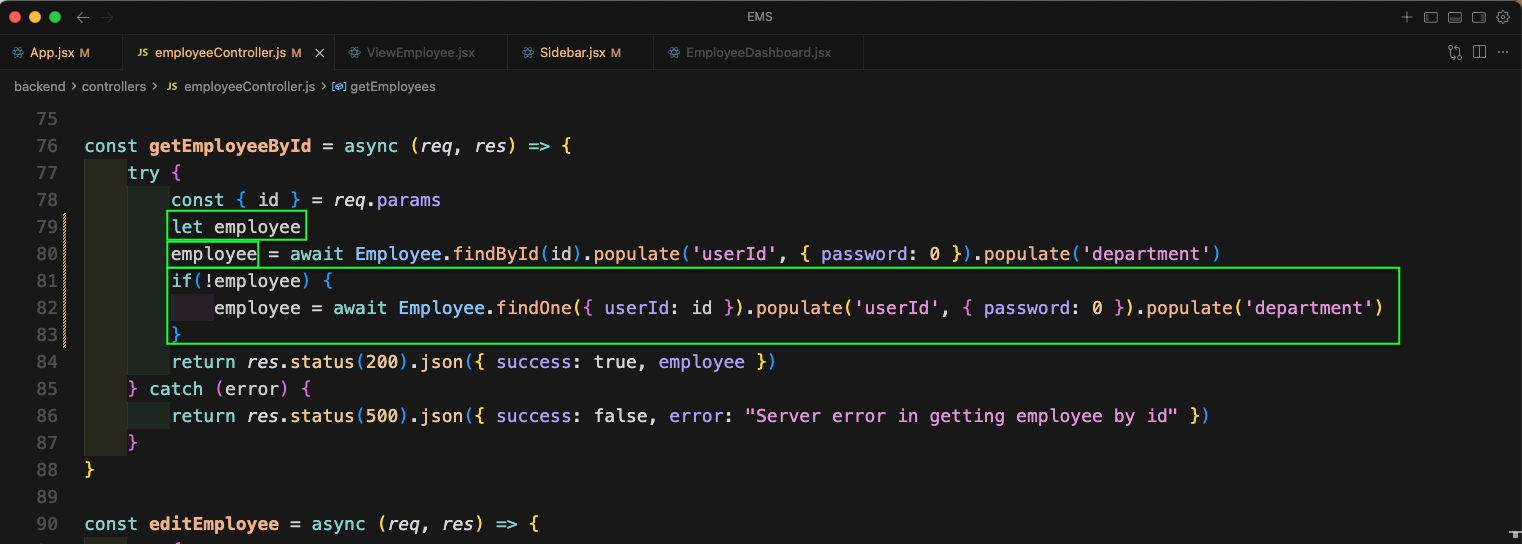
Now, in employeeController.js file we will update the function getEmployeeById. We have added a case where if no employee, then we are finding by the id from the params.
In the App.jsx file will add a new route of /employee-dashboard/profile/:id which will render the ViewEmployee component.

Now, click on the profile of an Employee and you will get details of the employee.

Now, we will create a new file LeaveList.jsx inside components folder. Here, we will create a simple LeaveList component with some tailwind css. We wil add more code in it later.

Back, in the App.jsx file we will add a new route of /employee-dashboard/leaves which will render the LeaveList component.

Now, clicking on Leaves in Sidebar will take us to http://localhost:5173/employee-dashboard/leaves and it will show the LeaveList component.

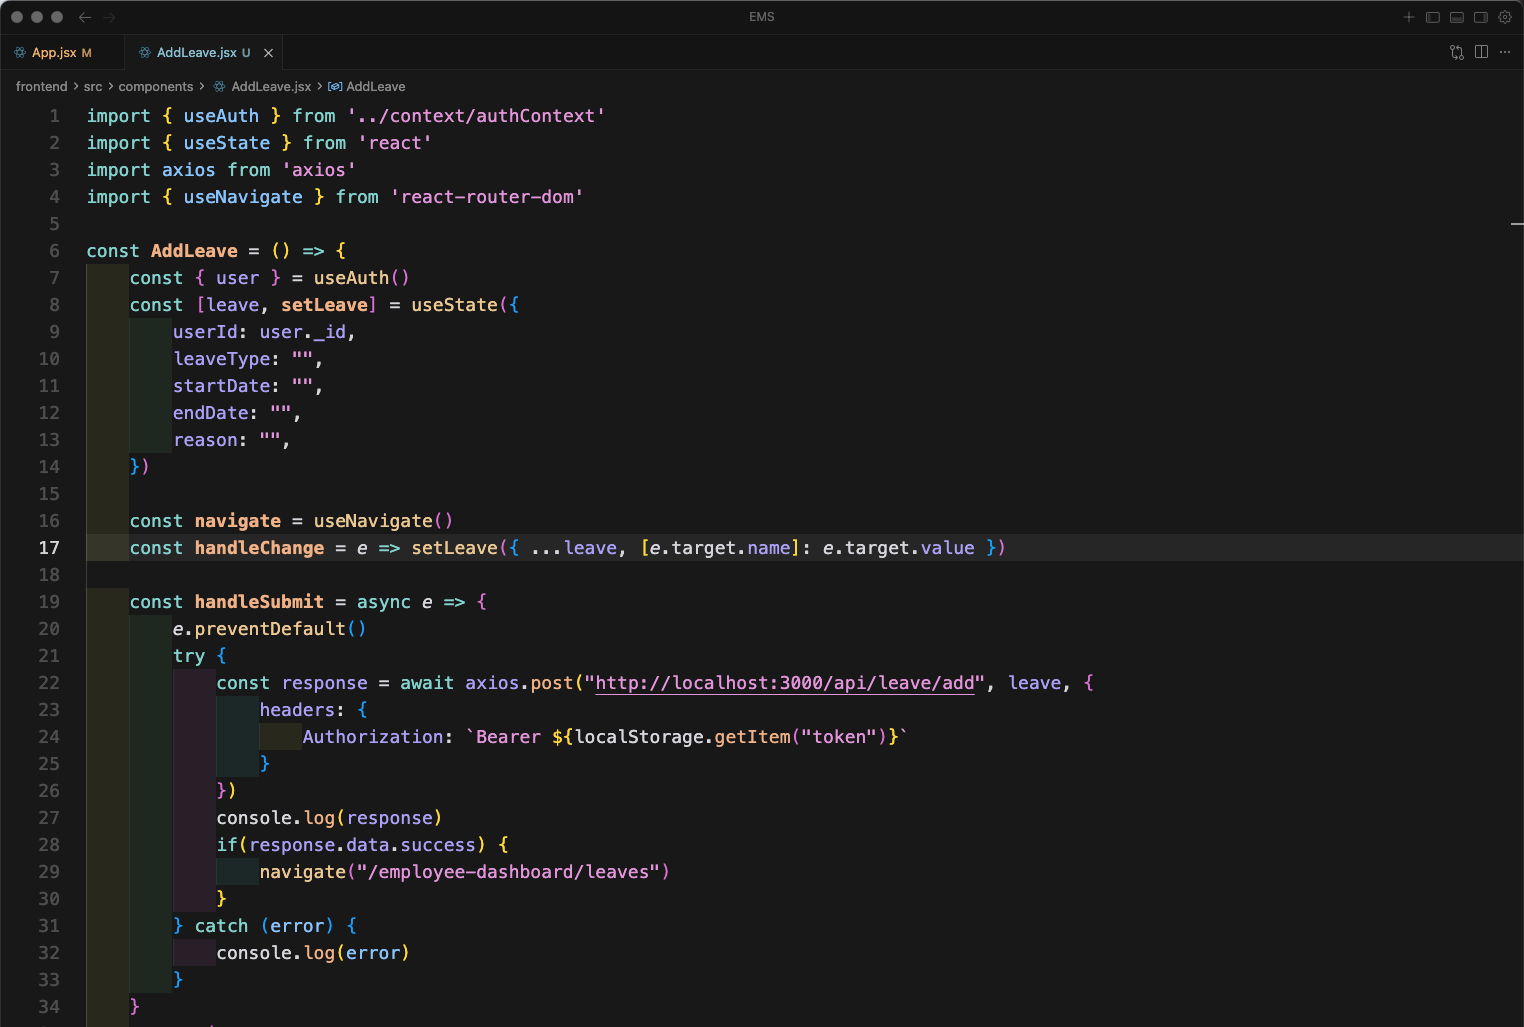
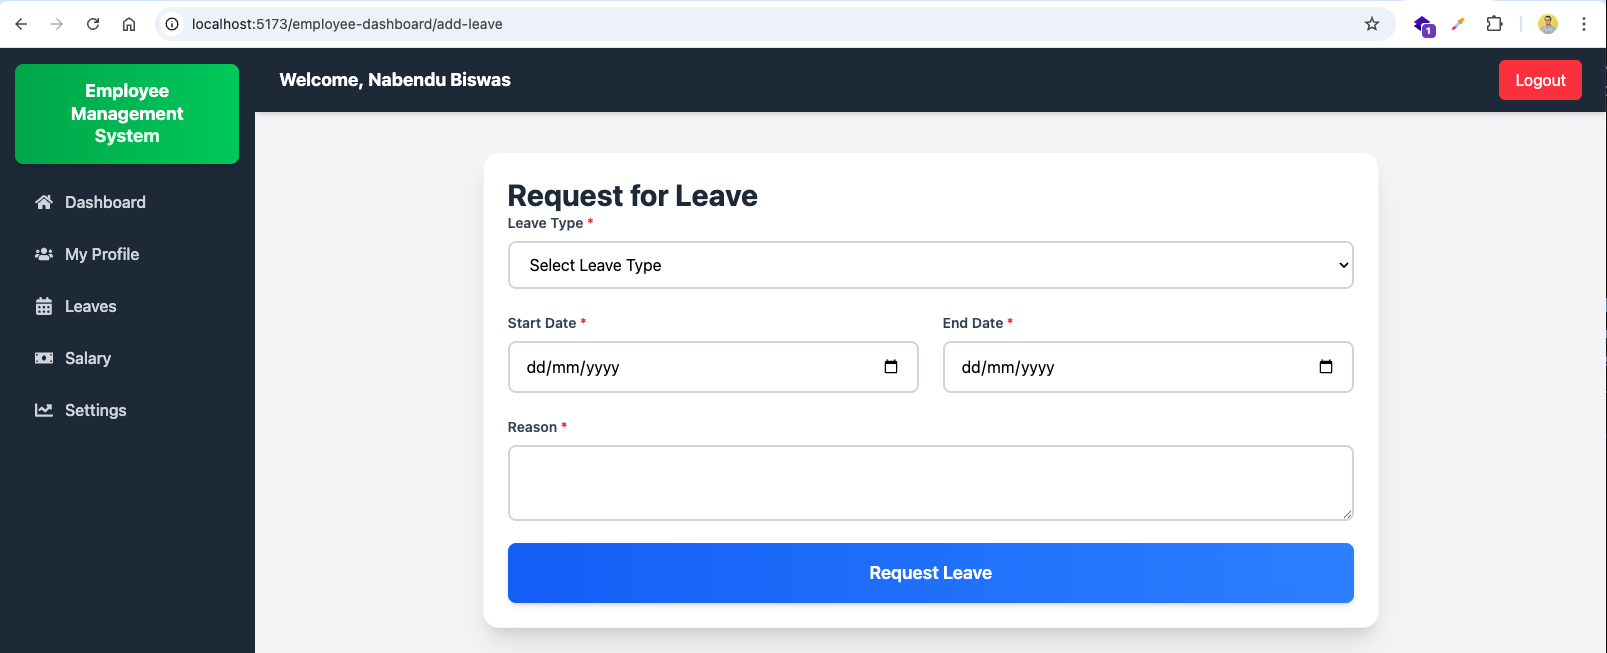
Now, inside the components folder create a file AddLeave.jsx. Here, we have first done the required imports. After that we are getting user from useAuth hook. Next, creating a state variable of leave. After that created the handleChange and handleSubmit functions. The handleSubmit function will pass data to the API endpoint of /leave/add.
Next, in the file AddLeave.jsx we will add the code in return statement. Here, we have a form with the fields of Leave Type, Start Date, End Date.

We will complete the code for AddLeave.jsx file. Here, we will add textarea for Reason and also a button for Request Leave.

Back, in the App.jsx file we will add a new route of /employee-dashboard/add-leave which will render the AddLeave component.

Now, goto http://localhost:5173/employee-dashboard/add-leave and you will get the form to add leave.
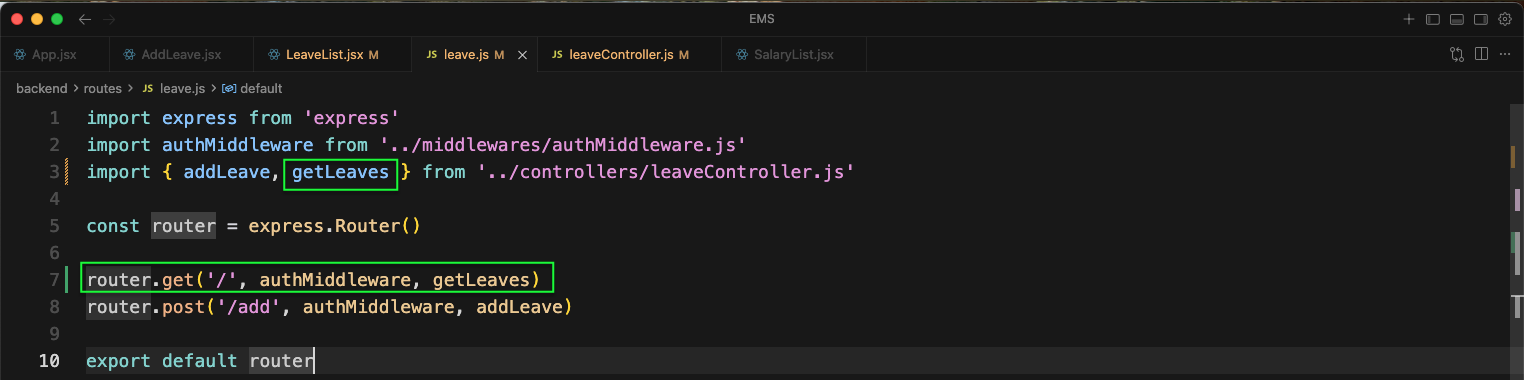
Now, in leave.js file we will add the get route of /. It will call the getLeaves function from leaveController.js file.
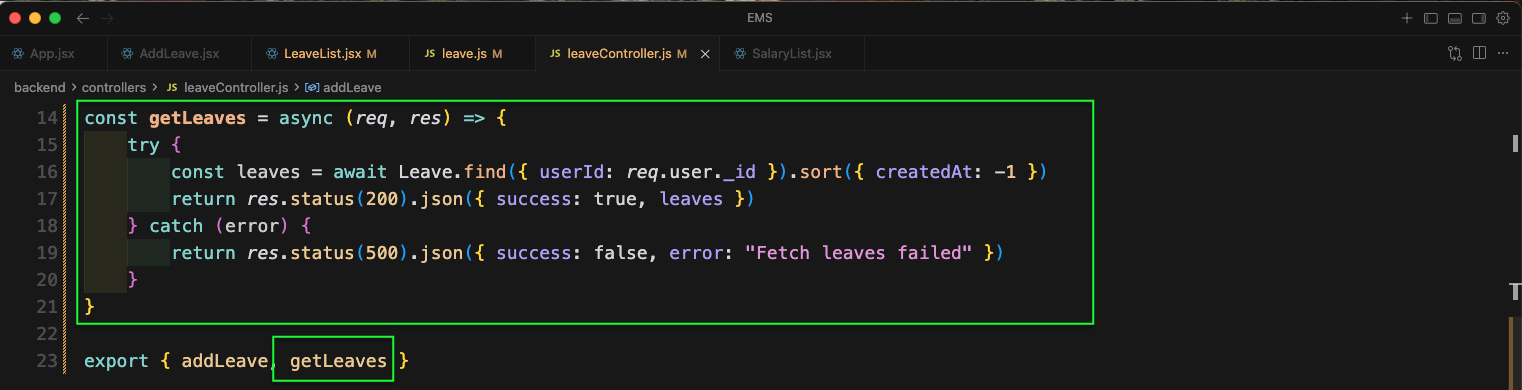
Now, in the leaveController.js file we will add the function of getLeaves. Here, we are getting the leaves from the database and returning them.
Now, going back to LeaveList.jsx file, we will first import the required things. After that we have a columns variable, which is an array of objects. It is required for DataTable of react-data-table-component. Also, we have data, filteredData and searchQuery state variables.

Now, in the LeaveList.jsx file we will add the useEffect for getting the leaves. It is hitting the GET endpoint of /leave.

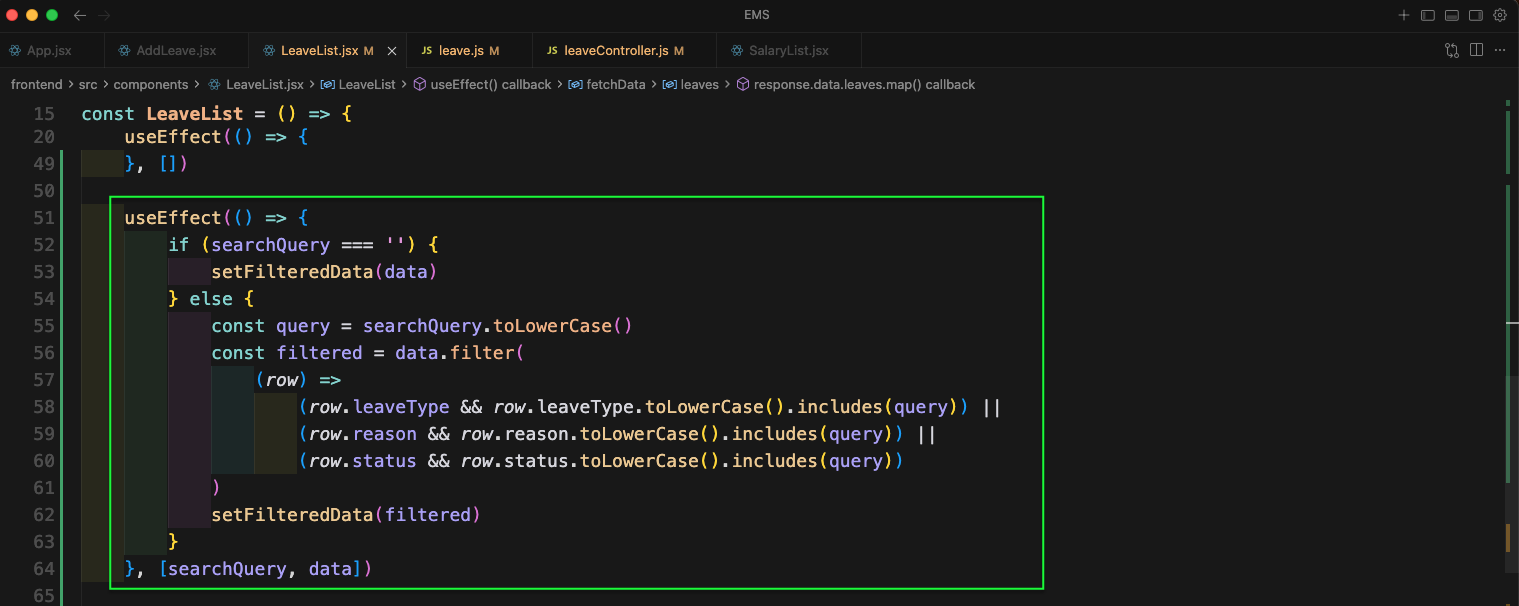
We have another useEffect for search and filter in LeaveList.jsx file.
Lastly, in the return statement of LeaveList.jsx file we will add the DataTable. Here, we are mapping through the data and showing the leave details. We are using the columns variable created earlier.

Now, in http://localhost:5173/employee-dashboard/leaves we will see all the leaves.

Now, in the backend index.js file add the route /api/salary. It will call salaryRoutes from salary.js file.

Now, create a new file salary.js file inside routes folder. Here, we will add the get route of /:id. It will call the getSalaries function from salaryController.js file.

Now, create a new file Salary.js inside models folder. Here, we will add the schema for the salary.

Now, create a new file salaryController.js file inside controllers folder. Here, we will add the function of getSalaries. It will return the salary of the employee.

Now, in App.jsx file we will add a new route of /employee-dashboard/salaries/:id which will render the ViewSalary component.

Now, in Sidebar.jsx file we will update the NavLink for Salary.

Now, create a new file ViewSalary.jsx inside components folder. Here, we are first importing the required things. After that we are getting the id from the useParams hook. Then creating the state variables of loading, rows and employeeInfo. Now, inside a useEffect we are hitting the GET endpoint of /salary/:id and also /employee/:id. We are calling both with Promise.all(). If both of them are successful, then we are setting the data to rows state.

Completing the useEffect and returning _id, sno, salary, department, designation. Updating the row state with setRows

Now, creating the columns variable with useMemo. Here, we are mapping through the rows and returning the columns. Next, inside the return statement we have a heading of My Salary and then showing Latest Salary.

Now, in DataTable we will show the data.

We are completing the ViewSalary.jsx file.

Now, clicking on Salary in Sidebar will take us to http://localhost:5173/employee-dashboard/salaries/:id and it will show the salary details.

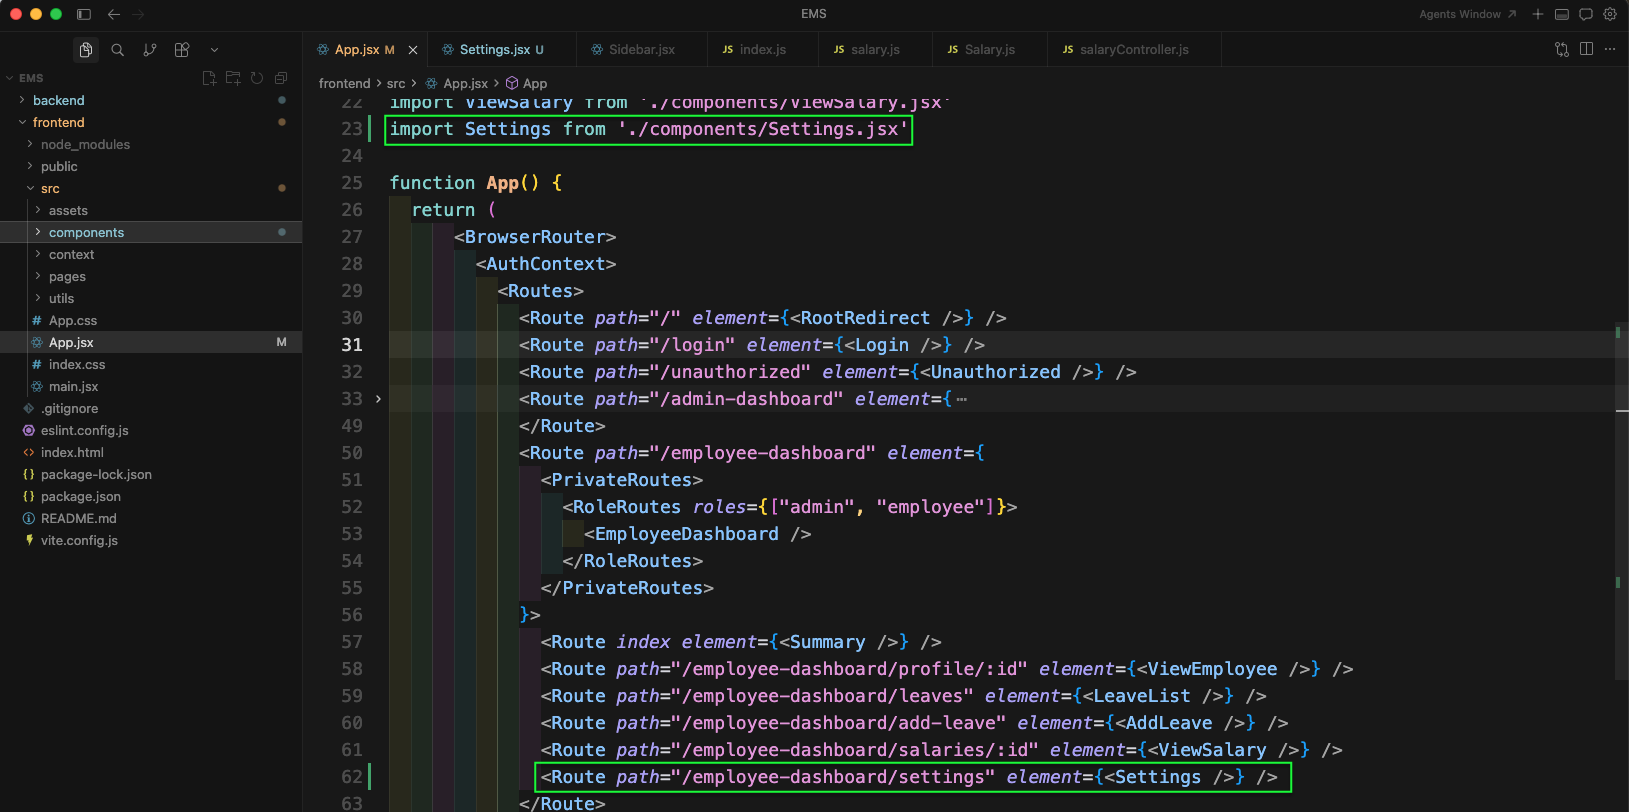
Now, in App.jsx file we will add a new route of /employee-dashboard/settings which will render the Settings component.
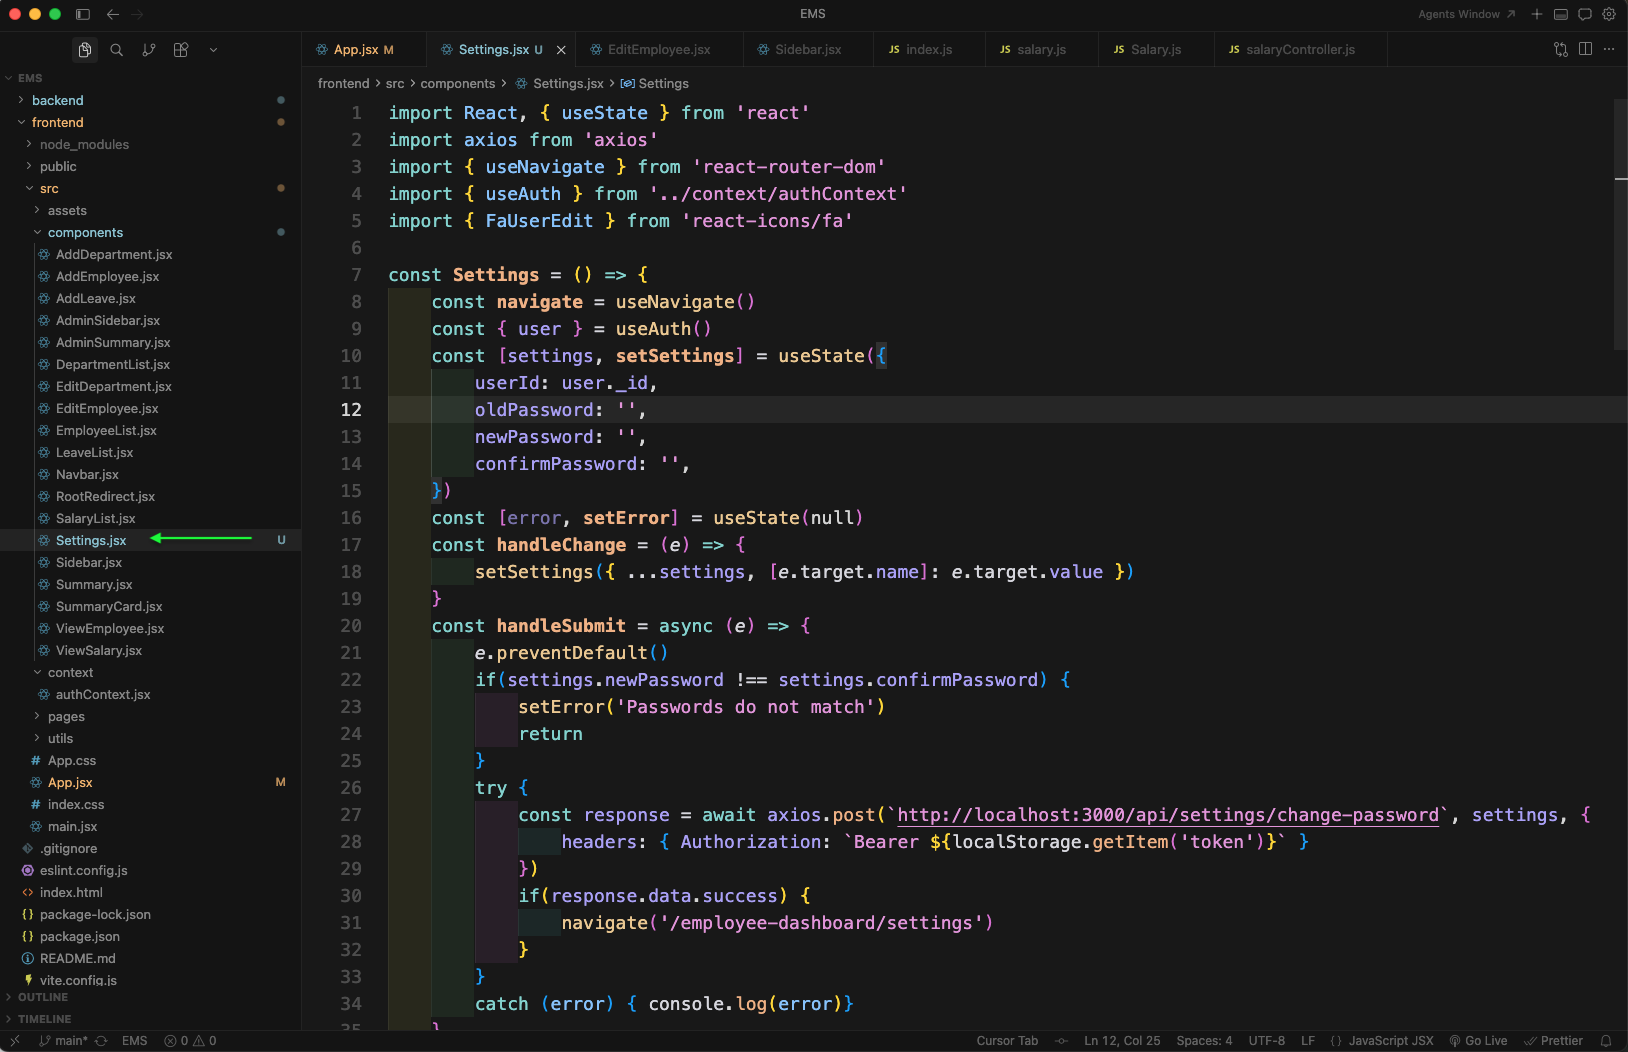
Now, create a new file Settings.jsx inside components folder. Here, we are importing required libraries, getting the user from useAuth hook, and creating a state object for old/new/confirm password. We are also adding handleChange and handleSubmit to call the API for changing password.
Next, in the return statement of Settings.jsx file we will start building the UI for settings page. Here, we have created the form and added the input fields for Old Password and New Password with Tailwind CSS styling.

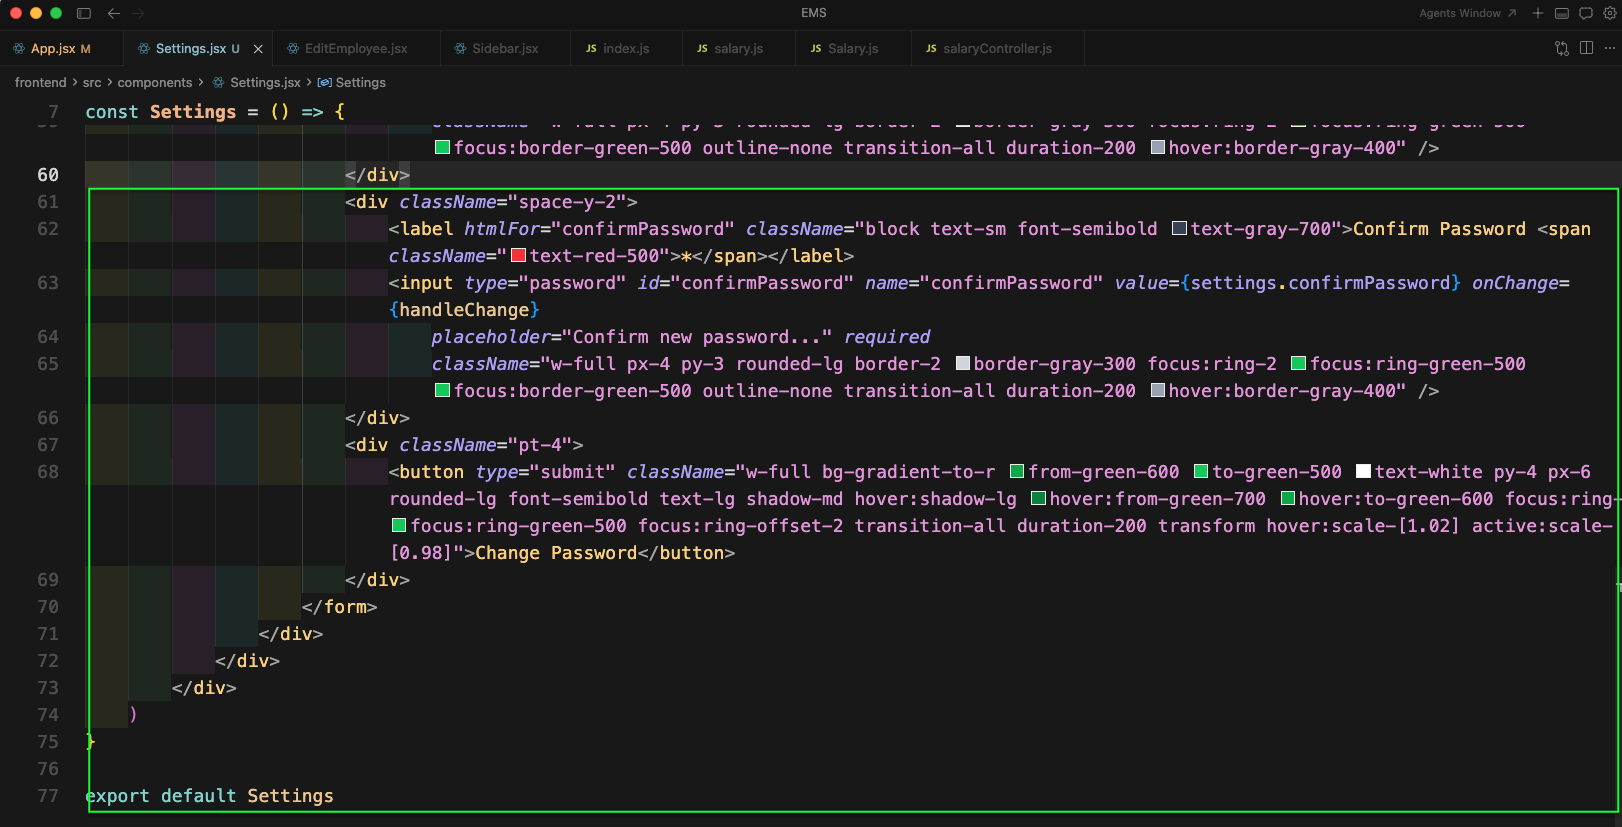
We are completing the form by adding the Confirm Password field and a button to submit the form (Change Password).
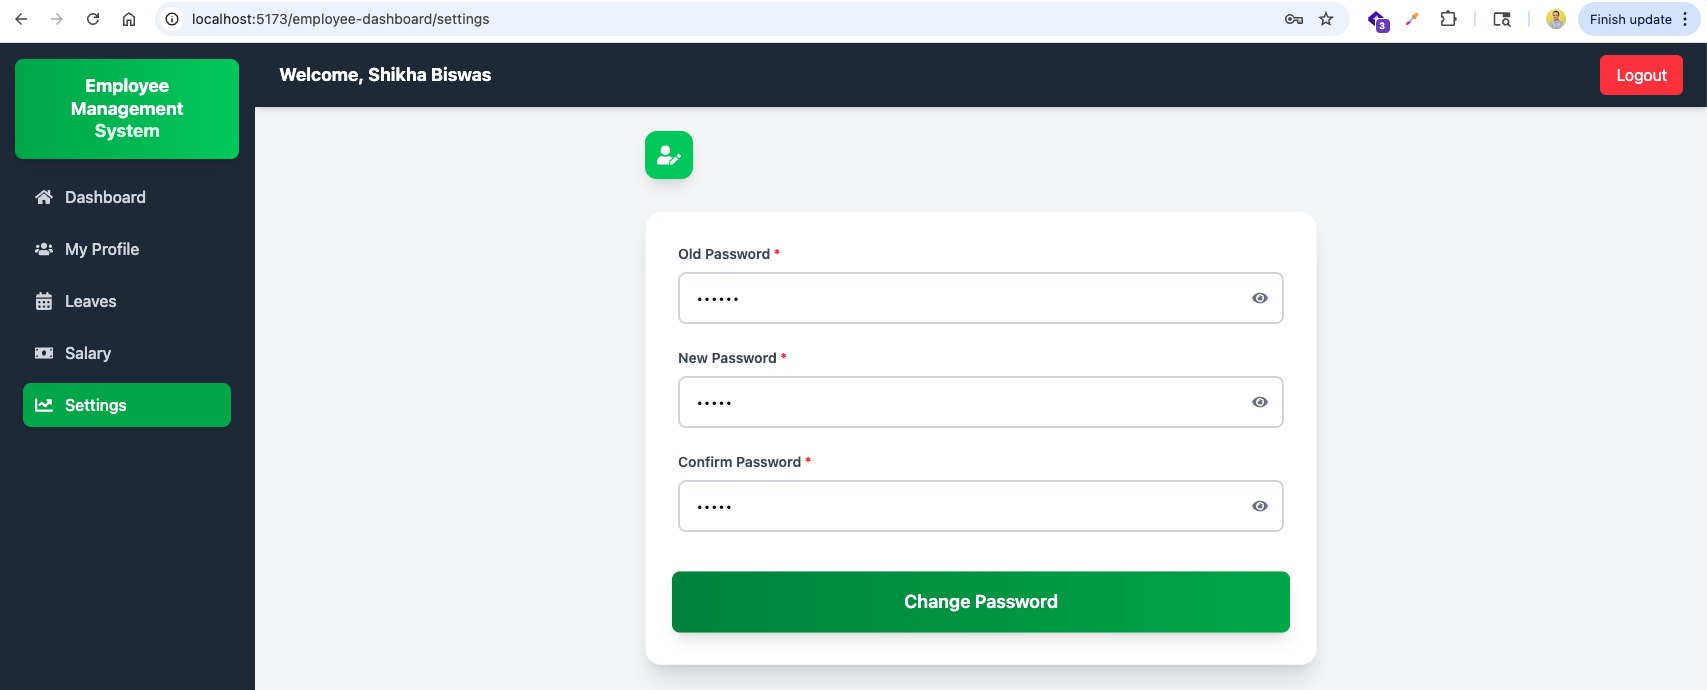
Now, go to http://localhost:5173/employee-dashboard/settings and you will get the settings page with the password change form.

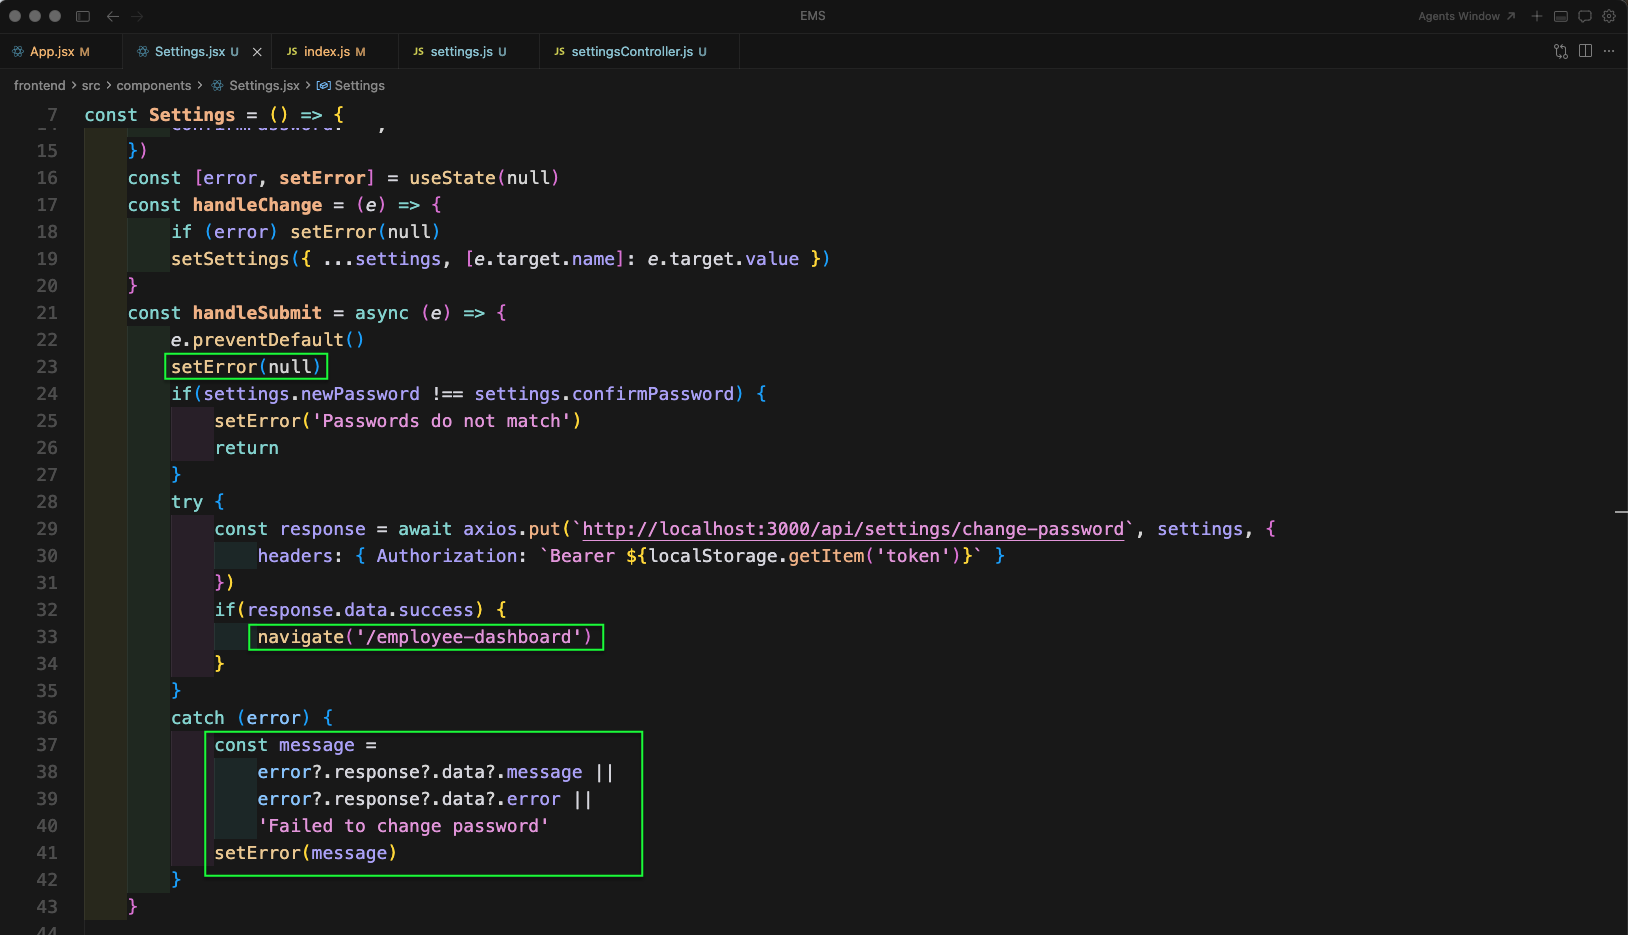
Now, we will update the Settings.jsx file. In handleSubmit function, we have first added setError to null. Next, on success we will navigate to /employee-dashboard. The catch block is also updated correctly.
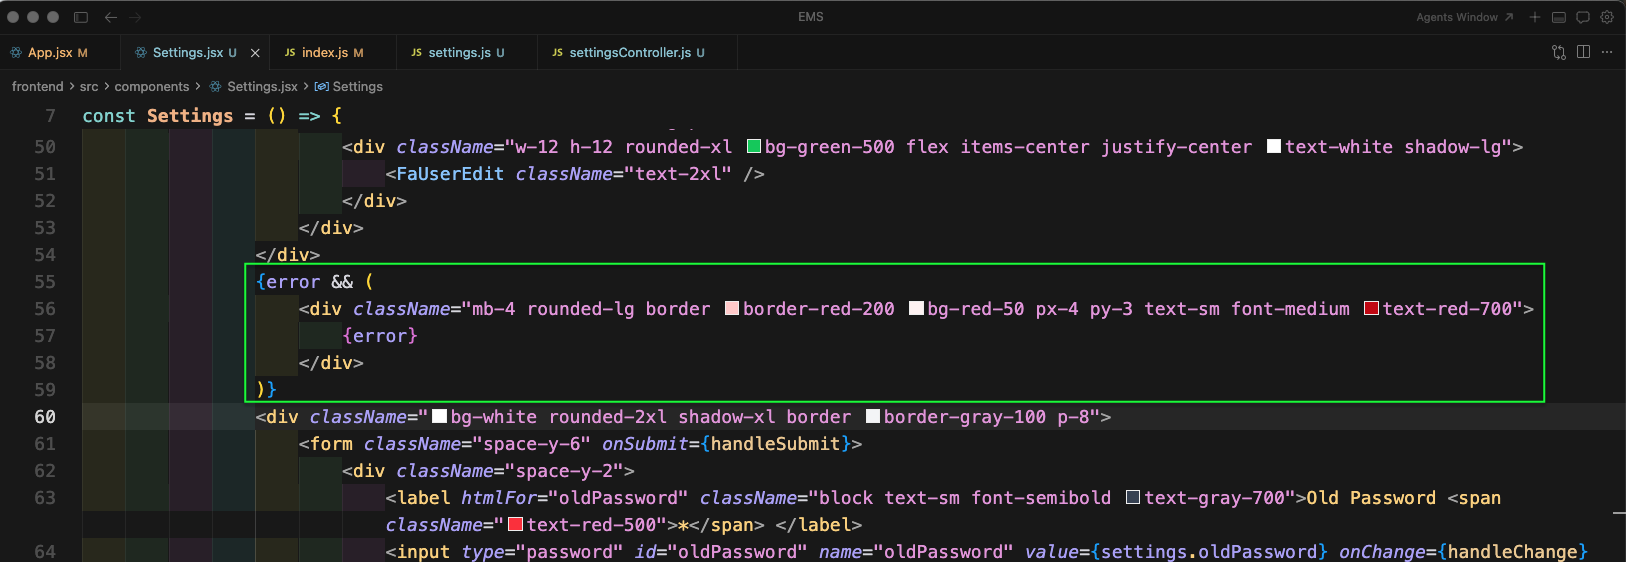
In the UI we will show the error message if any. Here, we are conditionally rendering the error block above the form.
Now, in the backend index.js file add the route /api/settings. It will call settingsRoutes from settings.js file.

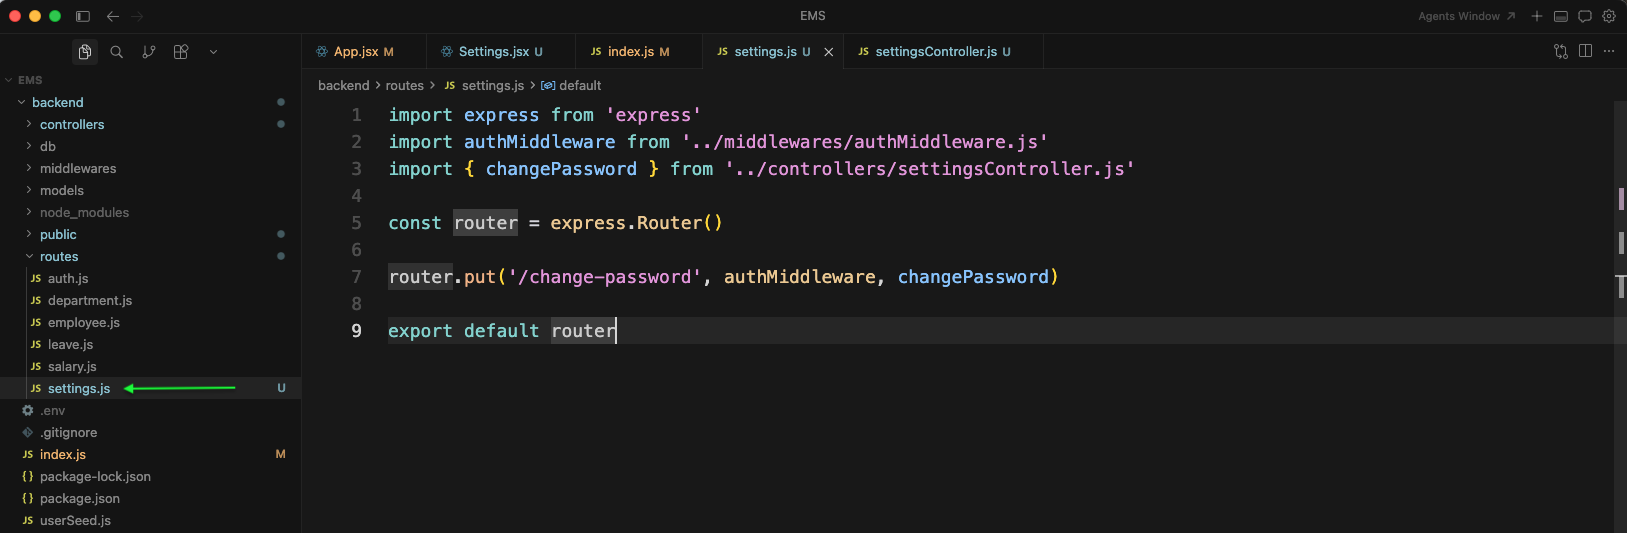
Now, create a new file settings.js inside routes folder. Here, we will add a PUT route of /change-password with authMiddleware. It will call the changePassword function from settingsController.js file.
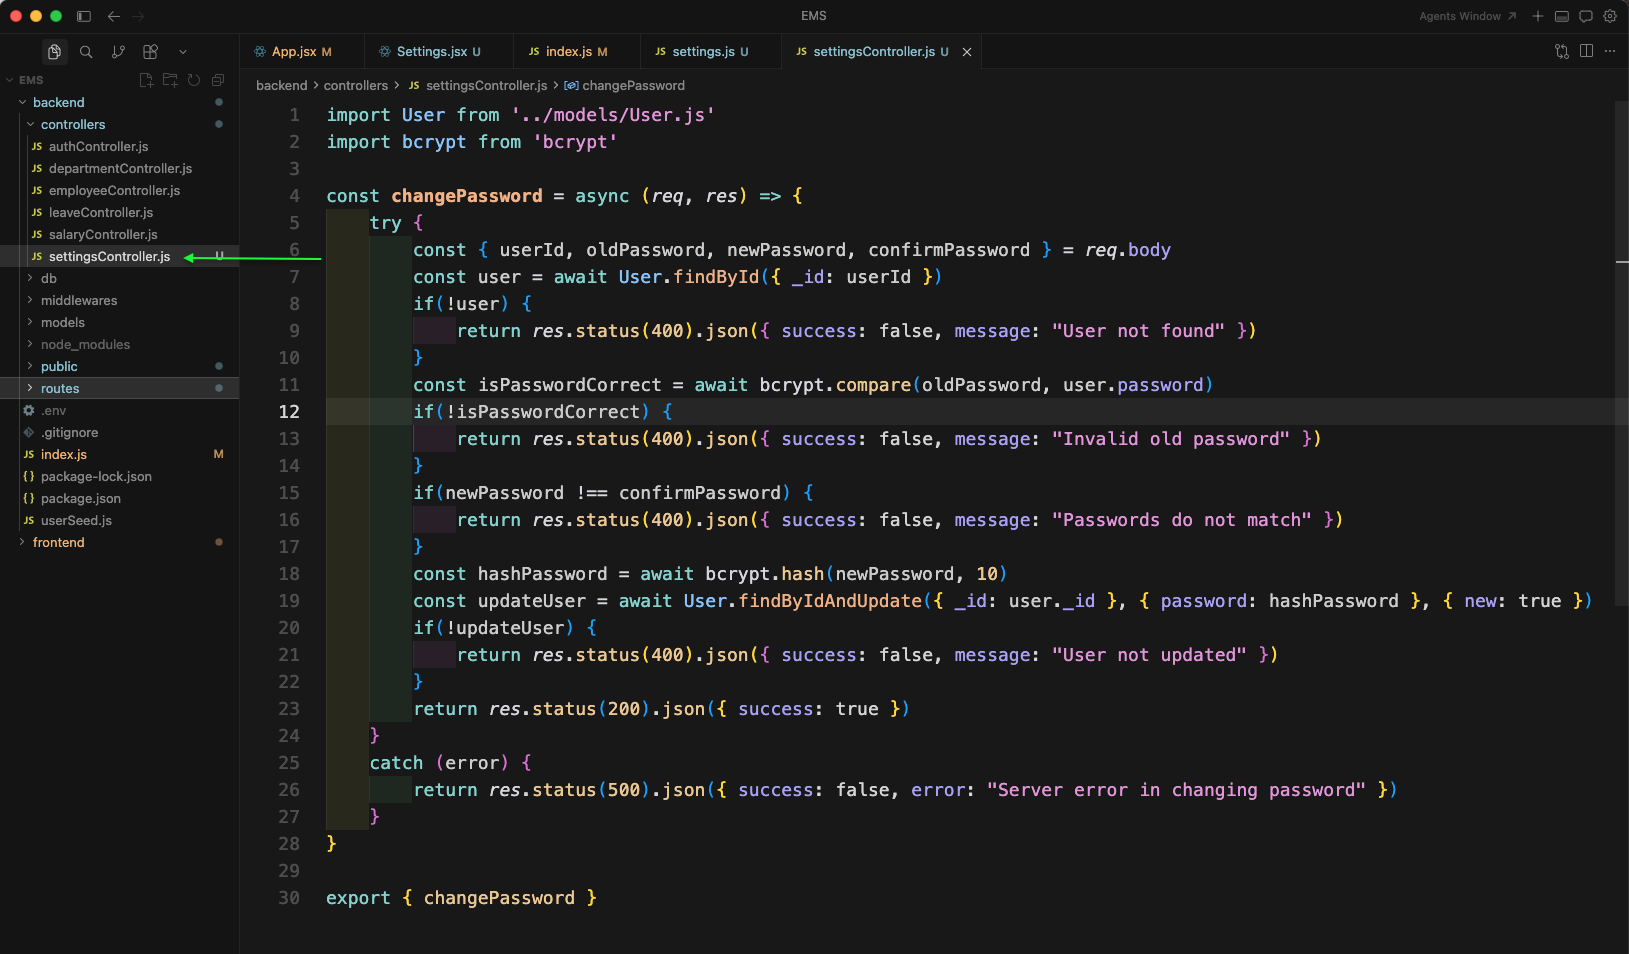
Now, create a new file settingsController.js inside controllers folder. Here, we will add the changePassword function. It will first find the user, validate the old password using bcrypt, check new and confirm password match, then hash the new password and update the user.
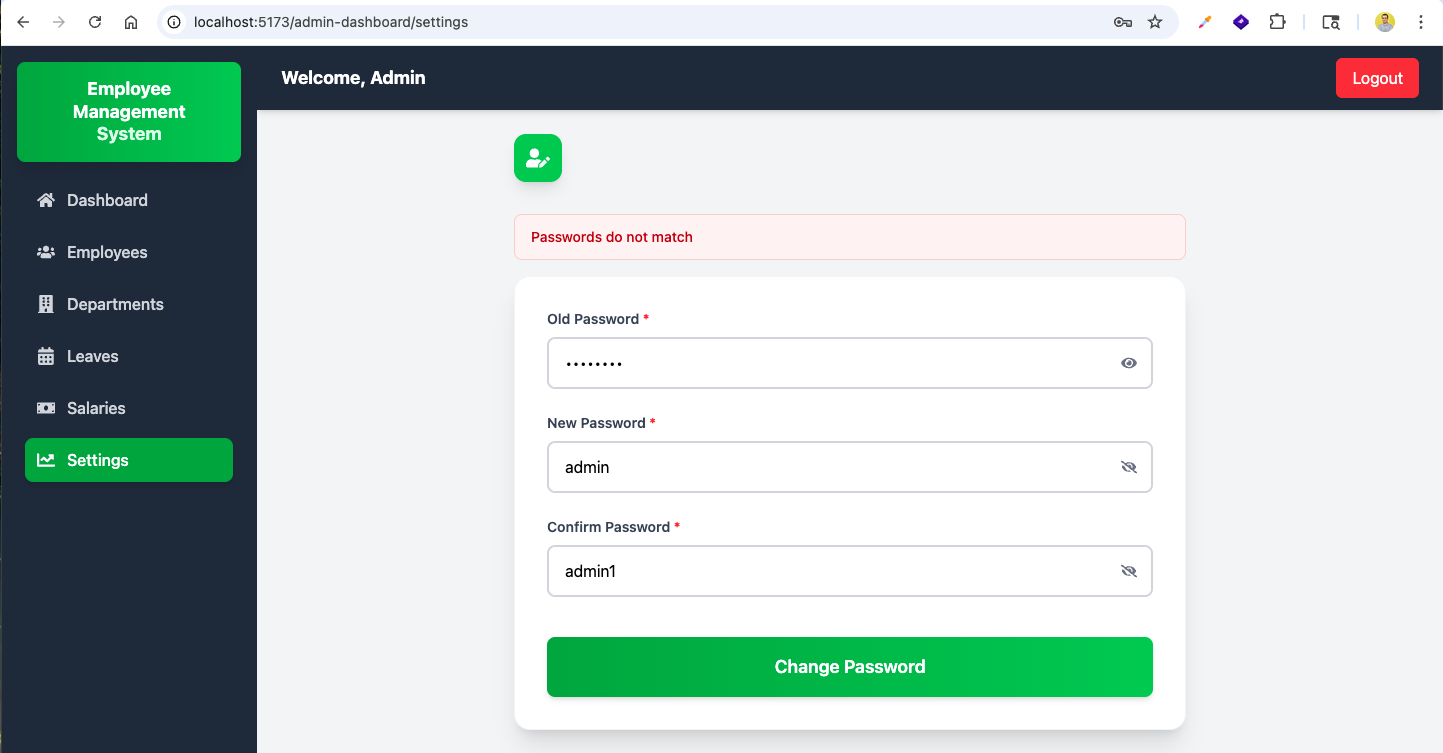
Now, if the new password and confirm password do not match, we will see the error message in settings page.

Now, we will add the show/hide password functionality in Settings.jsx file. We have created a showPasswords state object for old/new/confirm password and a helper function toggleShowPassword to toggle the input type.

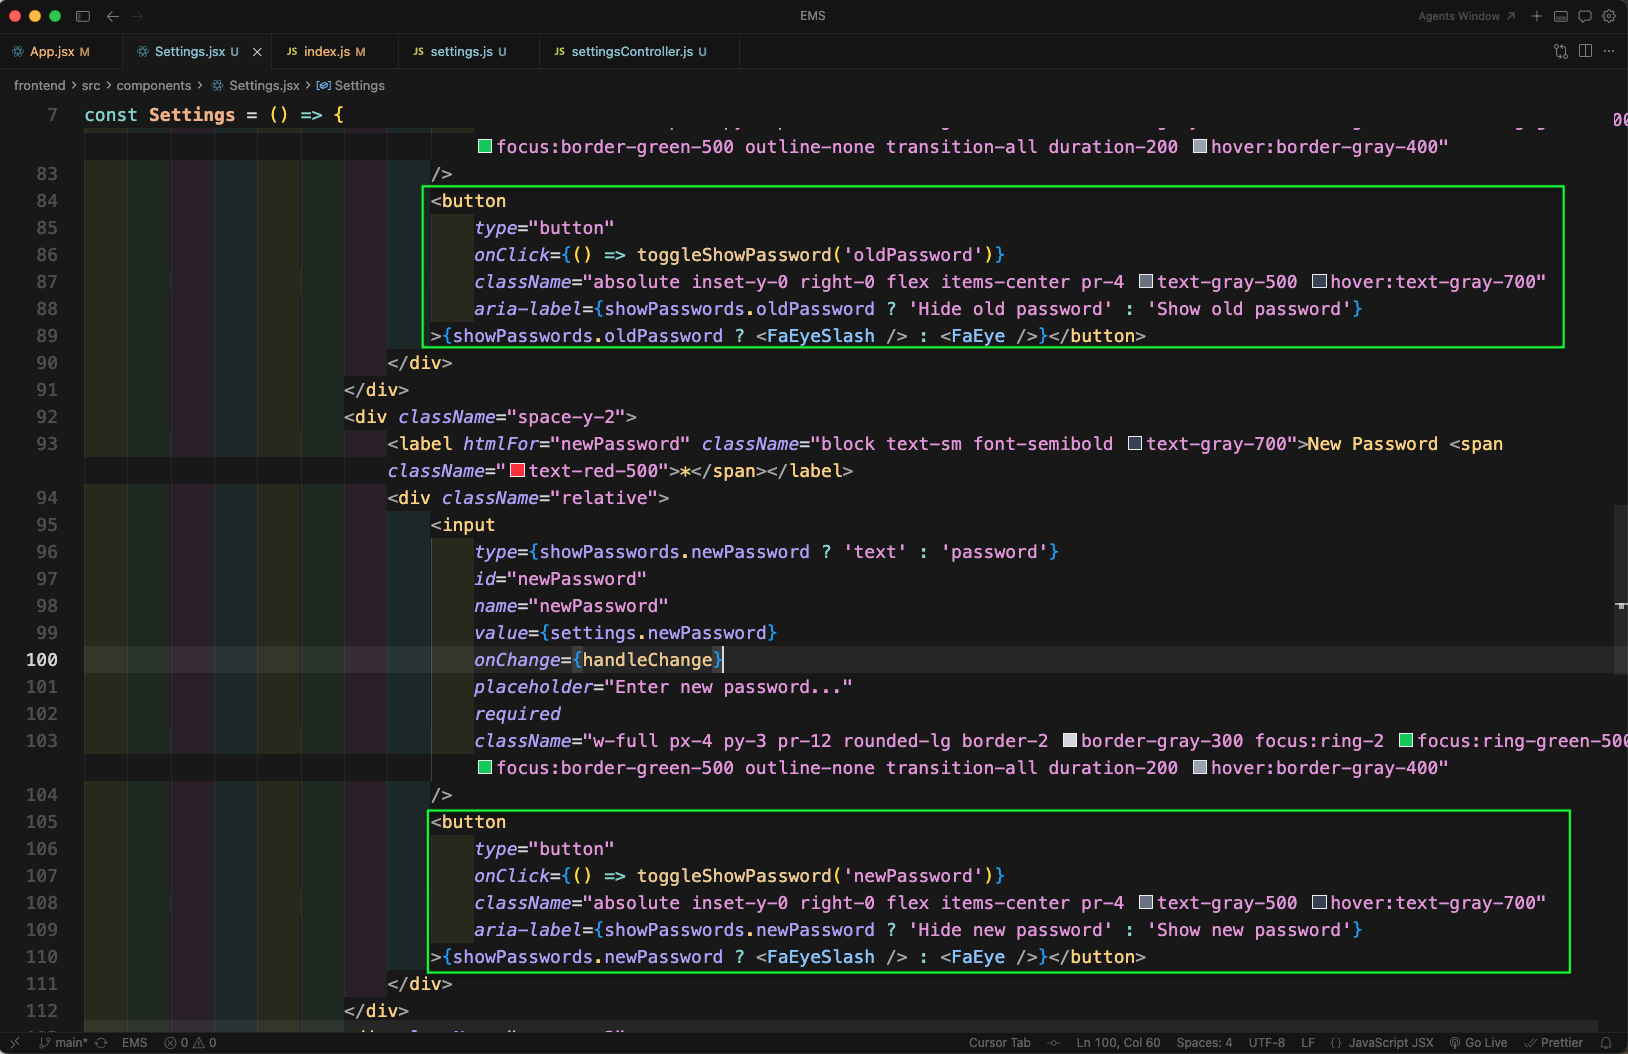
Next, in the form UI we will add an eye icon button for Old Password and New Password fields. Clicking the icon will toggle between type="password" and type="text" using showPasswords state.
Similarly, we will add the show/hide icon button for the Confirm Password field.
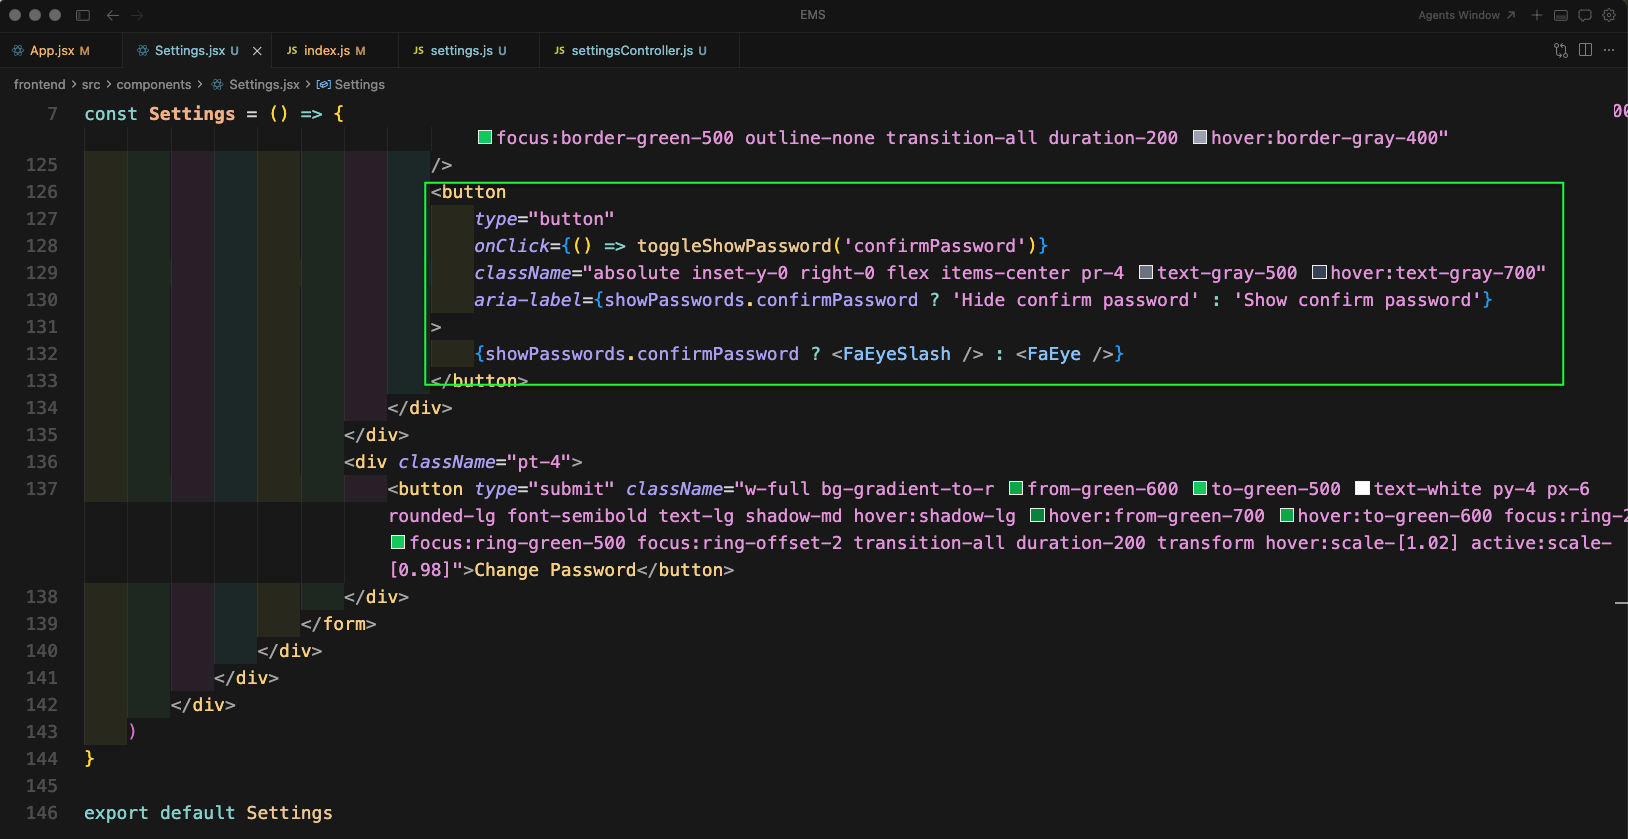
Now, in the settings page we can click on the eye icons to show or hide the passwords for each field.

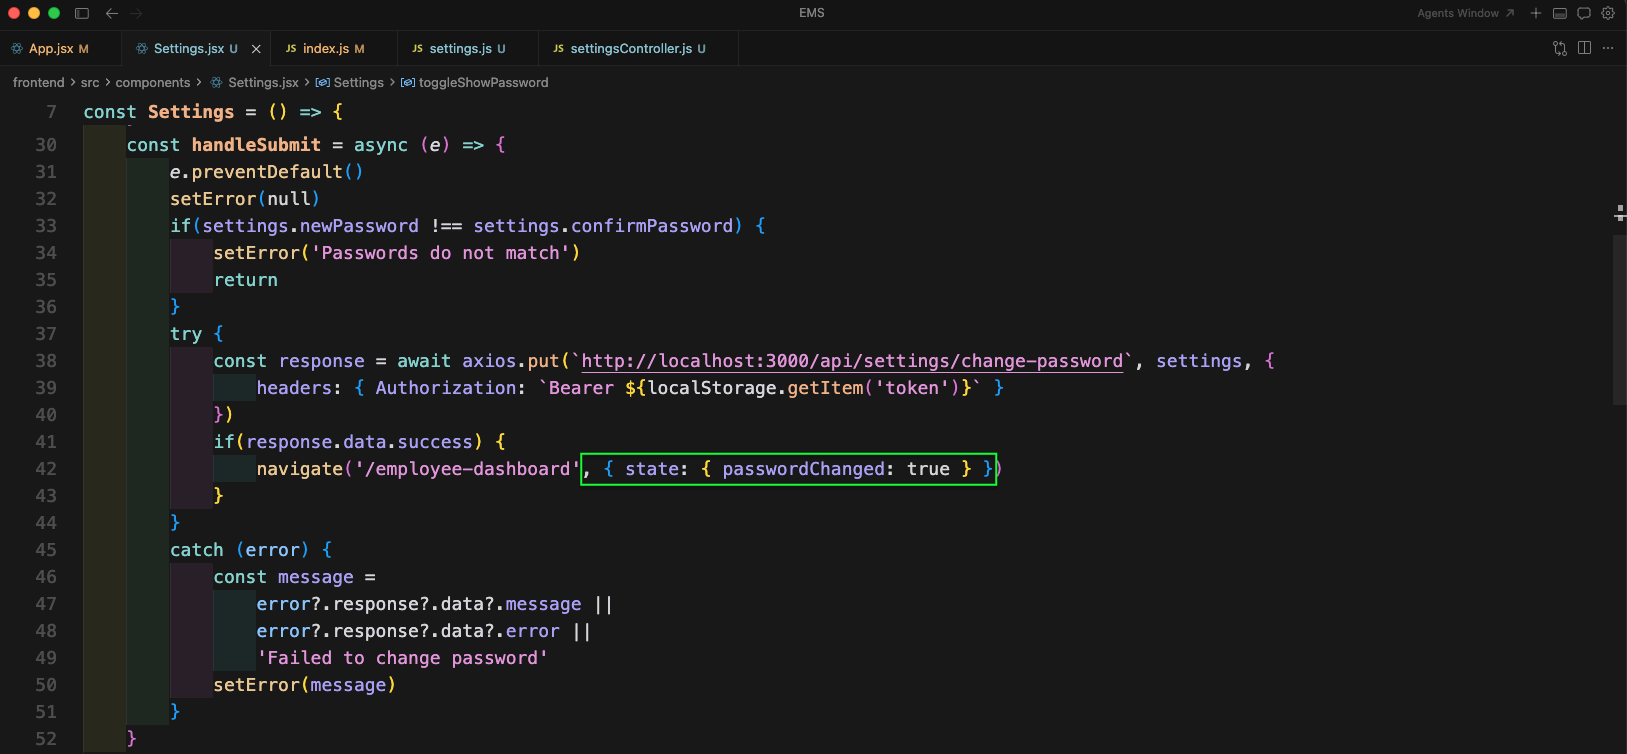
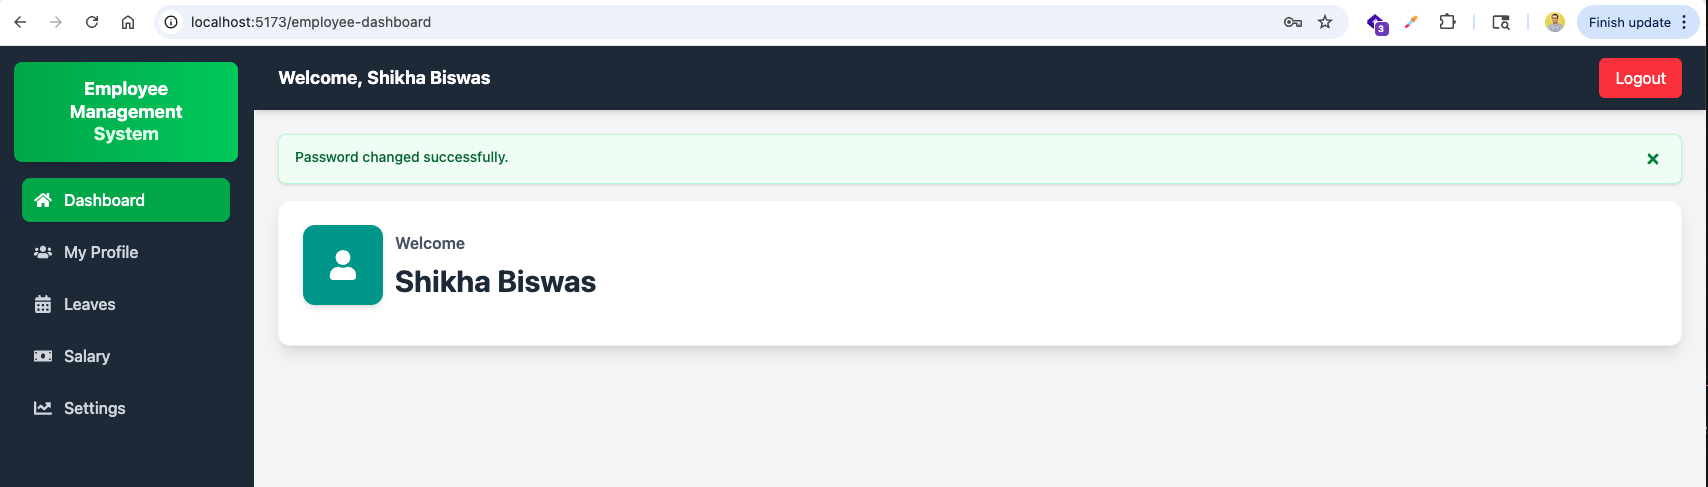
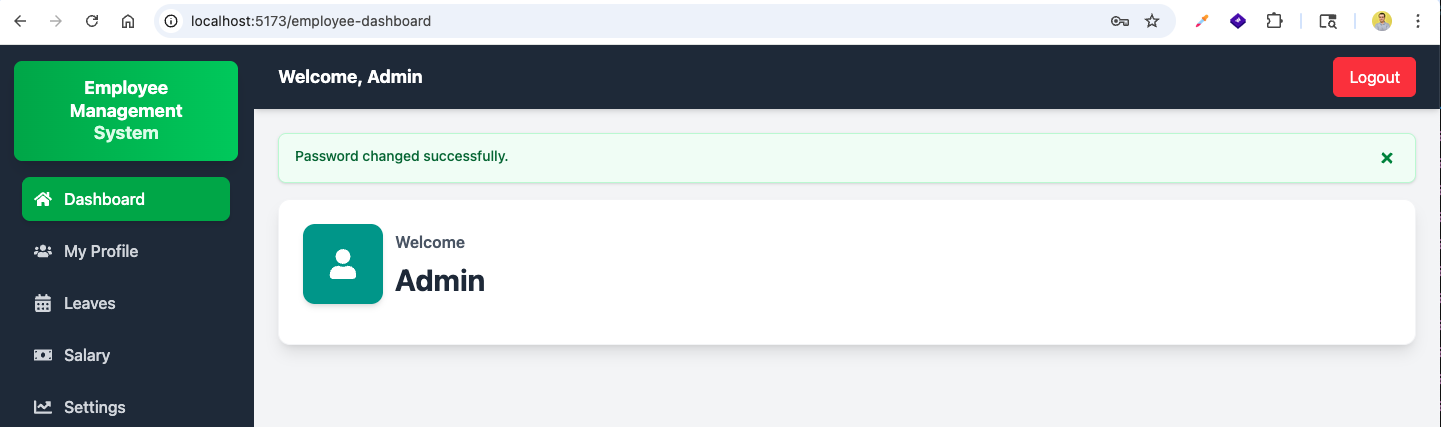
After a successful password change, we will pass a state flag while navigating back to dashboard. Here, we are doing navigate('/employee-dashboard', { state: { passwordChanged: true } }) so that we can show a success message on the dashboard.
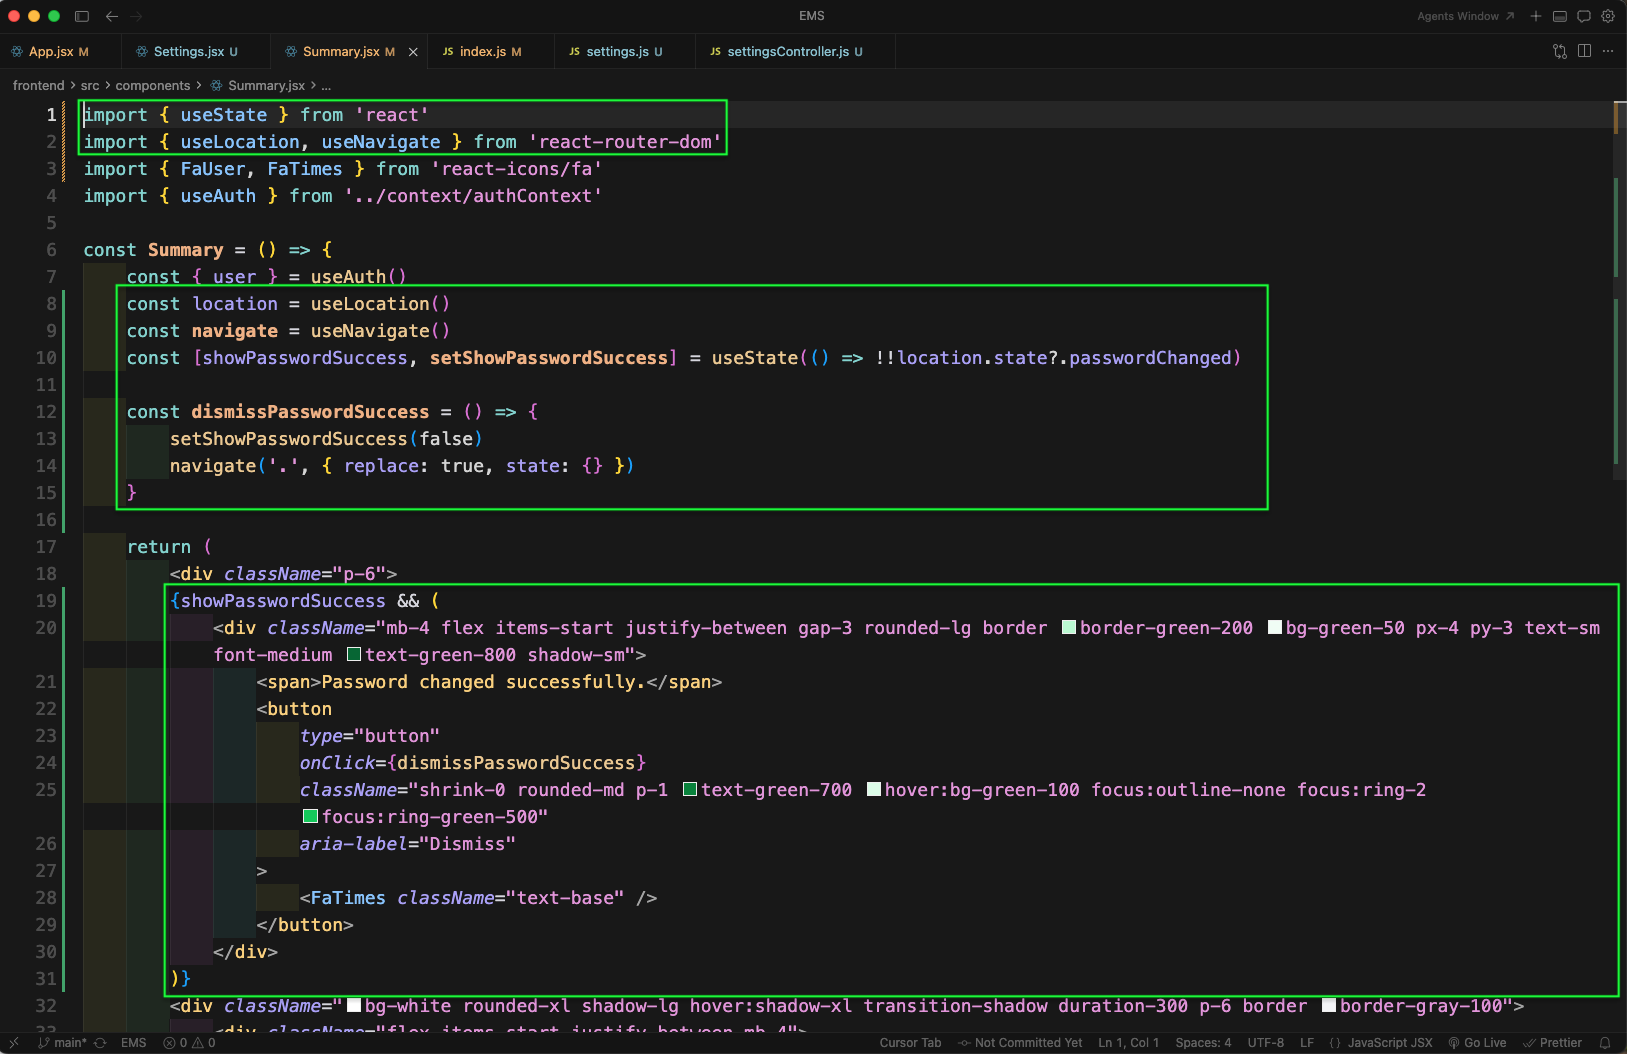
Now, in Summary.jsx file we will read the navigation state using useLocation. If location.state.passwordChanged is true, we will show a success alert on the dashboard and also add a dismiss button which clears the state.
This time we have given the correct Old password. Then a same New password and Confirm password. After that clicked on Change Password button.
Finally, after changing the password successfully and redirecting to dashboard, it will show the success message Password changed successfully.
Now, we will add leave management for admin. In App.jsx we are importing AdminLeaveList component and adding a new route /admin-dashboard/leaves to render it.

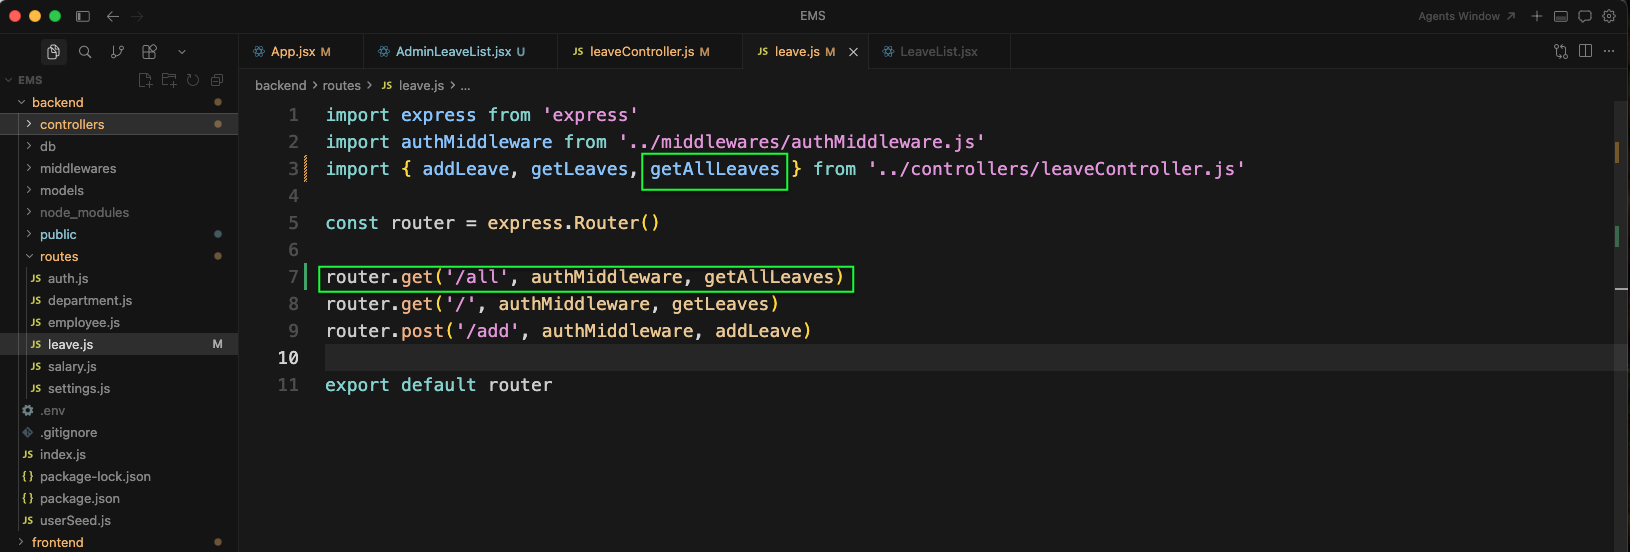
Now, in backend leave.js file we will add a new GET route /all. It will call the controller function getAllLeaves and is protected by authMiddleware.
Next, in leaveController.js we will add a new function getAllLeaves. Here, we are importing the Employee model along with Leave model and starting the admin-only implementation.
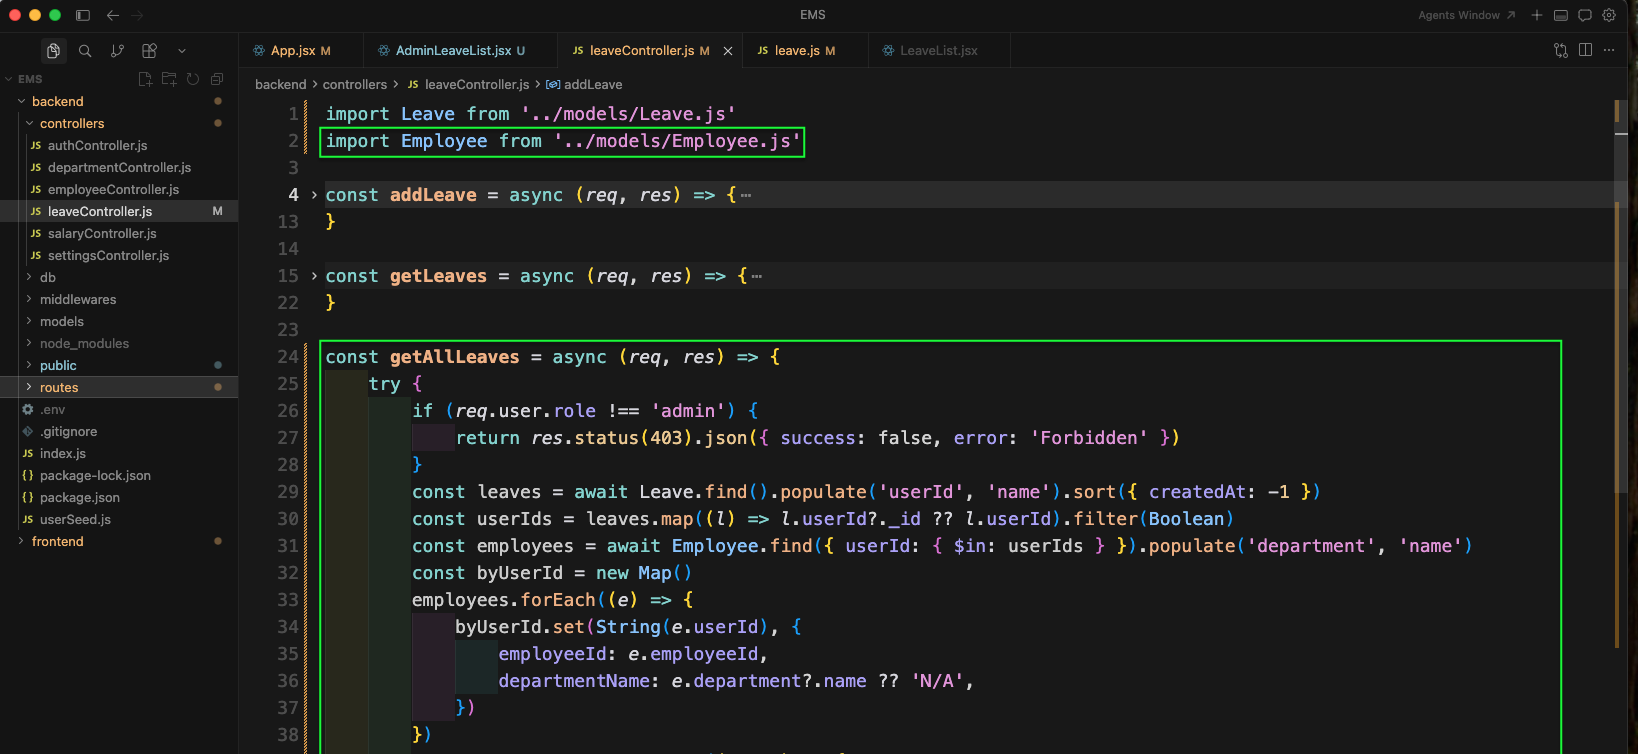
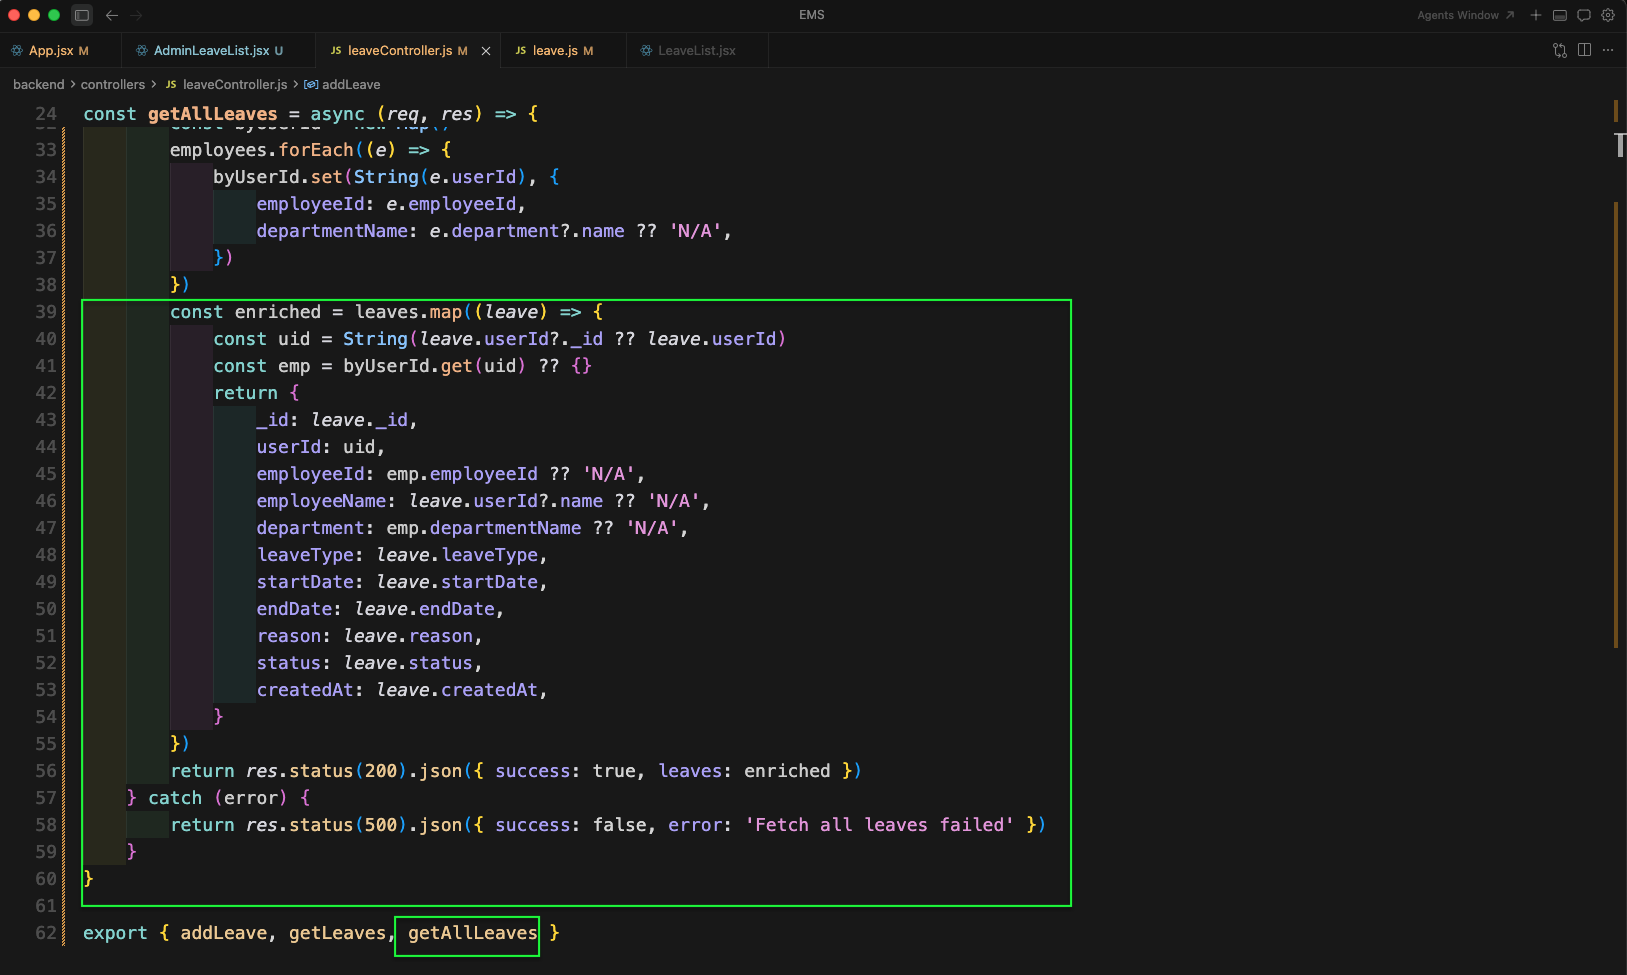
We are completing getAllLeaves logic. First we are checking if the logged in user role is admin. Then fetching all leaves (latest first) and also fetching employee details so that we can enrich leave rows with employeeId and department details.
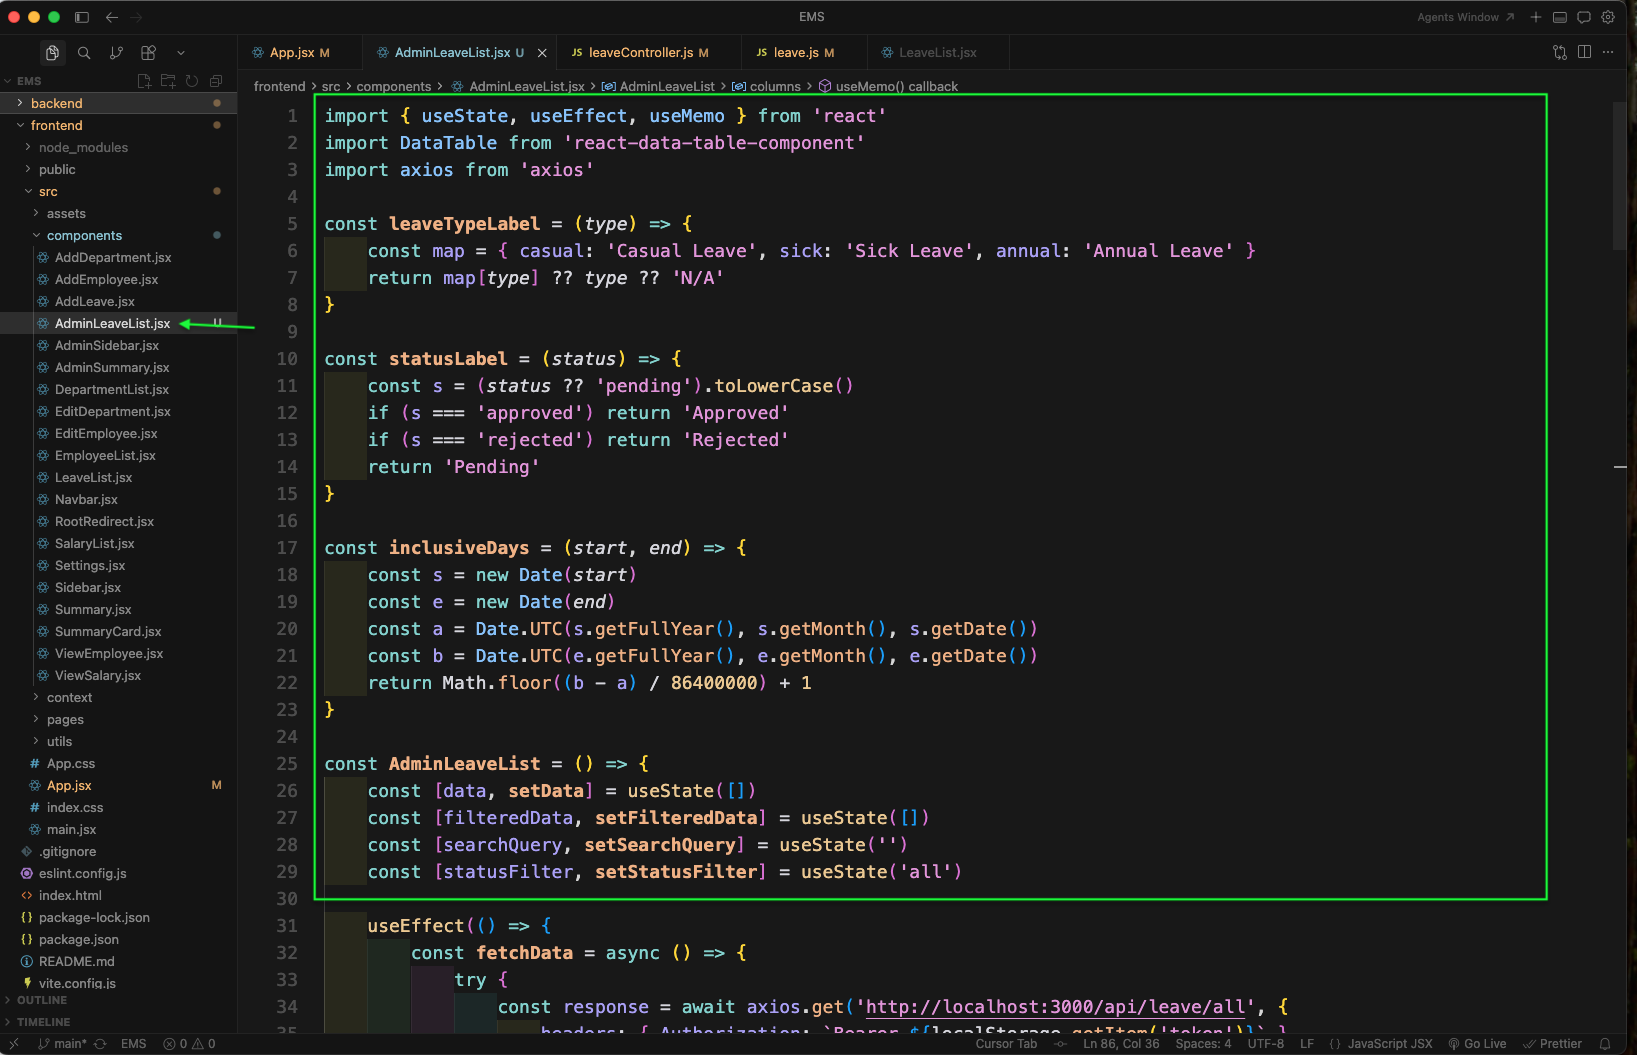
Now, create a new file AdminLeaveList.jsx inside components folder. Here, we are importing required things, adding some helper functions for Leave Type, Status and calculating Days, and creating state variables for table data, search query and status filter.
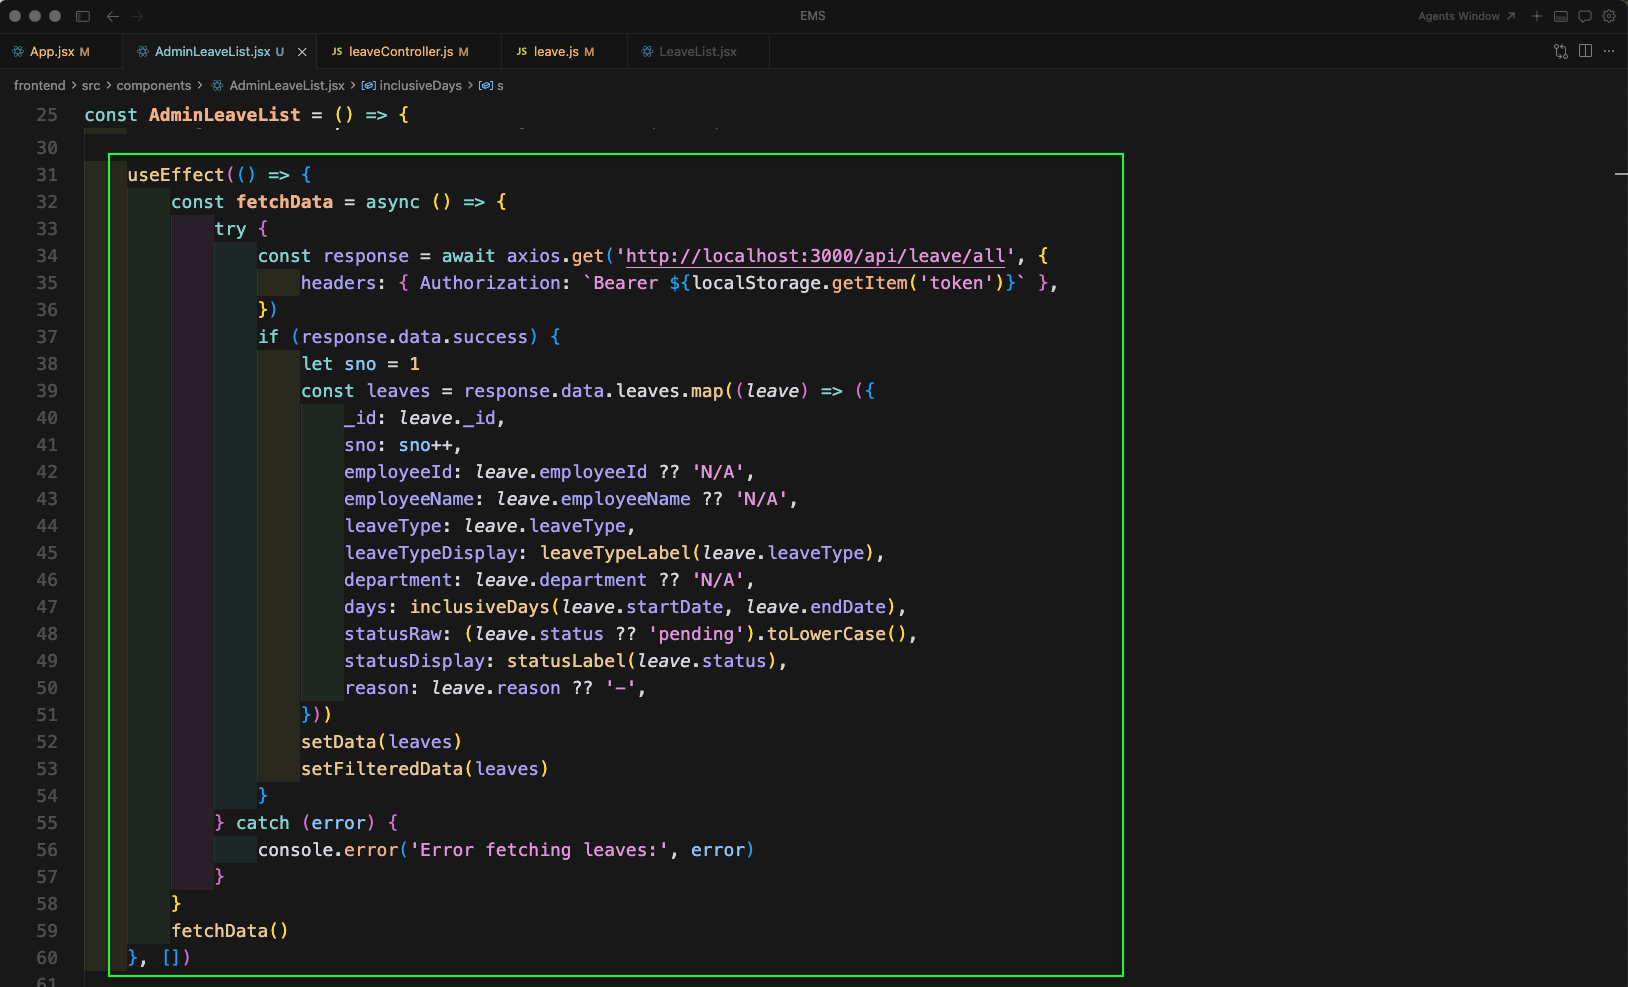
Next, in AdminLeaveList.jsx we will add a useEffect to fetch all leaves from the new endpoint /api/leave/all. We are mapping the API response into table rows (including employeeId, department and computed days) and setting both data and filteredData.
We will add another useEffect for searching and filtering. Here, we first filter by statusFilter, then apply the searchQuery against multiple fields like employee id, name, leave type, department, status and reason.

Now, we will define the columns for the DataTable using useMemo. Here, we are showing S No, Emp ID, Name, Leave Type, Department, Days, Status and an Action button (View).

In the return statement we will create the UI for Manage Leaves page. Here, we have added a search input and status filter buttons (Pending, Approved, Rejected).

Lastly, we are rendering the DataTable with filteredData, enabling pagination and adding some custom styles for header and rows.

Now, going to http://localhost:5173/admin-dashboard/leaves we will see the Manage Leaves page with the table, search and status filters.

Now, we will add a new page to view the leave details. In App.jsx import LeaveDetails component and add a new route
/admin-dashboard/leaves/:idwhich will render the leave details page.

In AdminLeaveList.jsx file update the Action column. Here, the View button is changed to a Link which navigates to
/admin-dashboard/leaves/${row._id}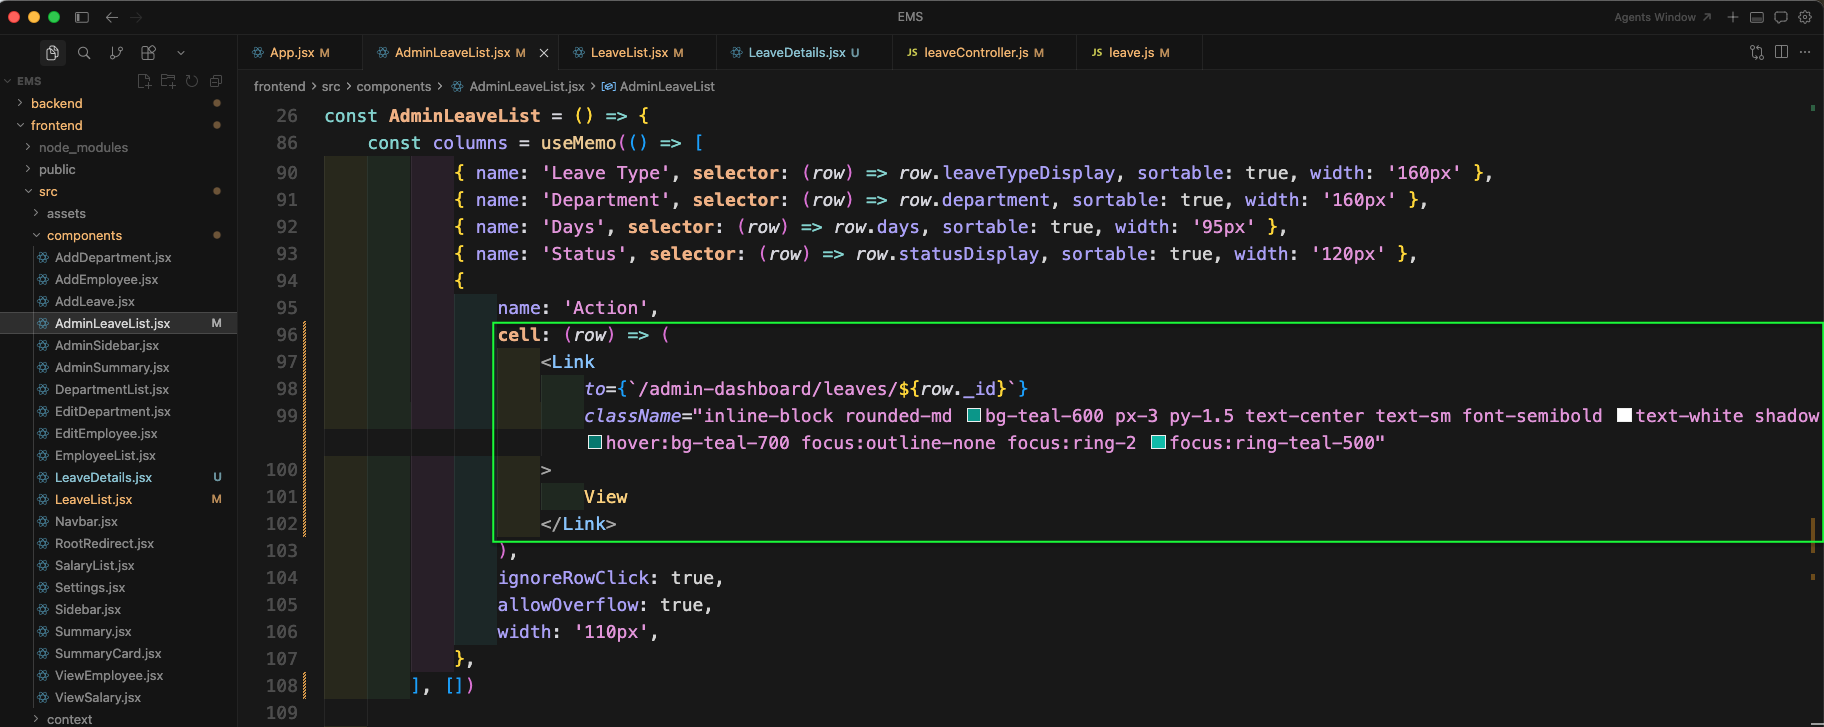
Now, in LeaveList.jsx file (employee side) we are adding useMemo and Link imports, so that we can also add a View action link in the employee leave list.
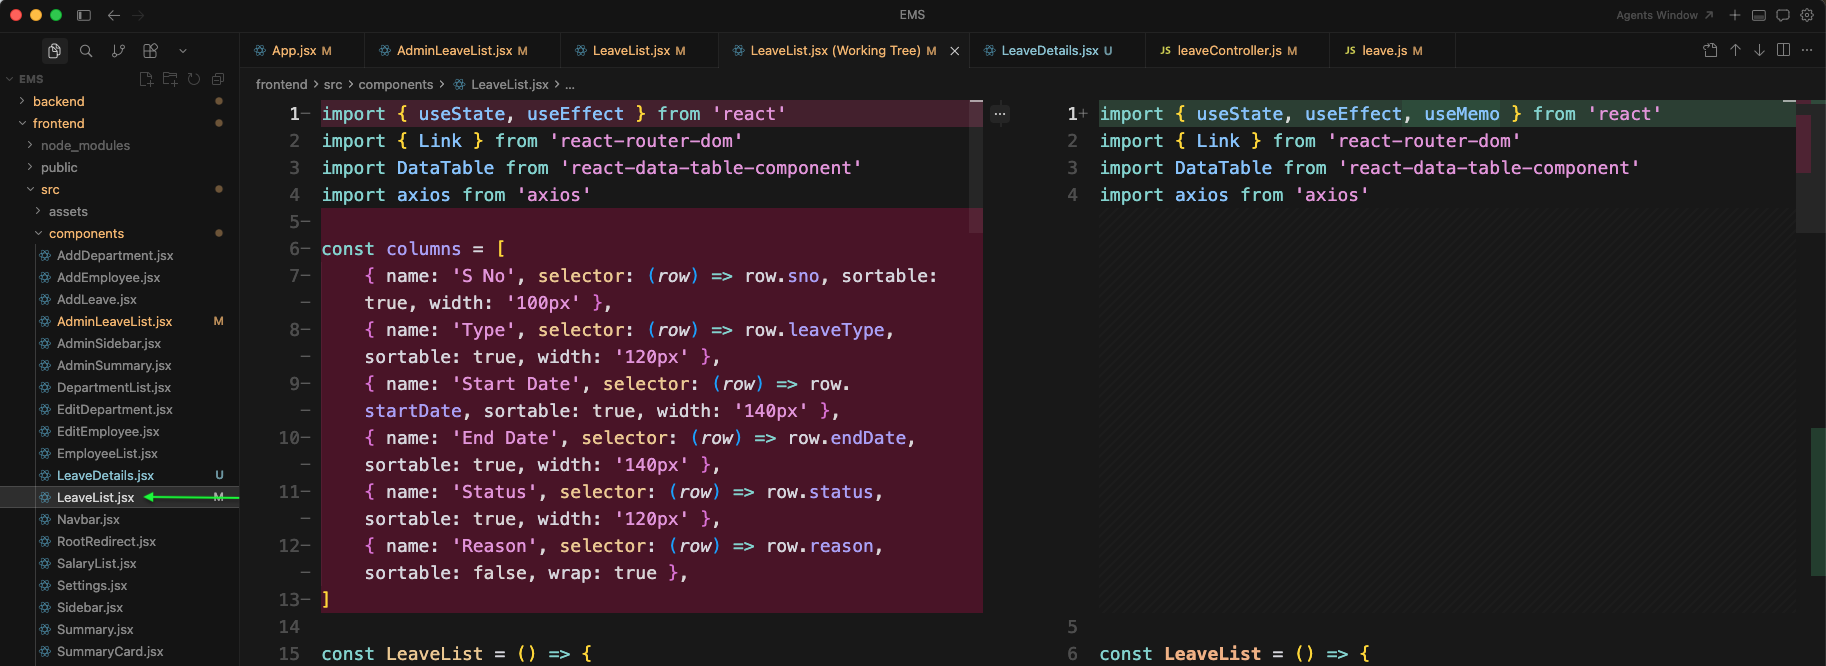
Next, in LeaveList.jsx we will update the columns definition to use useMemo and add an Action column. The action renders a View Link to
/employee-dashboard/leaves/${row._id}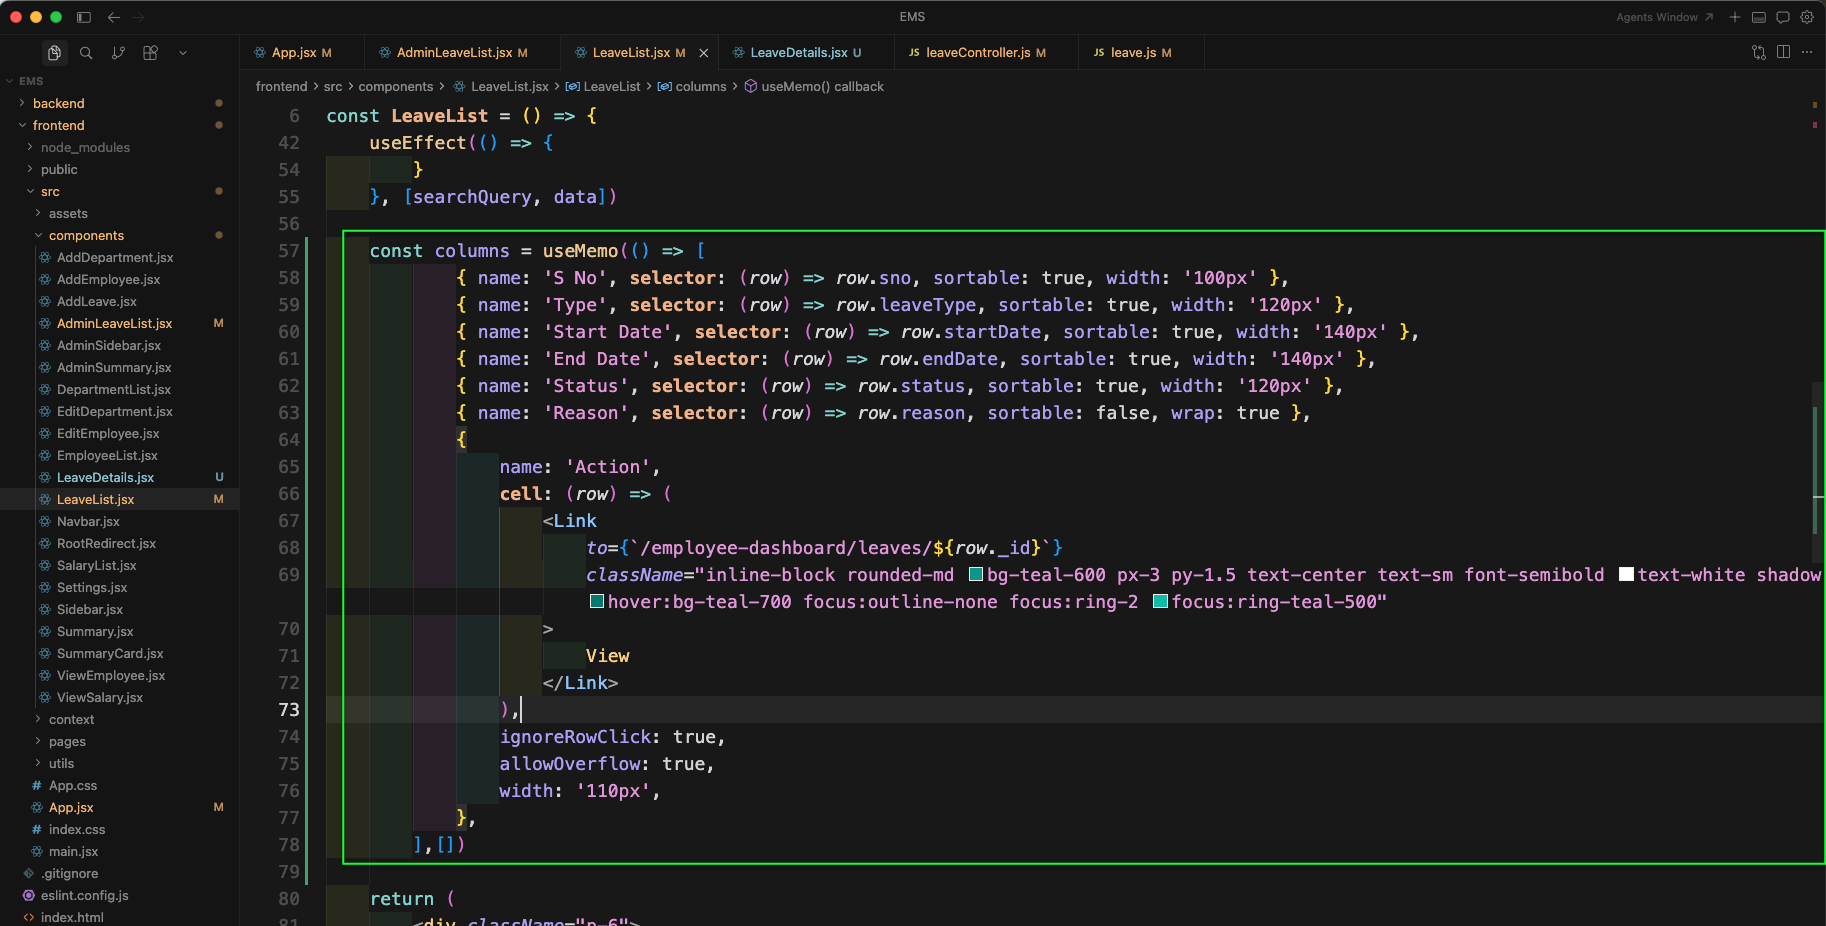
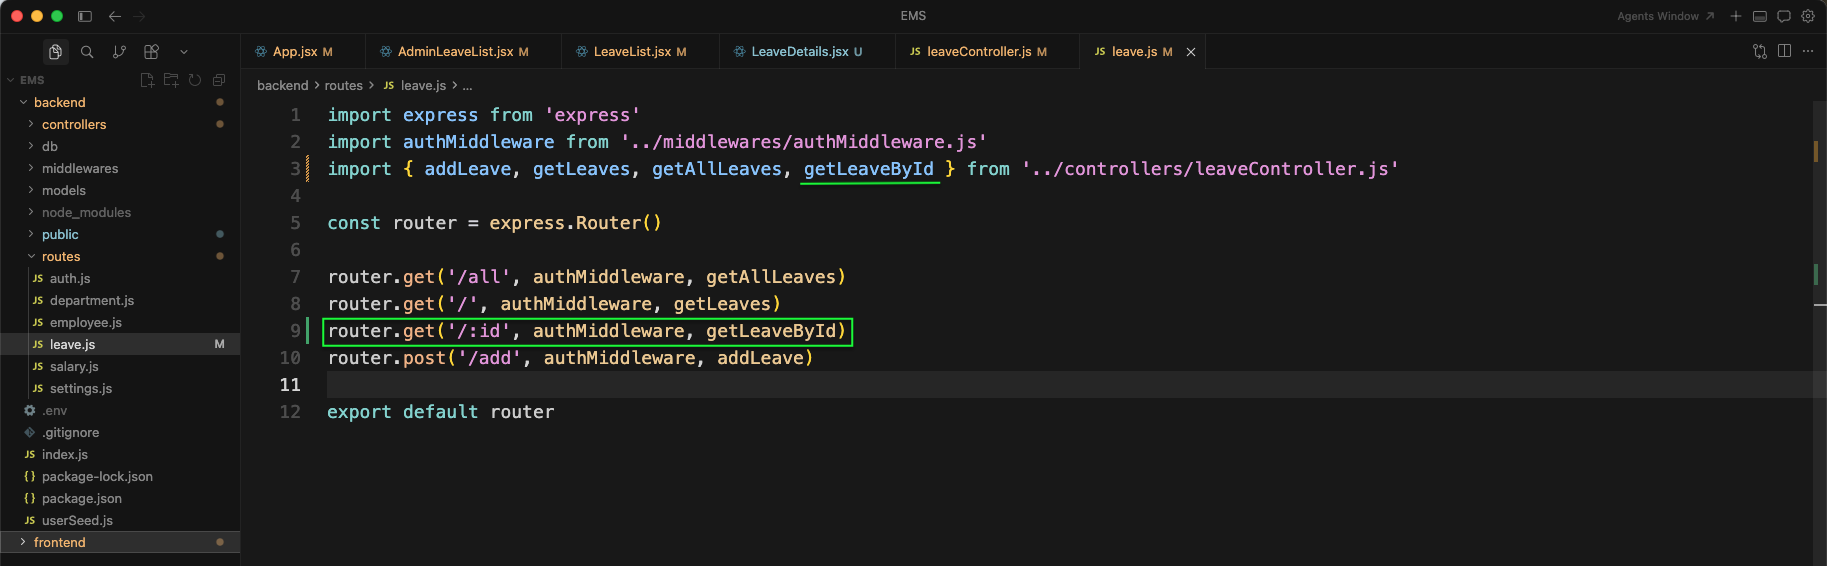
Now, in backend leave.js file we will add a new GET route /:id. It will call getLeaveById controller and is protected by authMiddleware.
Next, in leaveController.js we will create the function getLeaveById. It validates the leave id, fetches the leave with user details, and adds authorization so that admin can view any leave but employee can only view their own leave.
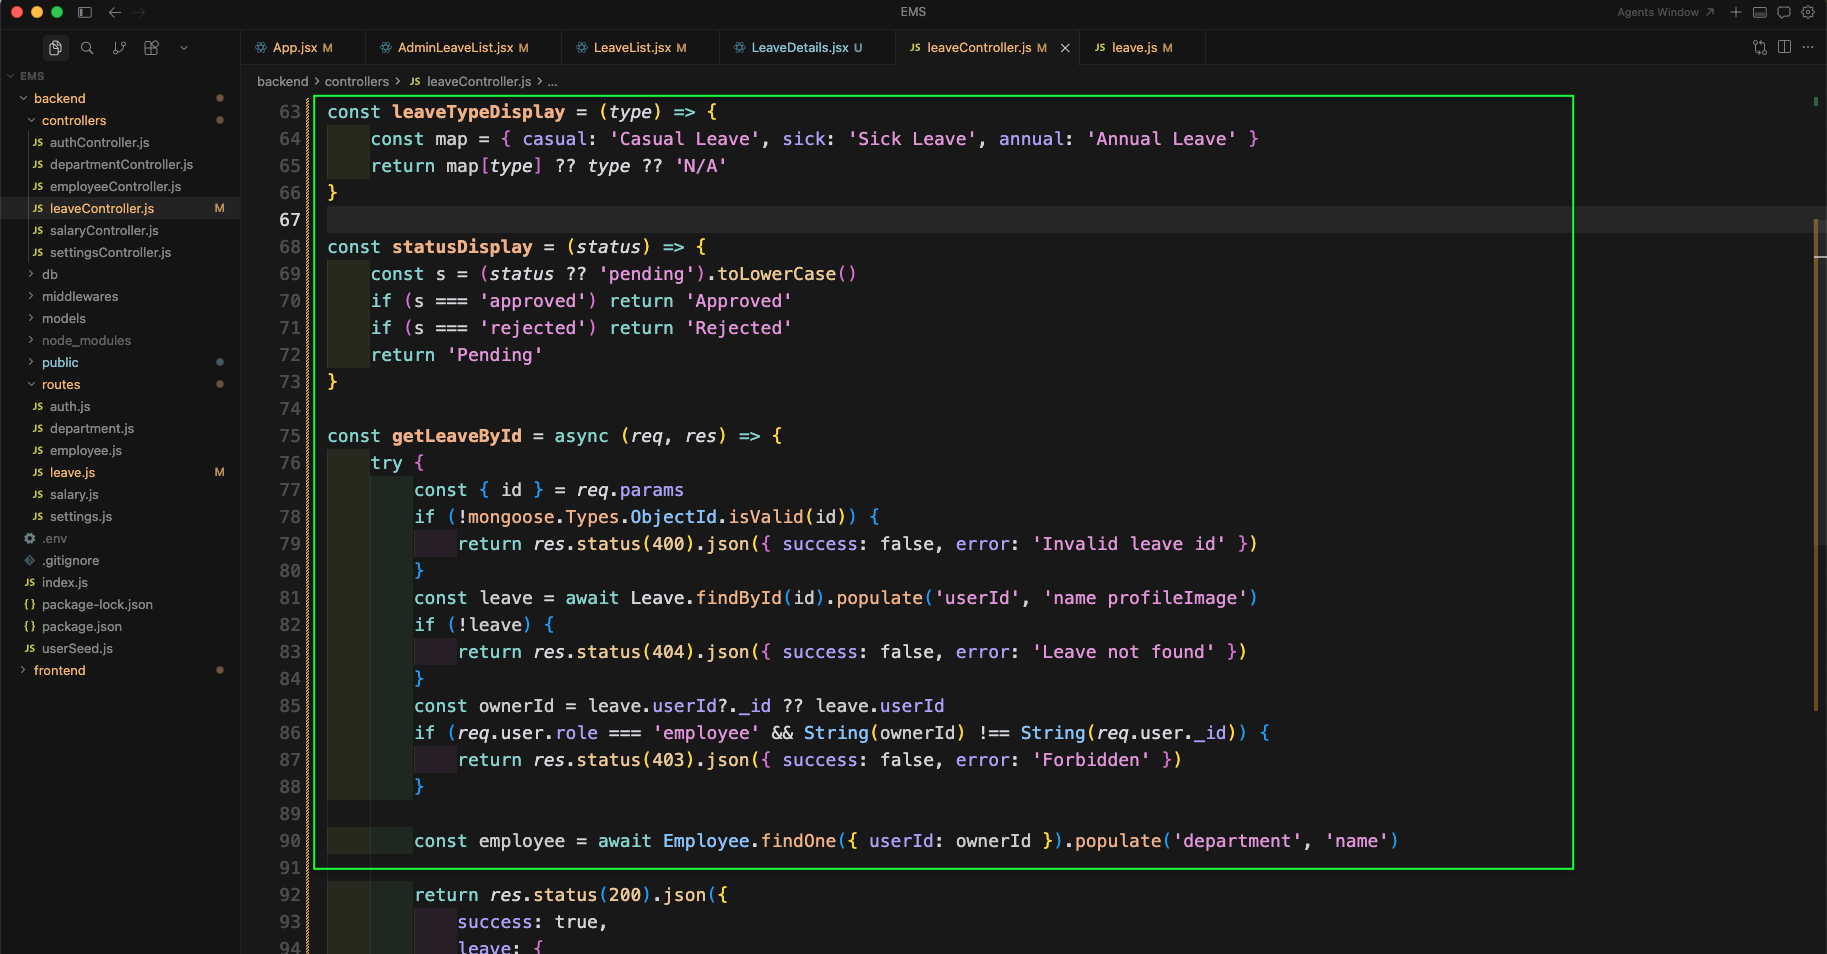
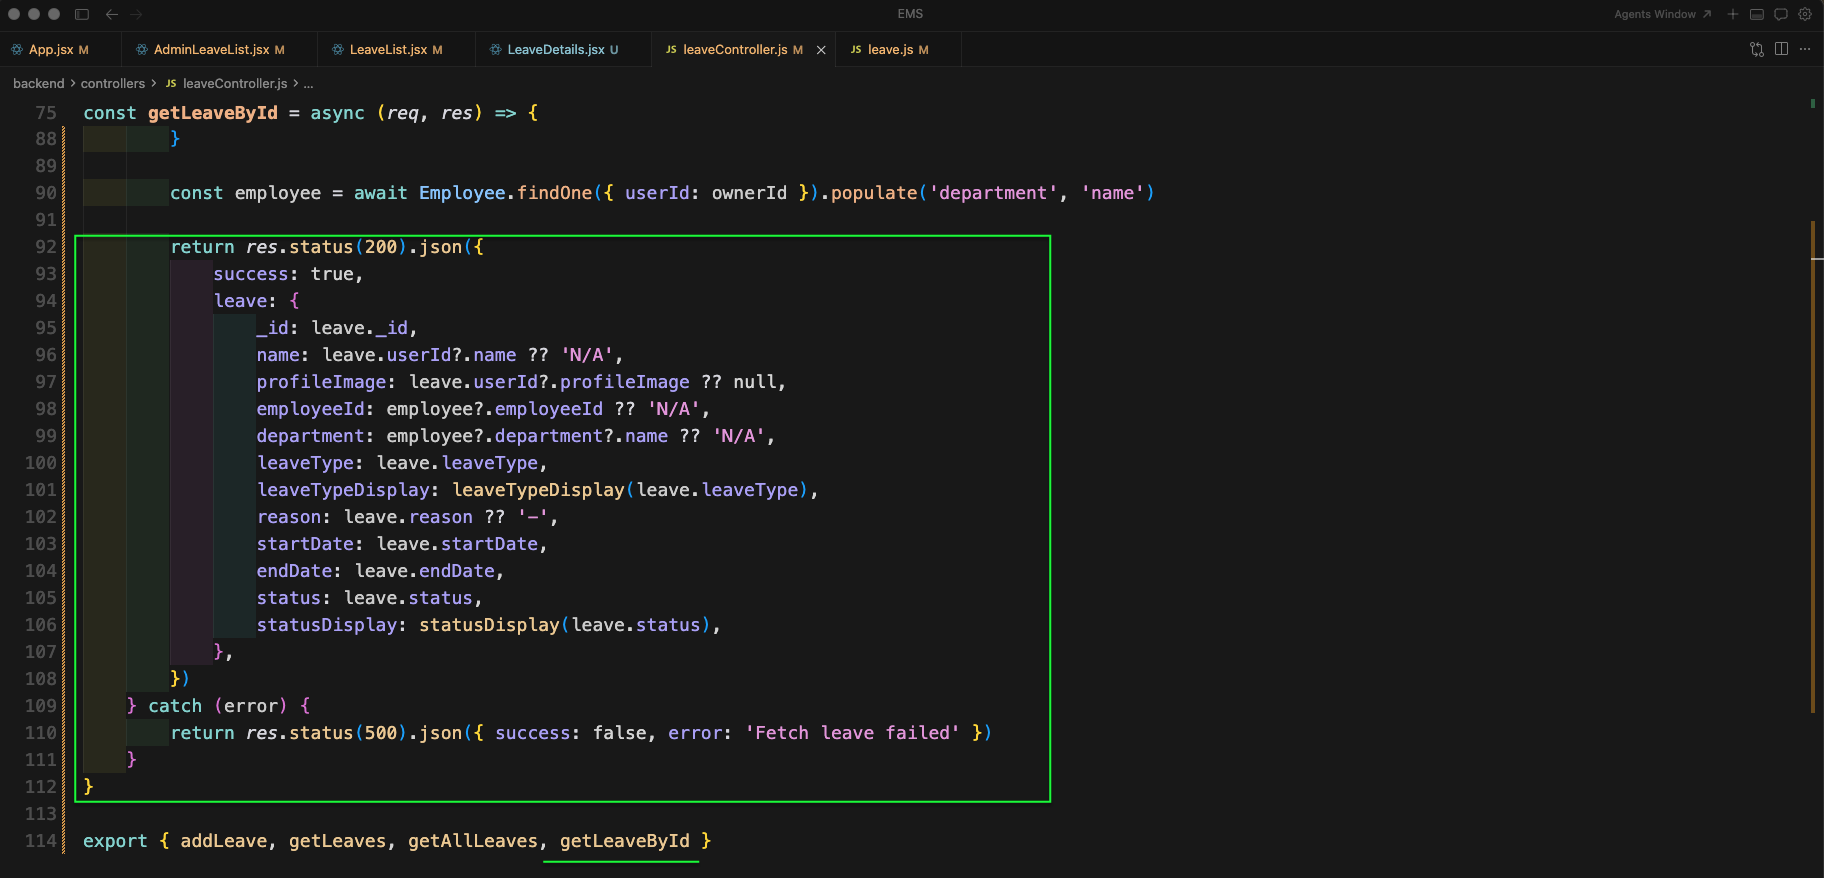
Now, we are returning the response for getLeaveById. Here, we are enriching the payload with employee info (employeeId, department), and also returning display friendly values like leaveTypeDisplay and statusDisplay.
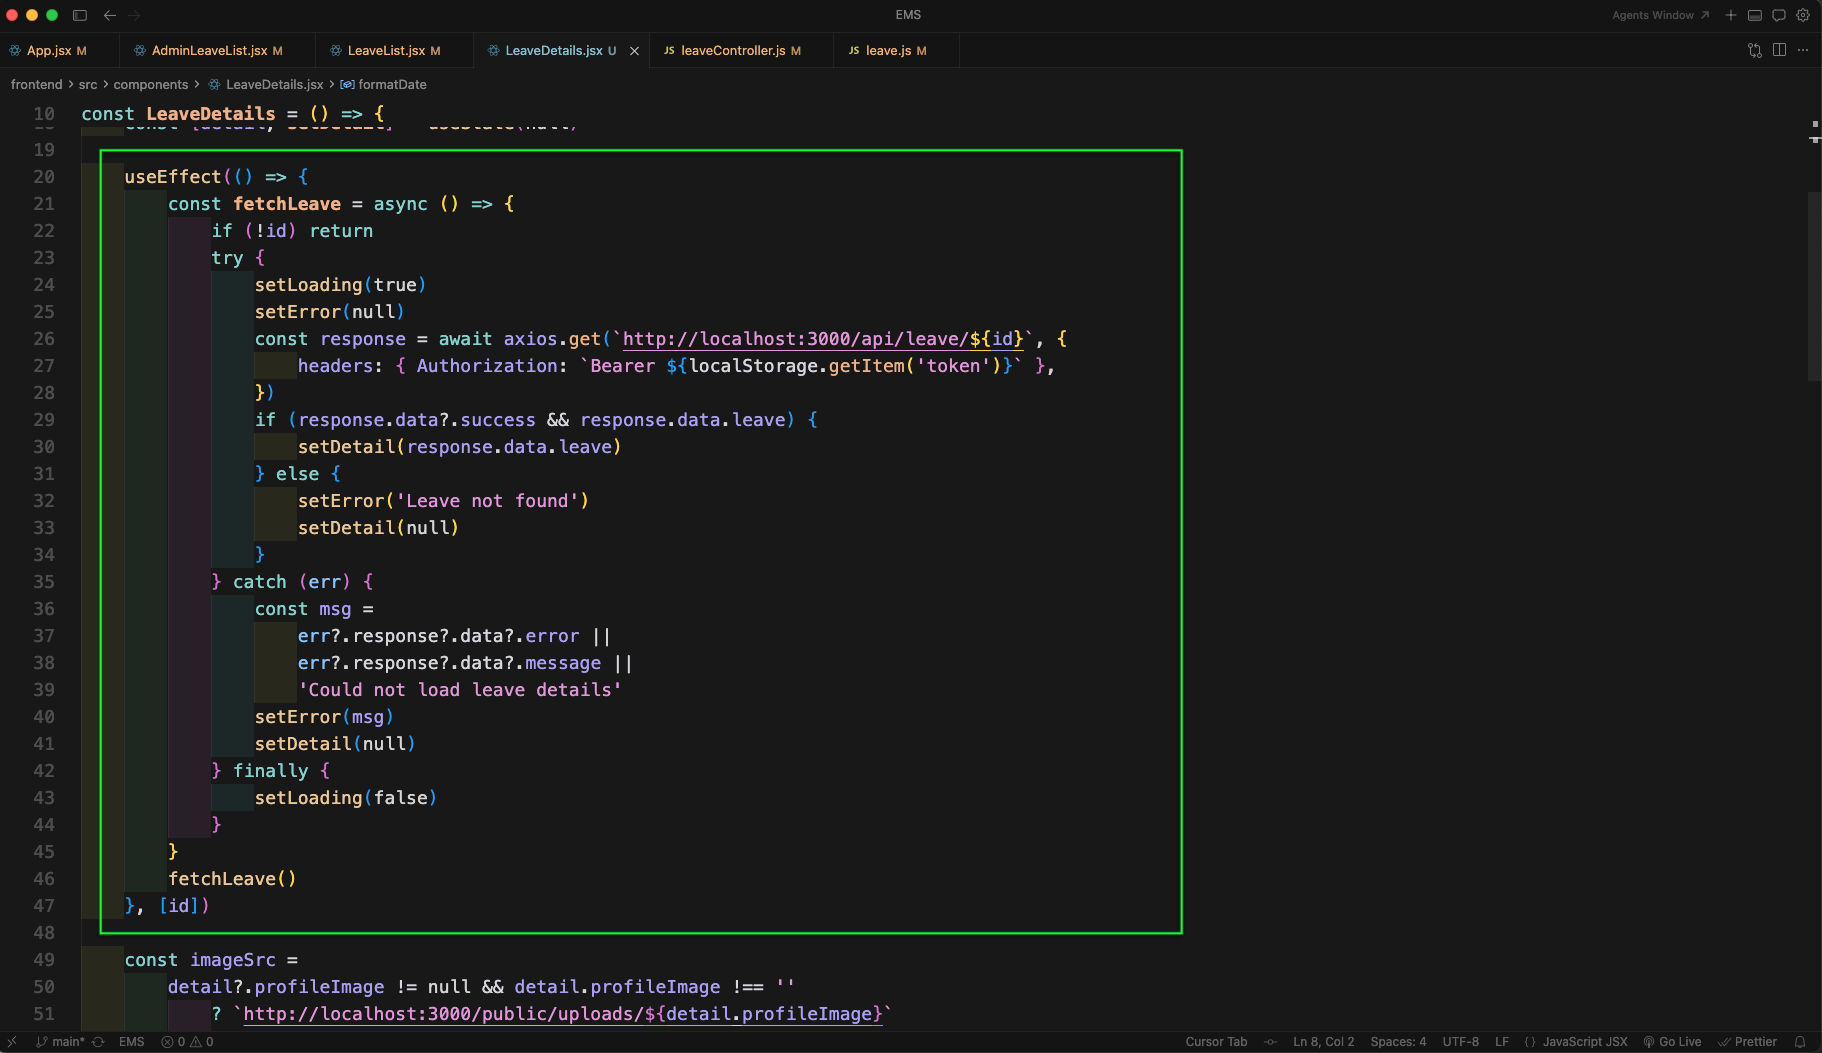
Now, create a new file LeaveDetails.jsx inside components folder. Here, we are importing required hooks, reading the leave id from useParams, and deciding the back link based on whether the URL is for admin or employee.

In LeaveDetails.jsx we will add a useEffect to fetch the leave details from backend endpoint
/api/leave/${id}Based on the response we are updating loading, error and detail state.
Next, in LeaveDetails.jsx we are building the UI. We compute the profile image URL if present, add a Back to leaves link, and handle three states: loading, error and the leave details card (with profile image or fallback avatar).

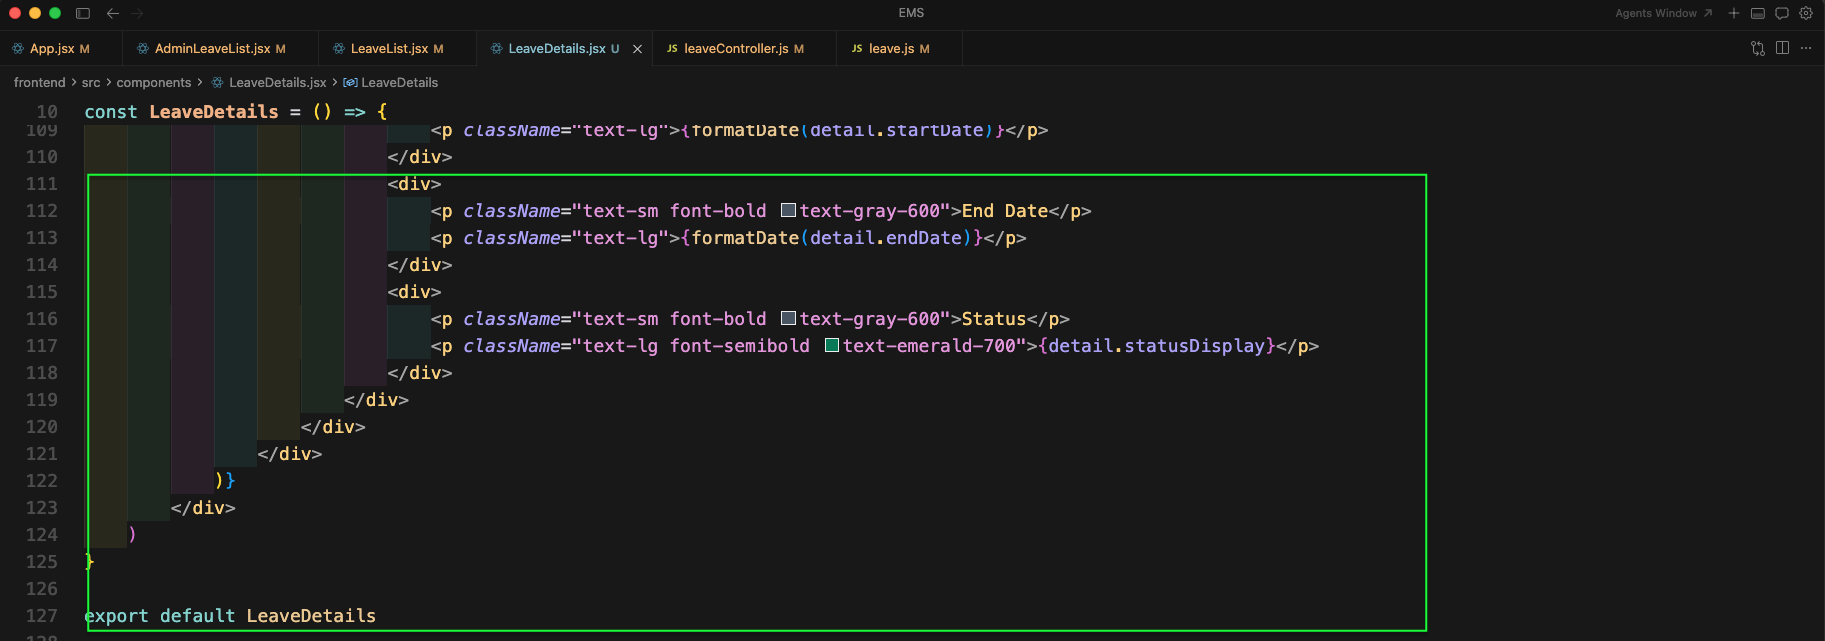
We are adding the main details section in the UI. Here, we are displaying fields like Name, Employee ID, Leave Type, Reason, Department and formatted Start Date.

Lastly, we are showing End Date and Status in the leave details page.
Now, clicking on View from admin leaves list will take us to http://localhost:5173/admin-dashboard/leaves/:id and it will show the leave details page.

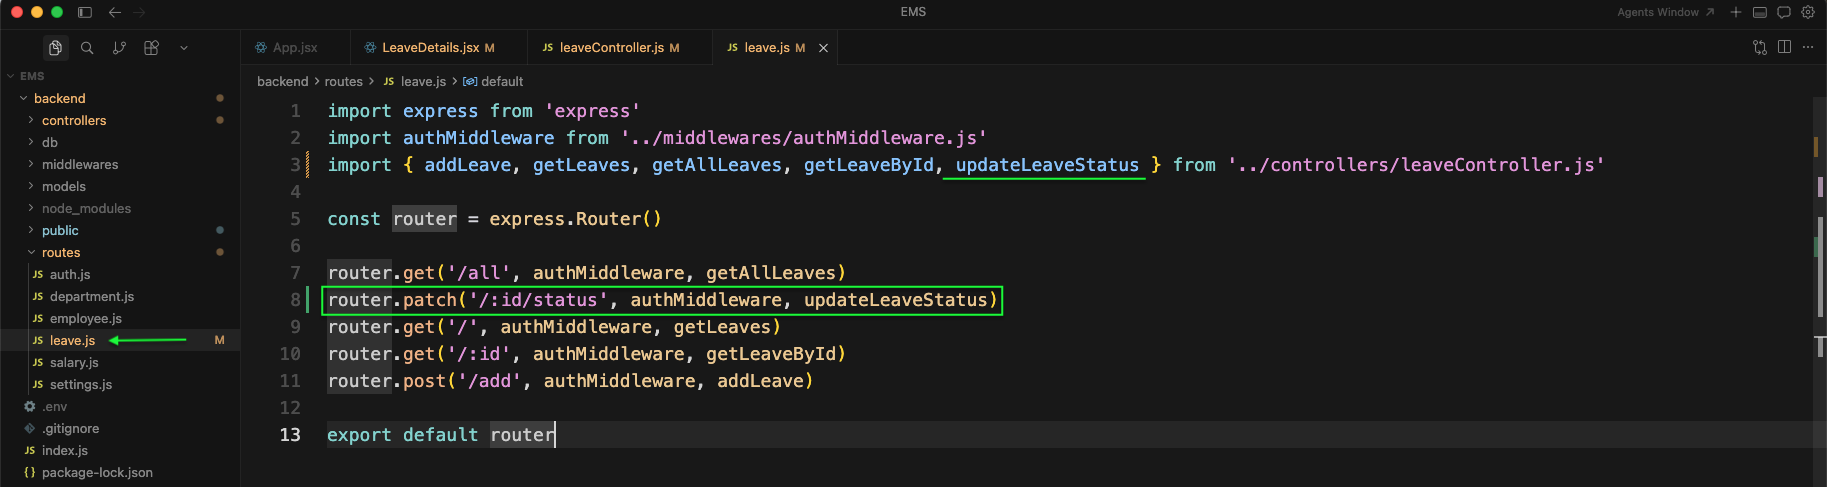
Now, we will add the functionality for admin to approve or reject the leave request. In backend leave.js file add a new PATCH route
/:id/statusIt will call the controller function updateLeaveStatus.
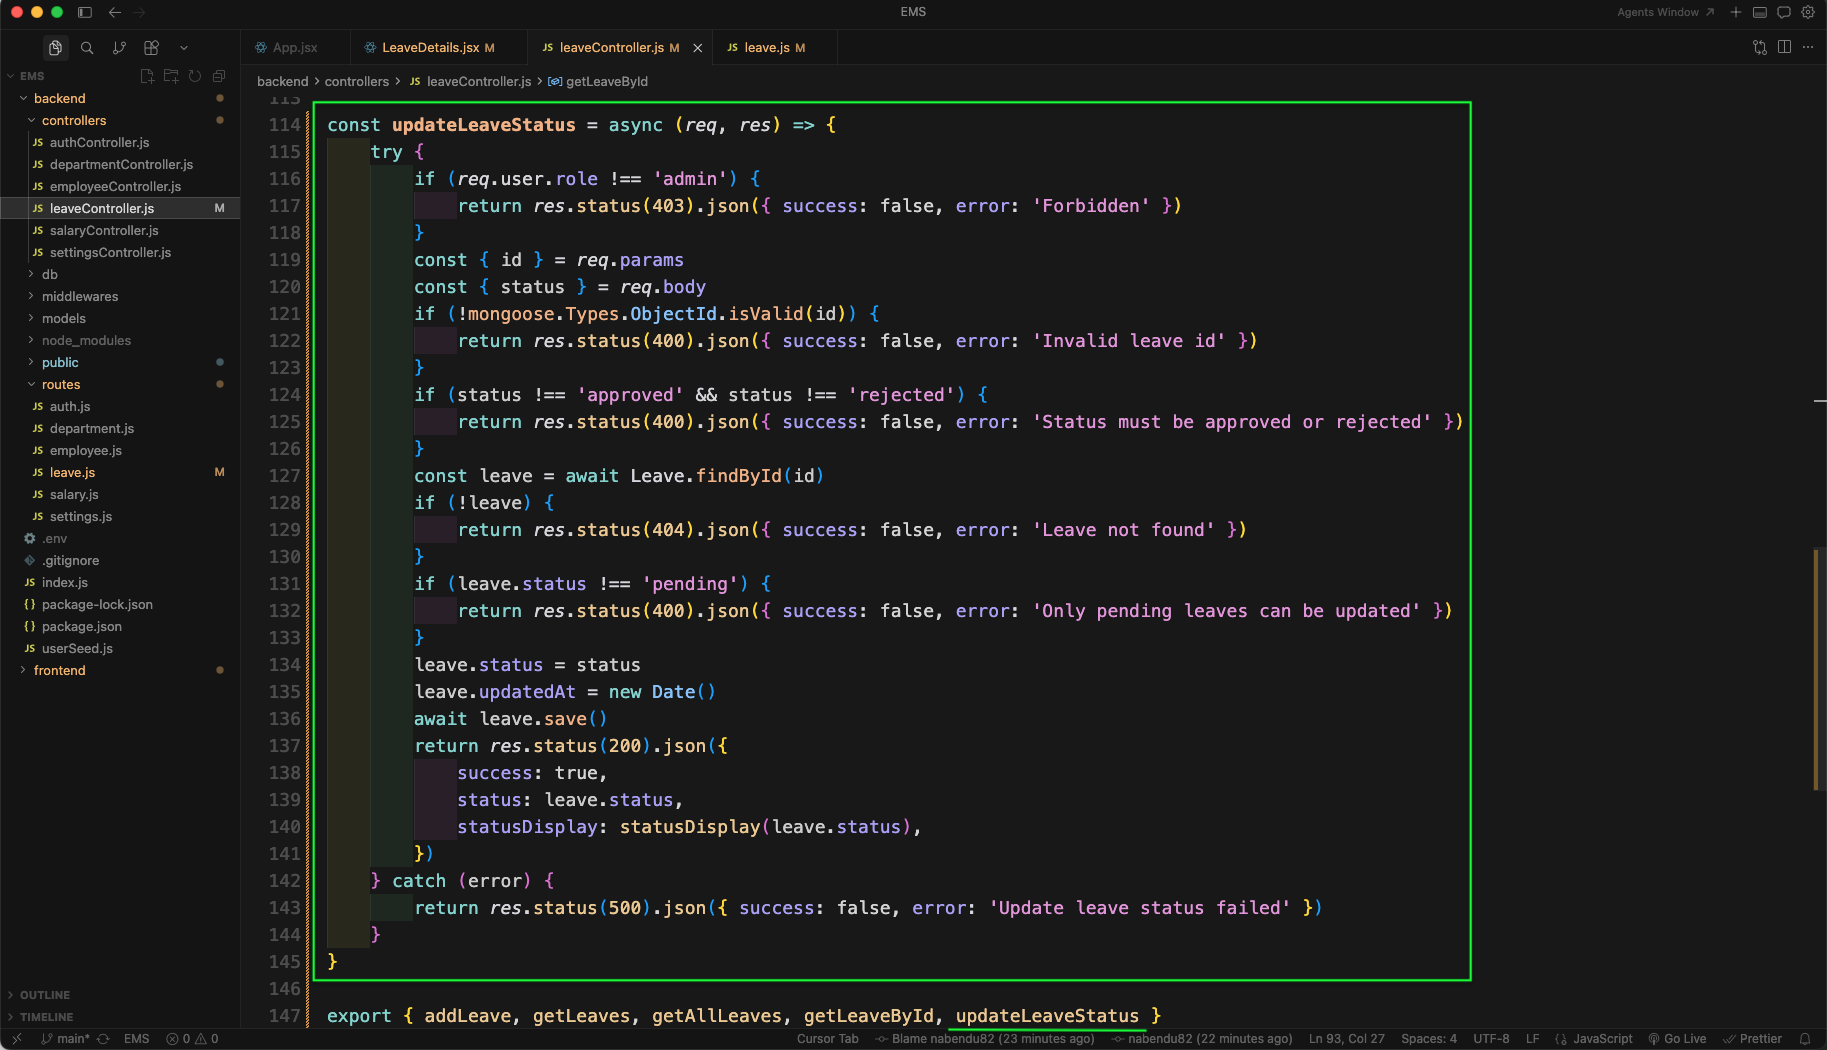
Now, in leaveController.js file we will add the function updateLeaveStatus. It validates the leave id and status, checks that the logged in user is admin, and only allows updating leaves which are still in pending state.
Next, in LeaveDetails.jsx we will enhance the data fetching. We are adding actionError and submitting states, and moving the API call into a reusable function fetchLeave so that we can refresh the UI after status update.
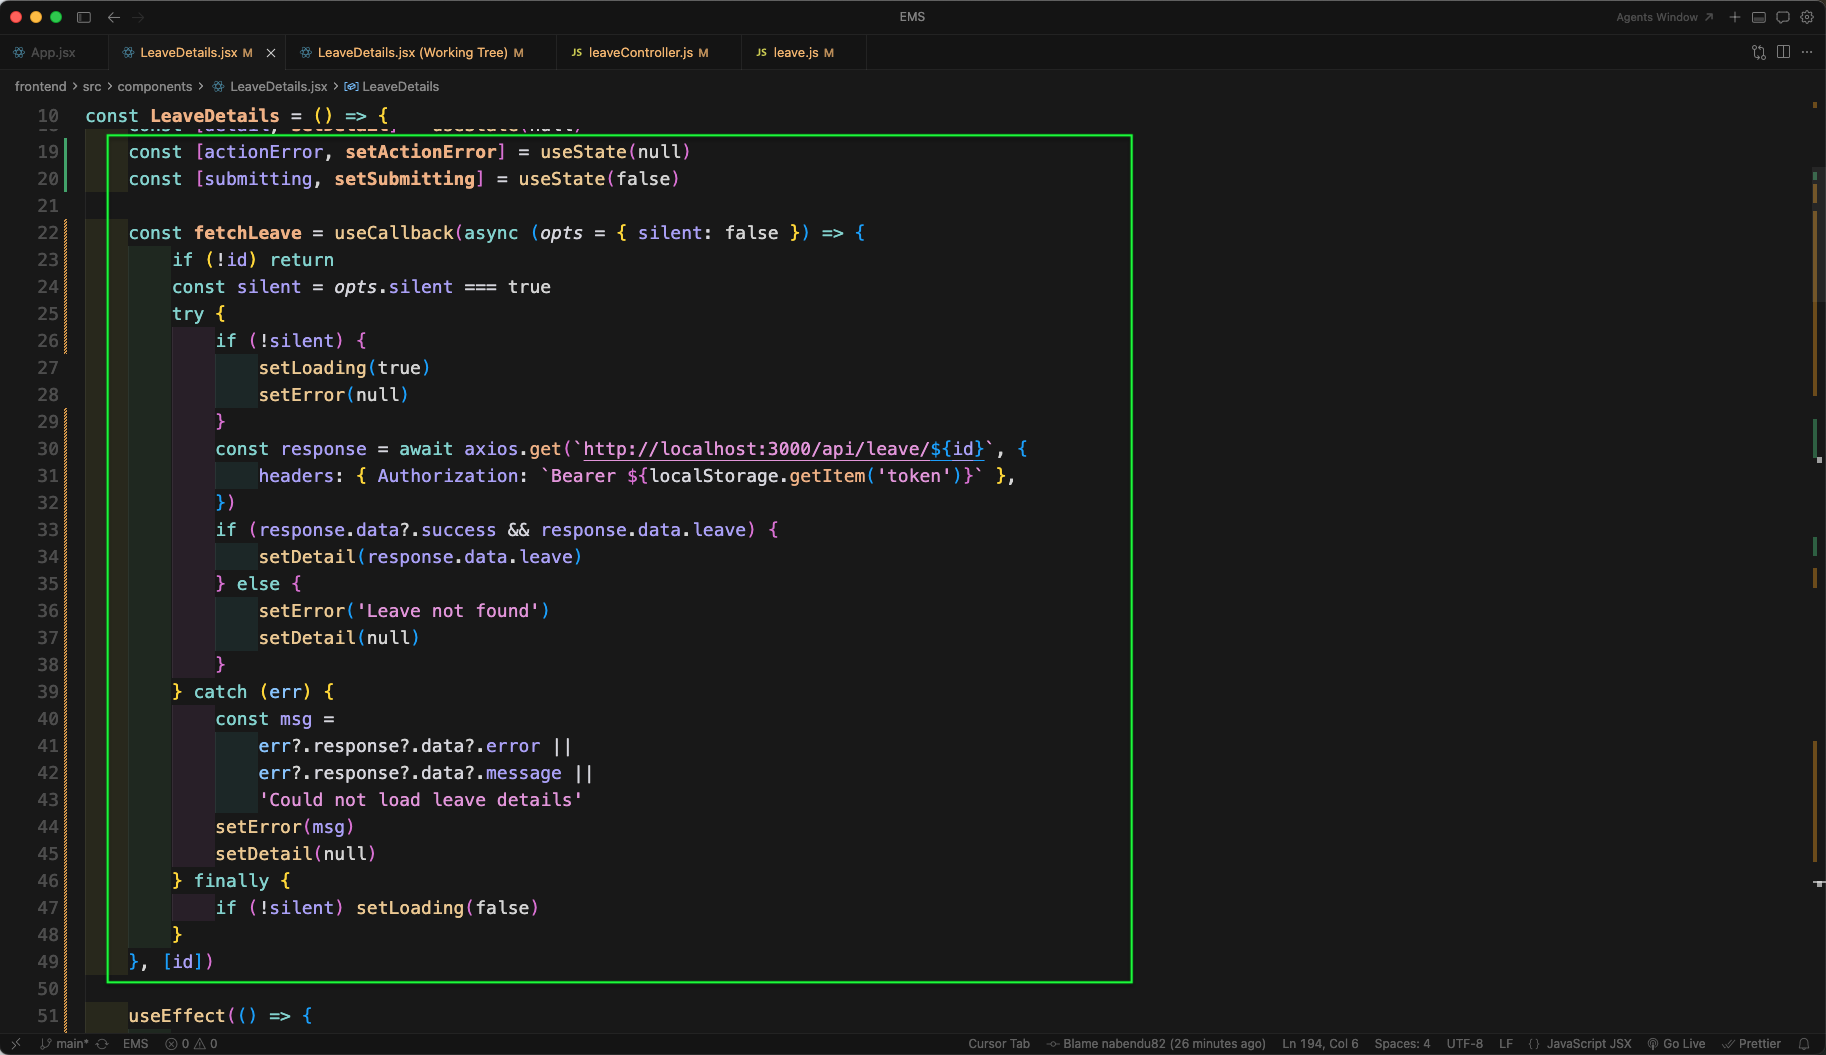
Now, in LeaveDetails.jsx we will add a handler handleStatusUpdate. It calls the PATCH endpoint to update the status and then refetches the leave details. The endpoint is:
/api/leave/${id}/status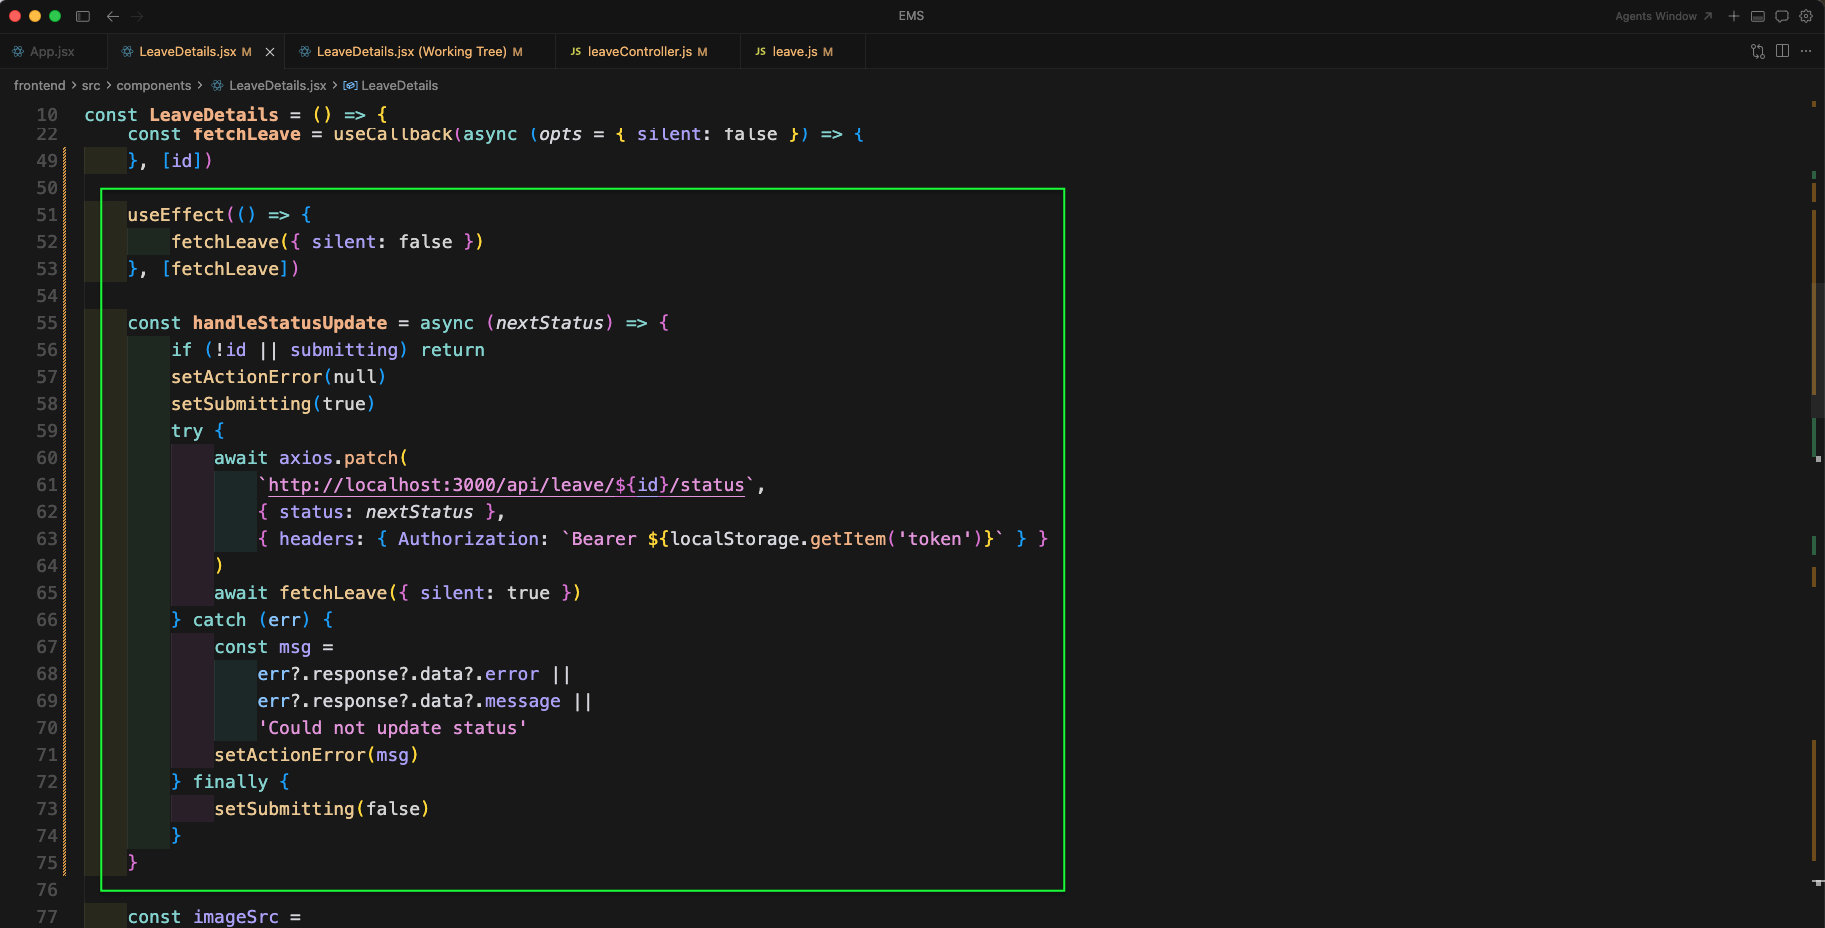
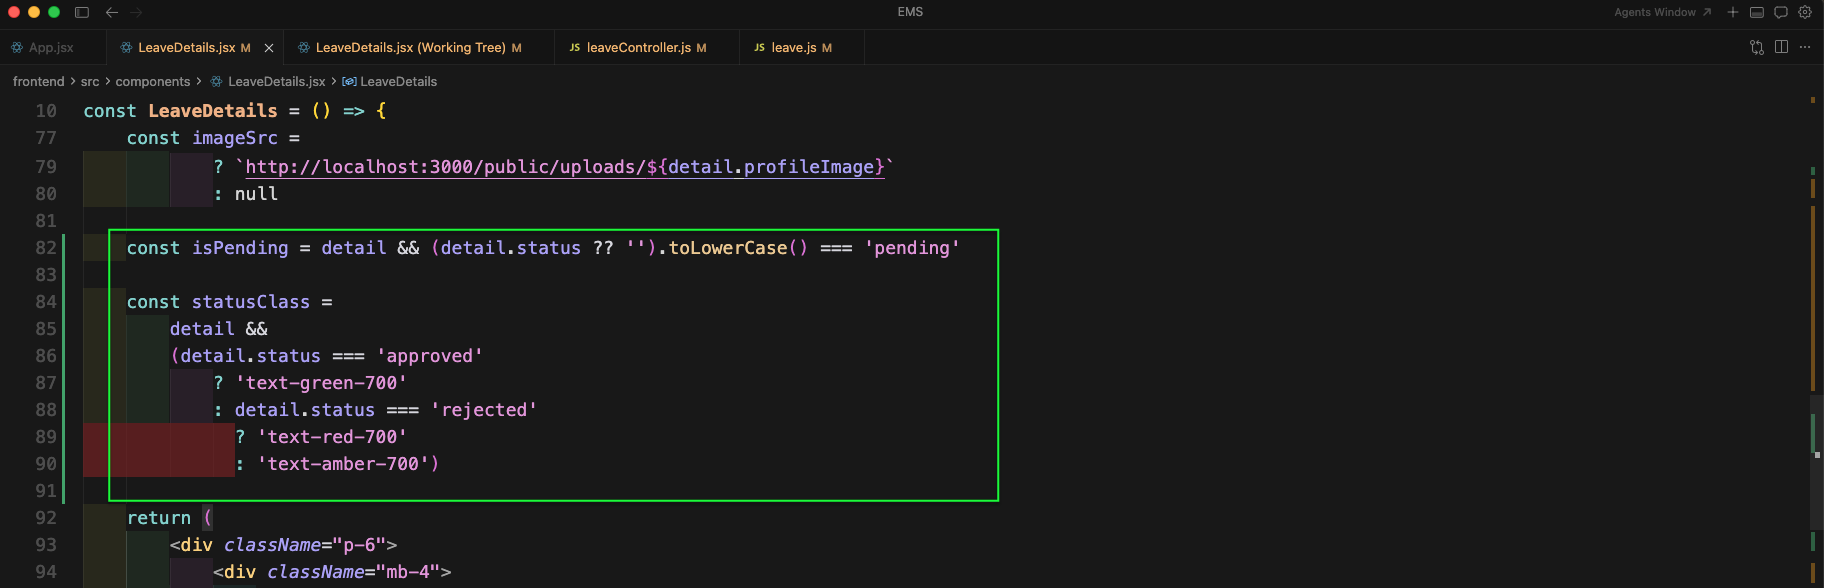
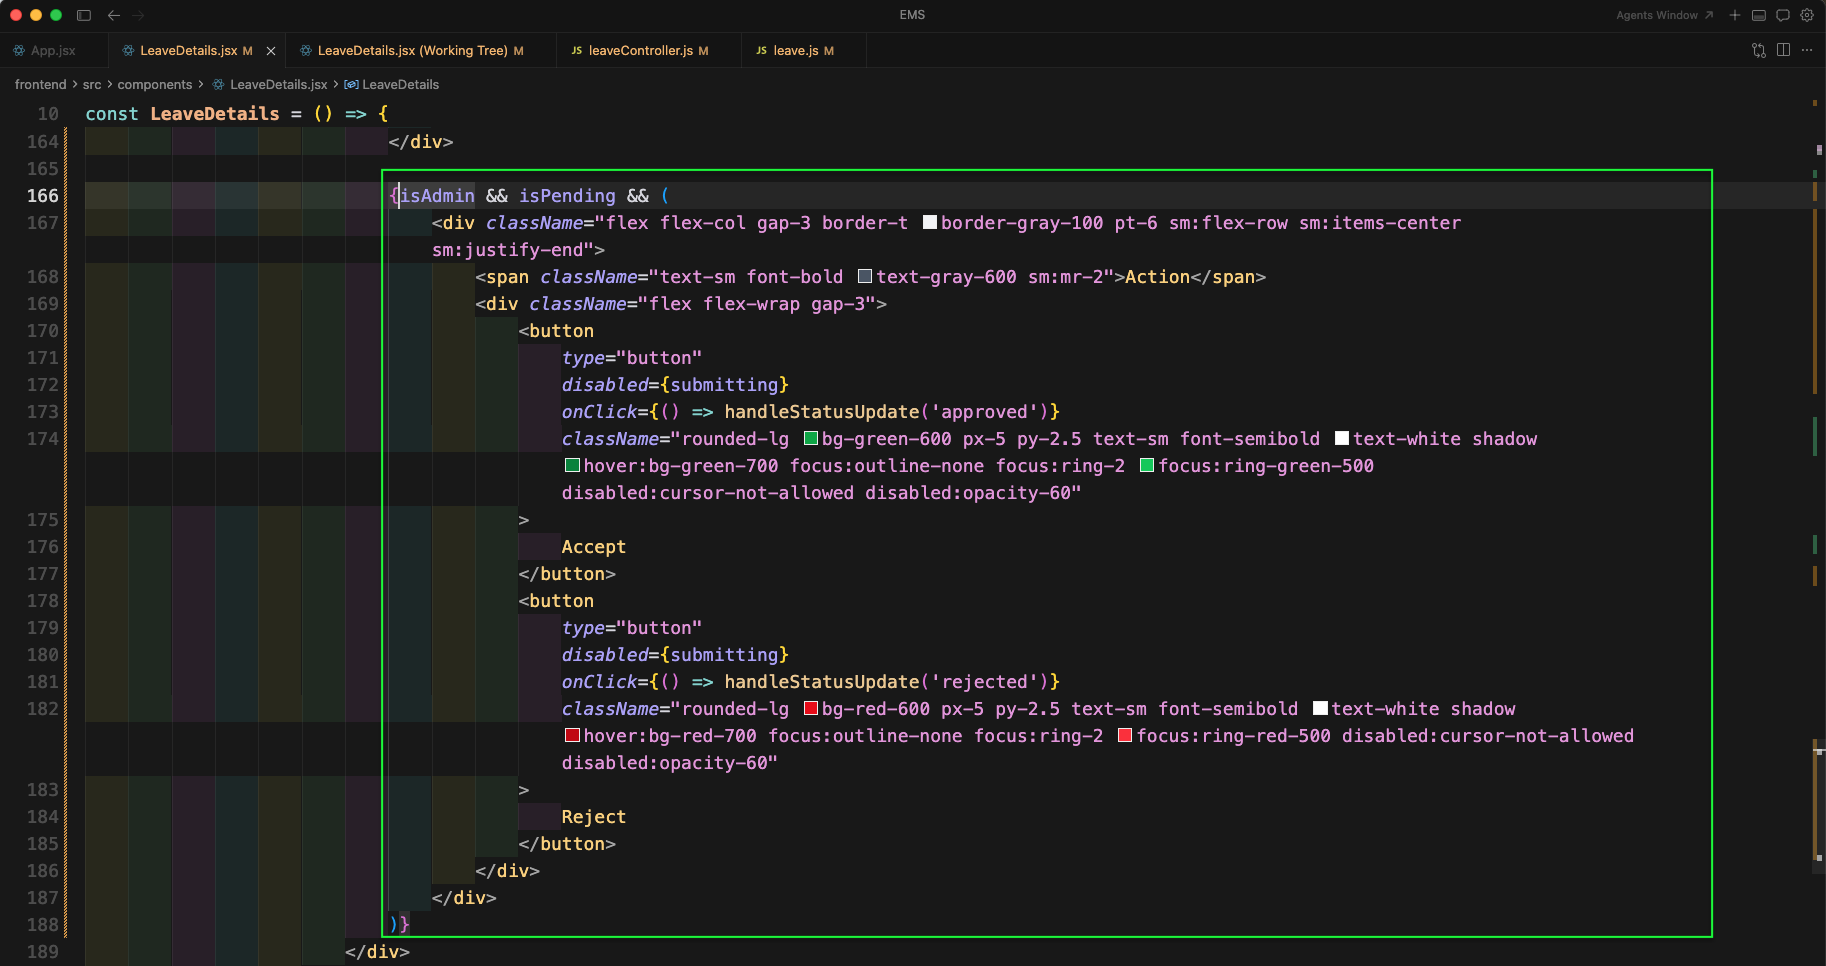
We will also improve the UI by adding status based styling. Here, we are creating isPending and a statusClass so that Approved shows in green, Rejected shows in red, and Pending shows in amber.
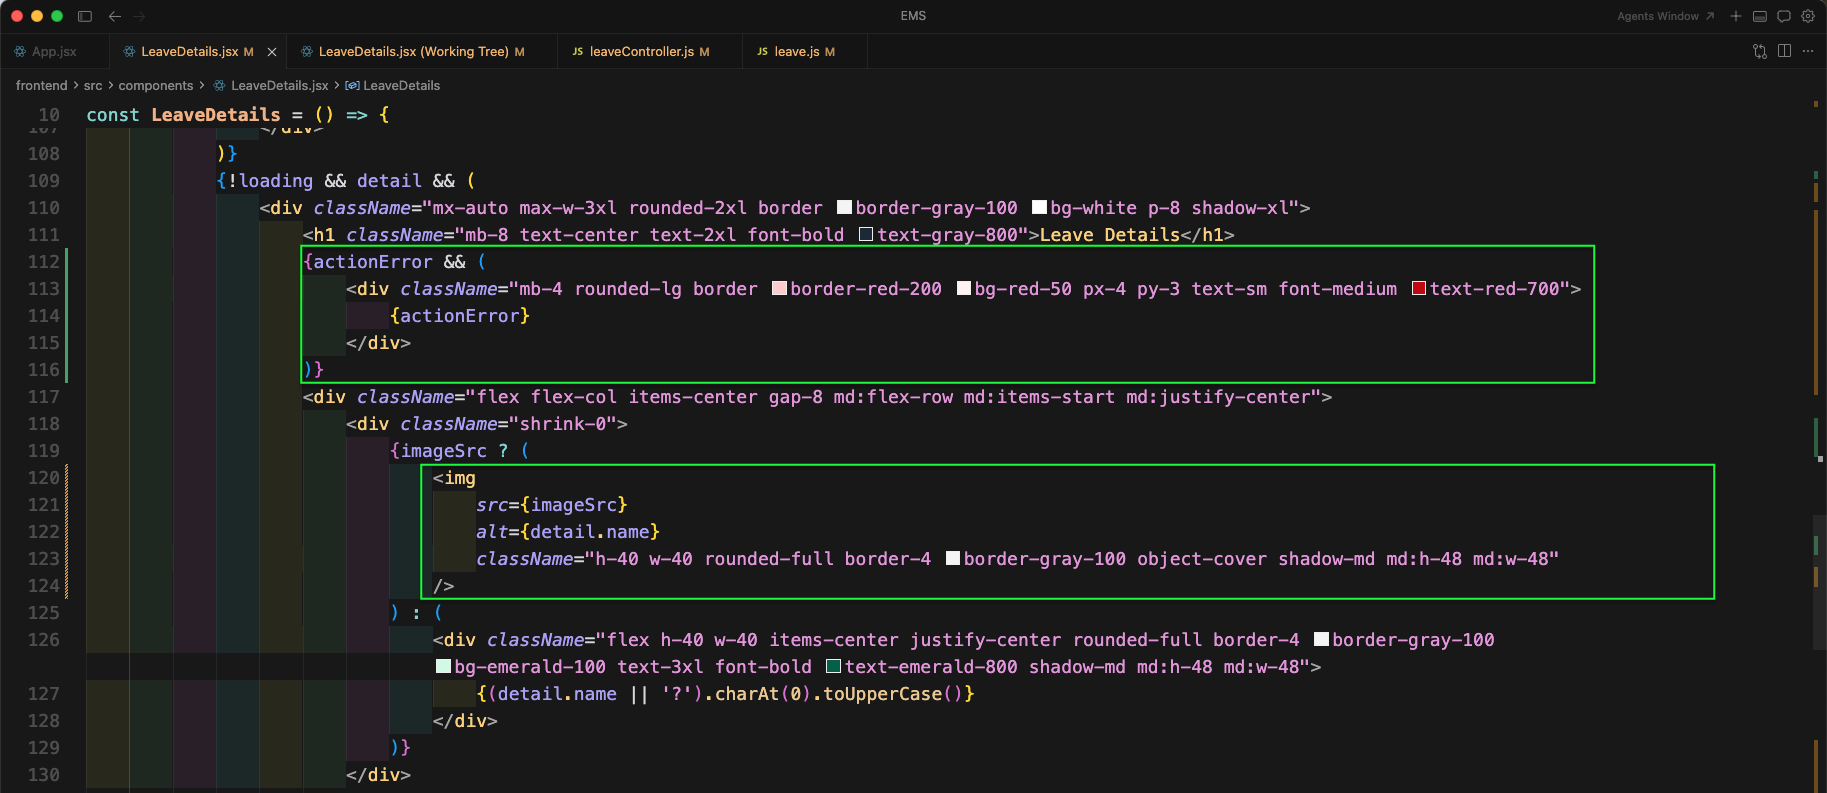
Now, in the UI we will show the action error if status update fails. We are also using the computed imageSrc and rendering the leave details card as before.
Finally, for admin users, when the leave is pending we will show an Action section with Accept and Reject buttons. Clicking them calls handleStatusUpdate('approved') or handleStatusUpdate('rejected').
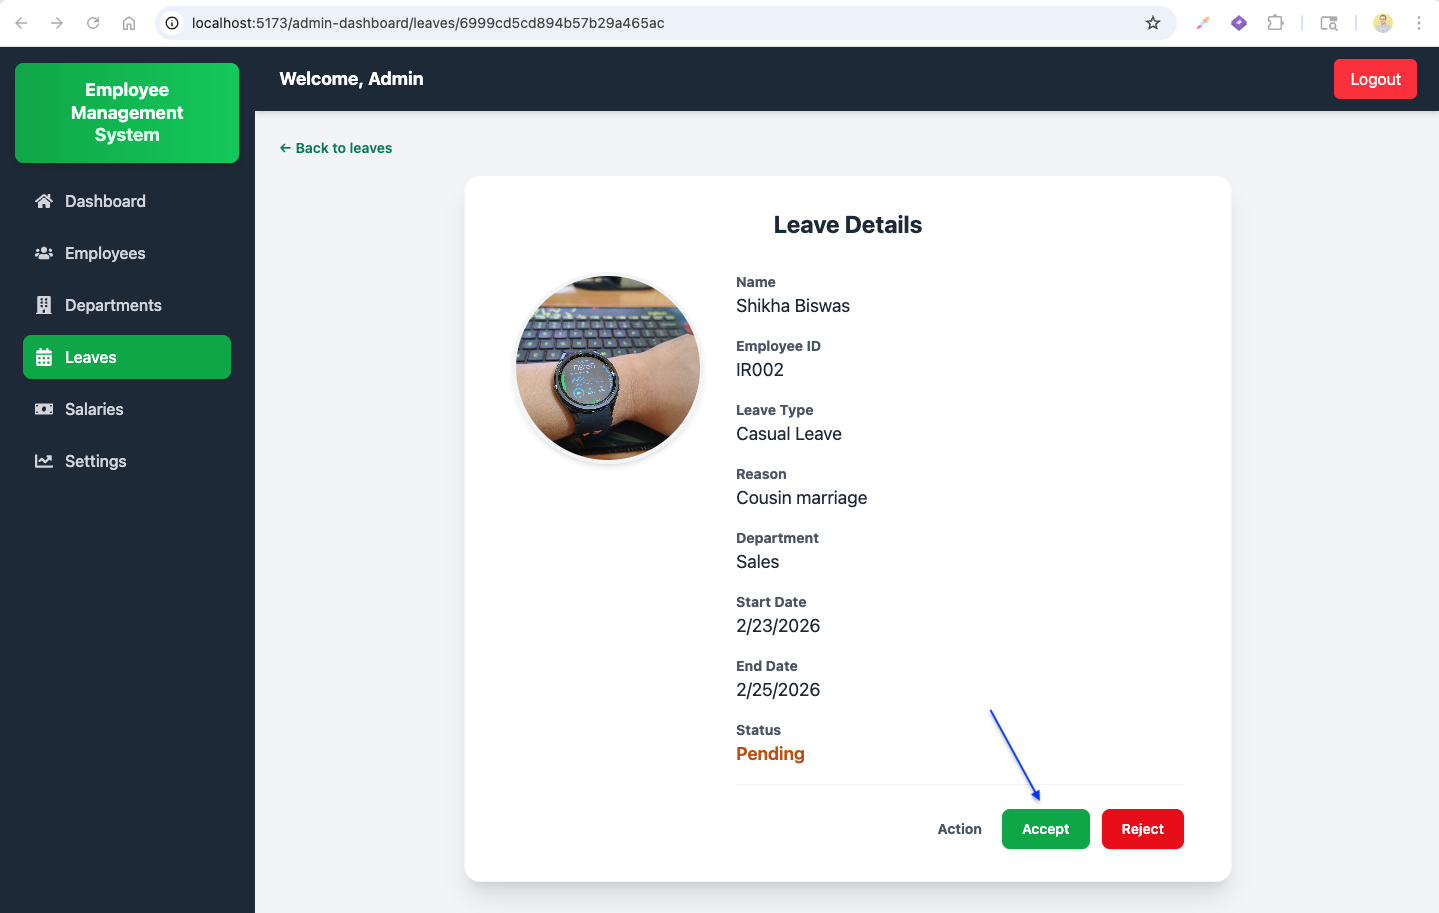
Now, going to the leave details page for a pending leave, admin will see the Accept and Reject buttons.
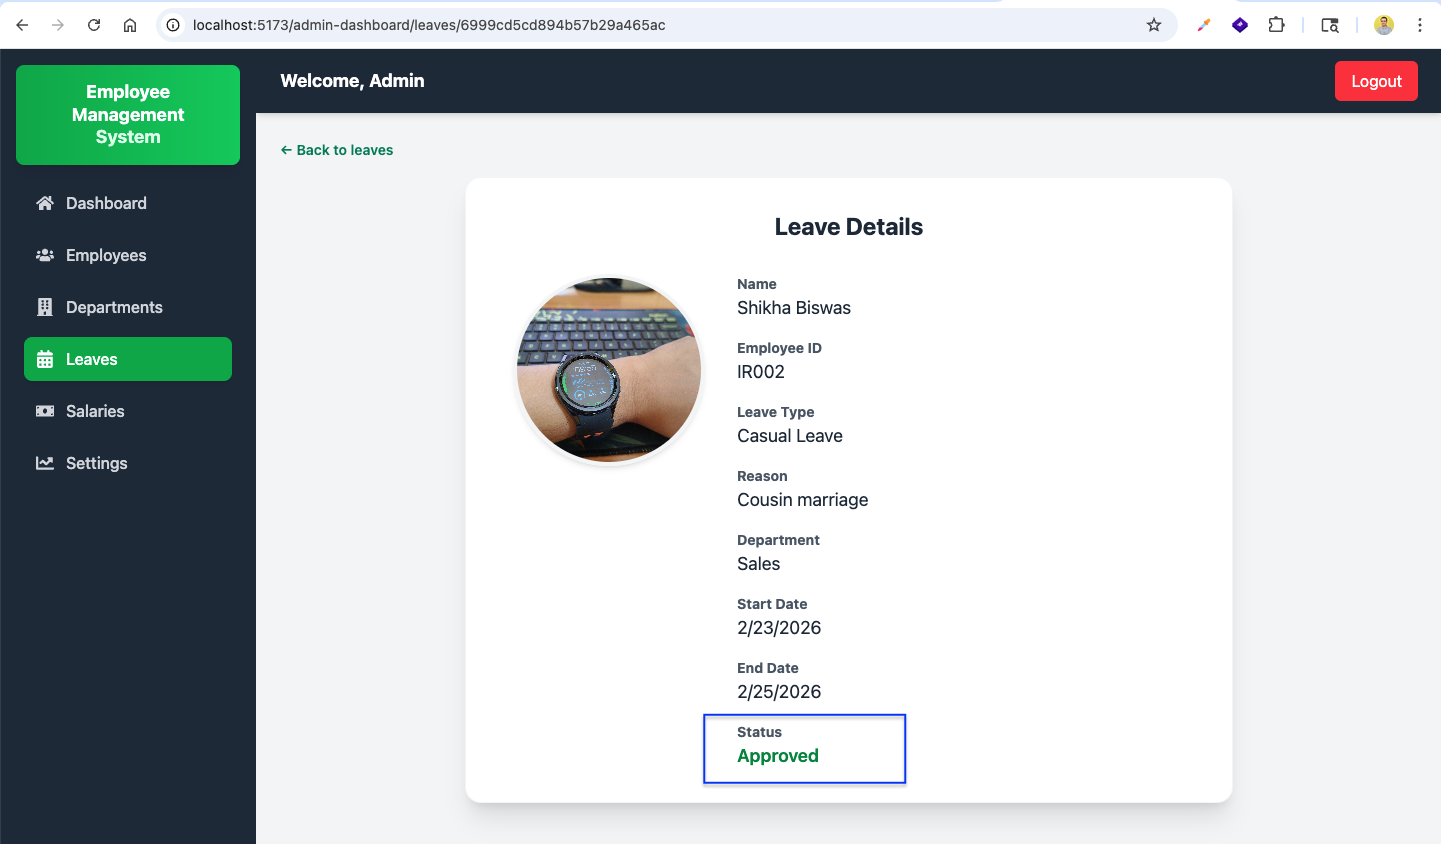
After clicking on Accept, the status will be updated and it will show Approved on the leave details page.
Now, going back to Manage Leaves page, the approved leave will show the updated status in the table.

Similarly, in employee dashboard Leaves page the employee will also see the updated status.

Now, we can use the status filter buttons. Clicking Approved will show only approved leave requests.

Clicking on Pending will show only pending leave requests.

Now, from admin side we will add a page to view leaves of a specific employee. In App.jsx import EmployeeLeaveList component and add a new route:
/admin-dashboard/employees/leaves/:id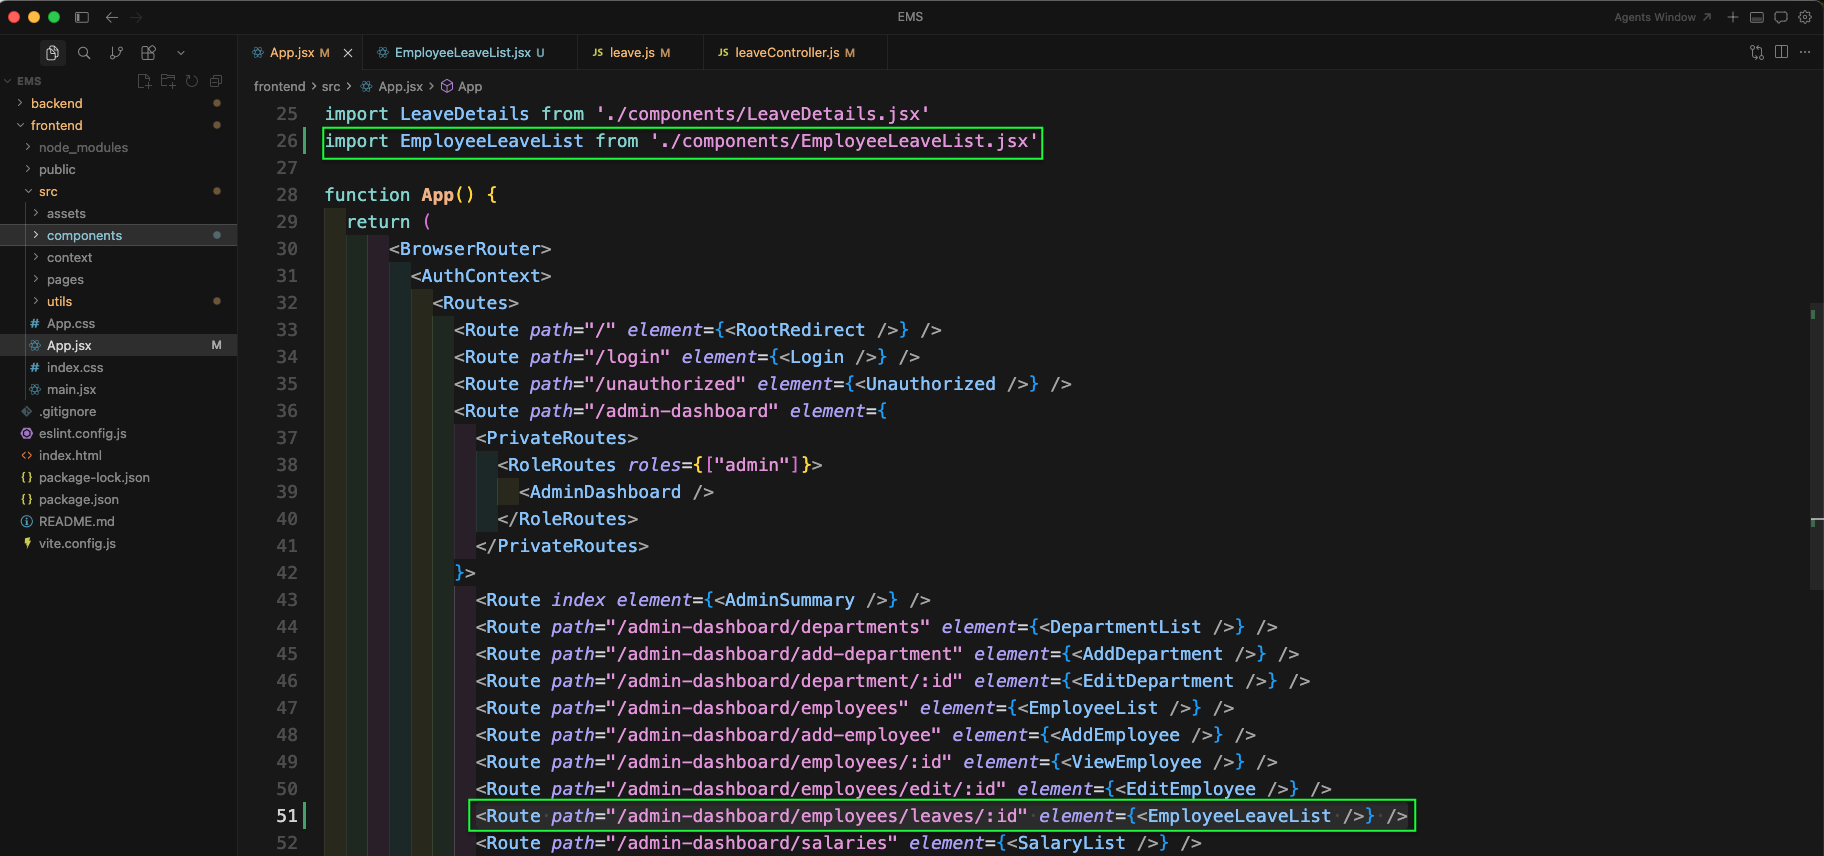
Now, in backend leave.js file add a new GET route for fetching leaves of a specific employee:
/employee/:idIt will call the controller function getLeavesForEmployee.

Now, in leaveController.js file we will add the function getLeavesForEmployee. It is admin-only, validates the employee id, fetches the employee (with user + department), then finds all leaves for that employee and returns an enriched array.

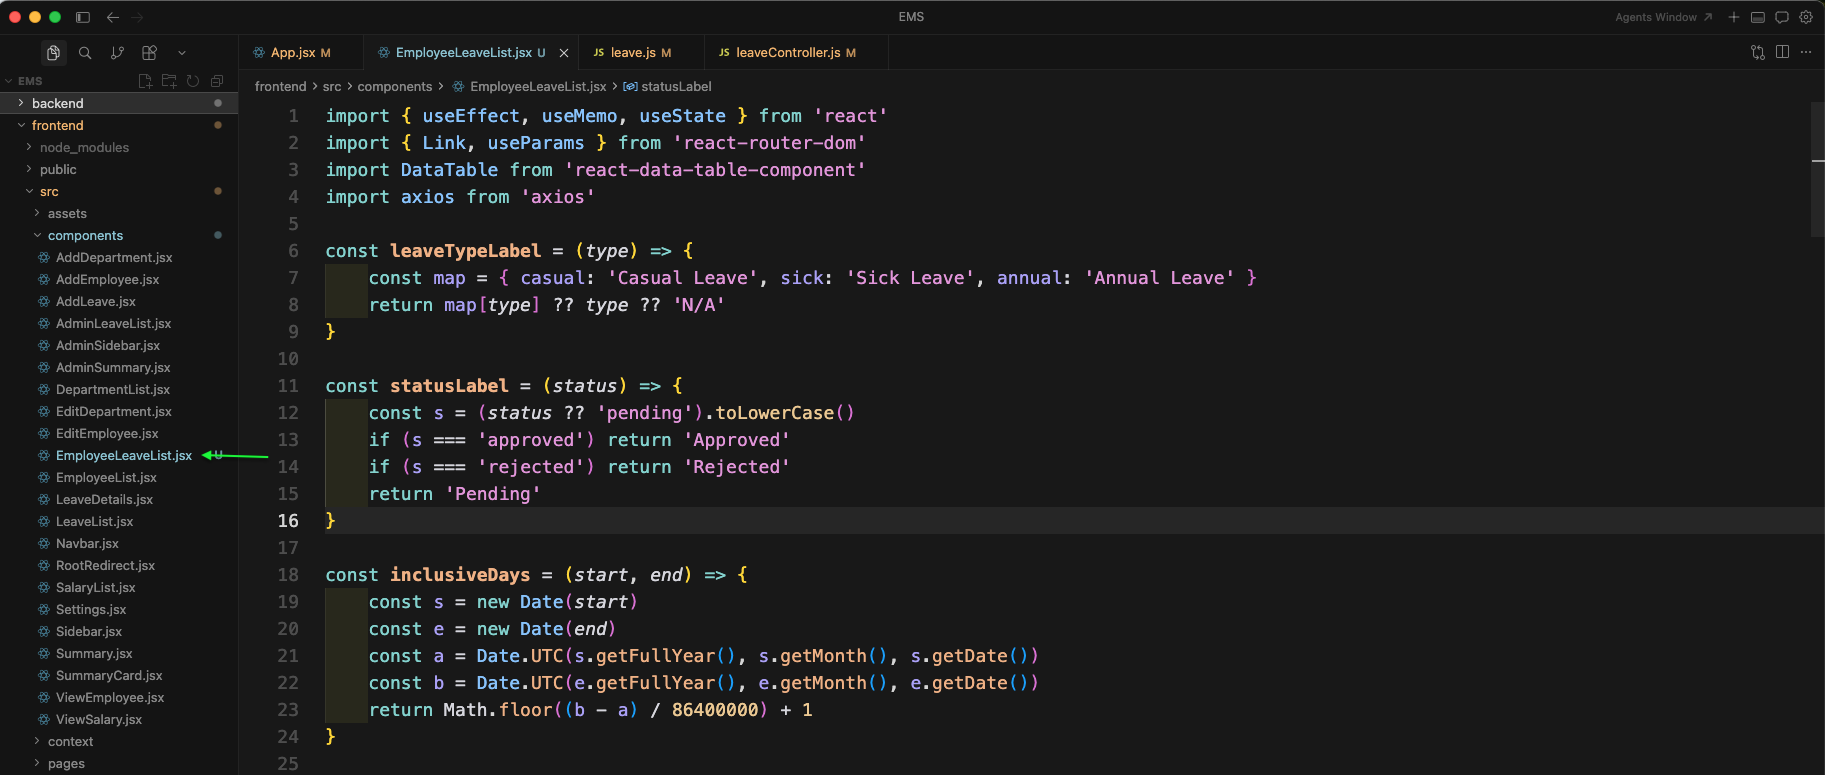
Now, create a new file EmployeeLeaveList.jsx inside components folder. Here, we are importing required hooks, DataTable and axios. We are also adding helper functions for leave type label, status label, and calculating days.
Next, in EmployeeLeaveList.jsx we will fetch the employee leaves and employee details in a single useEffect using Promise.all. The two endpoints are:
/api/leave/employee/${id}
/api/employee/${id}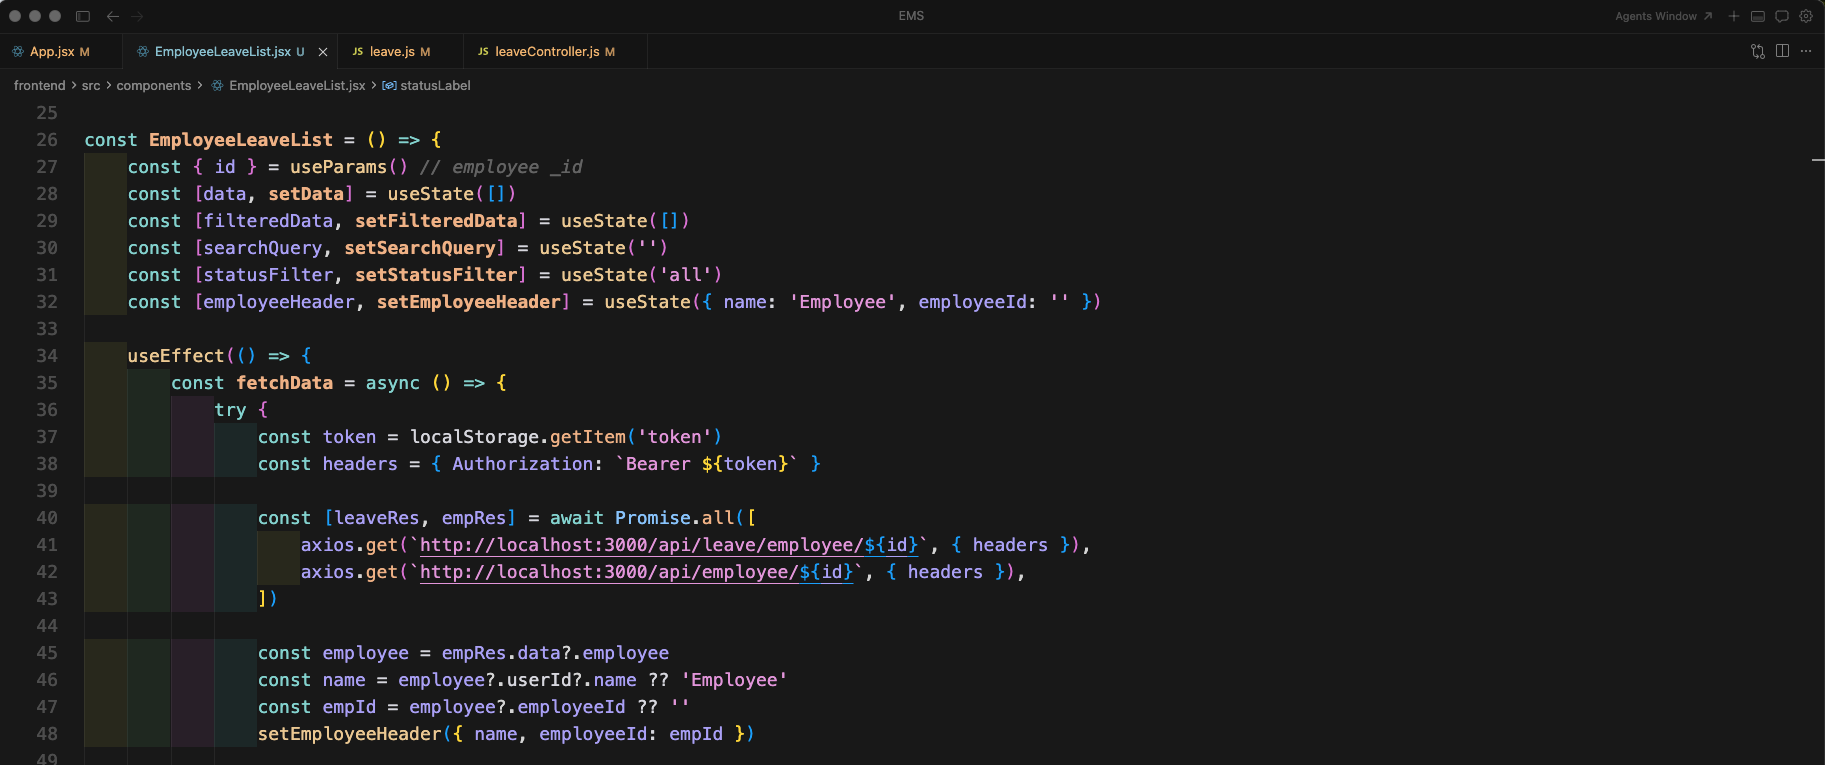
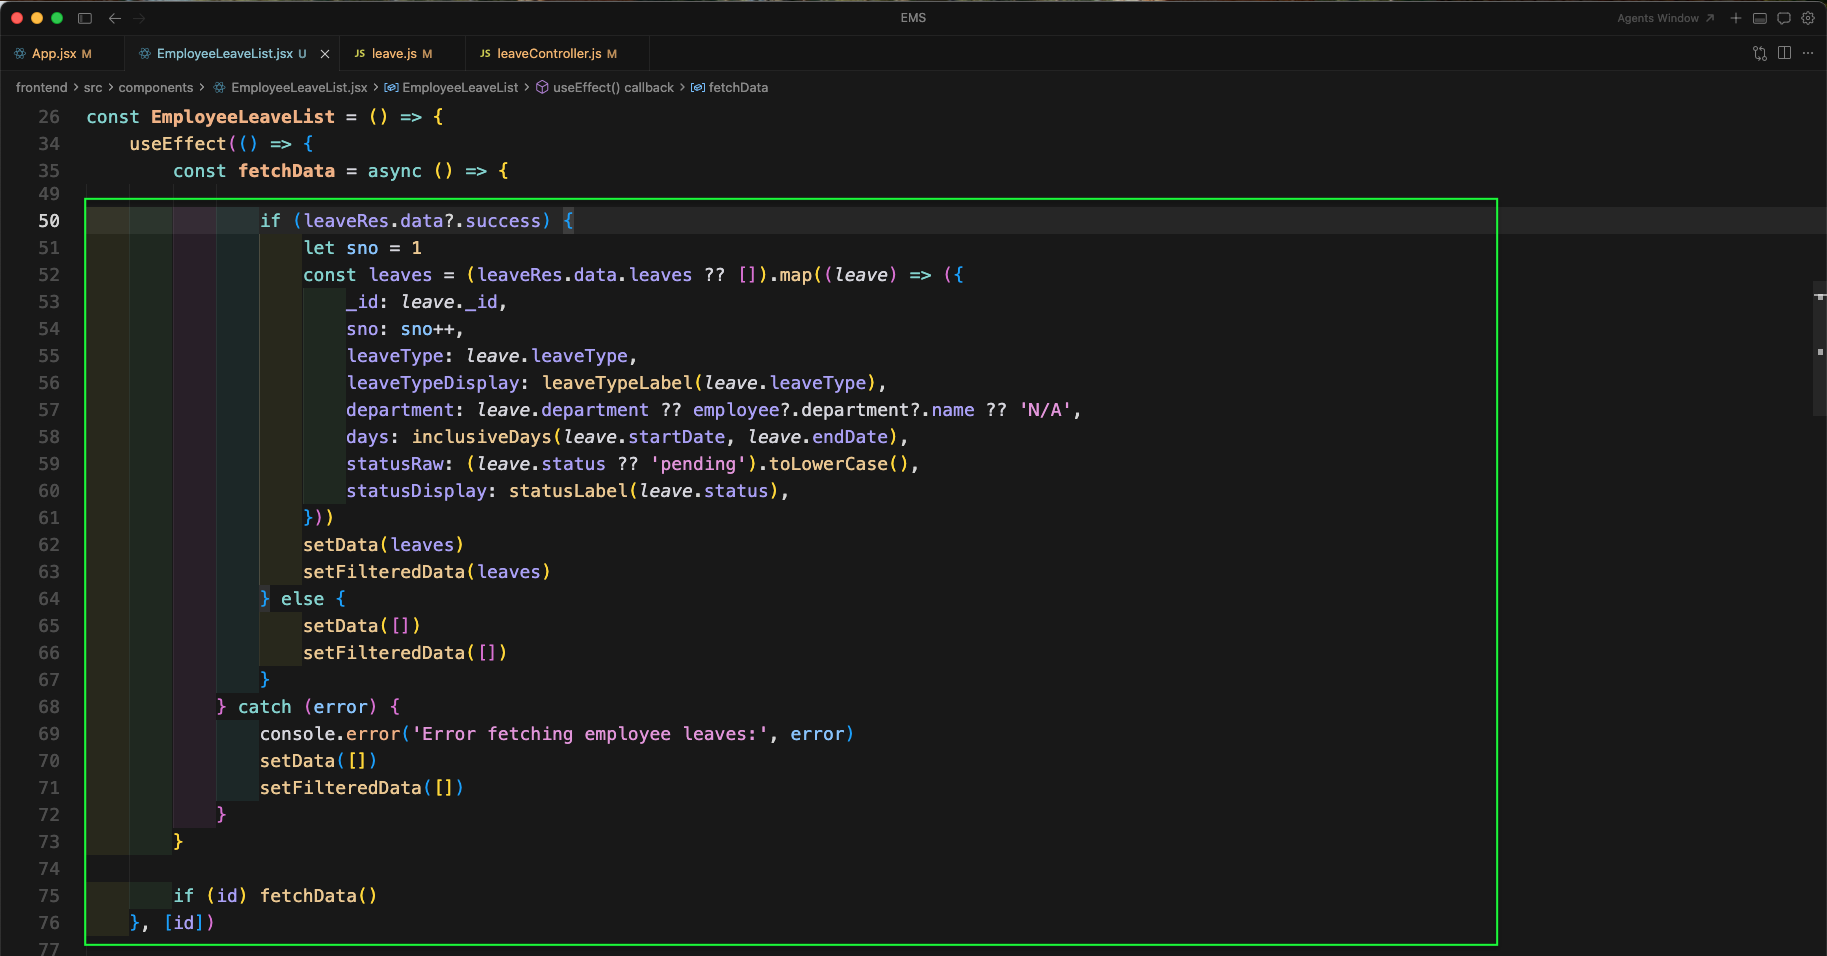
Now, we are mapping the leave response into DataTable rows. We are also setting employeeHeader (name and employeeId) which will be shown at the top of the page.
We will add the search and status filtering logic similar to admin leave list. Here, we filter by statusFilter and then apply searchQuery on leave type, department and status.

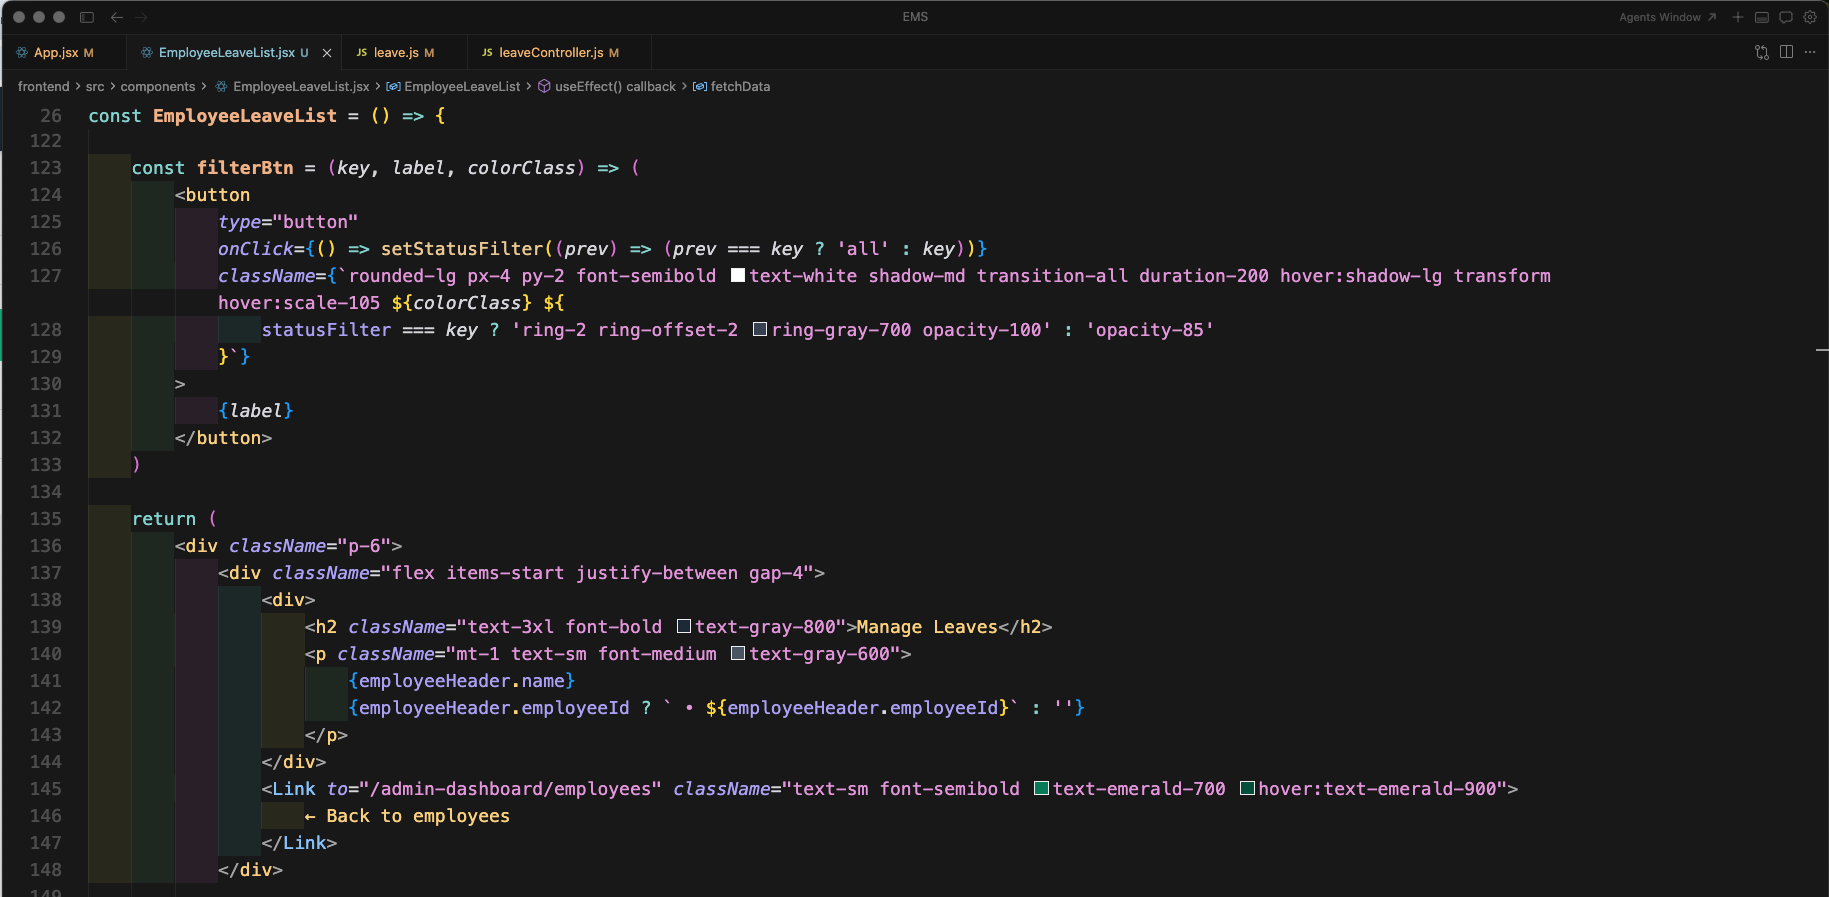
Now, we will define the DataTable columns and add an Action column with a View button to navigate to leave details.

Now, we will add the header section UI and filter buttons. It shows Manage Leaves with employee name and employee id, and provides a Back to employees link.
Finally, we are rendering the DataTable with filteredData, custom styles, and pagination.
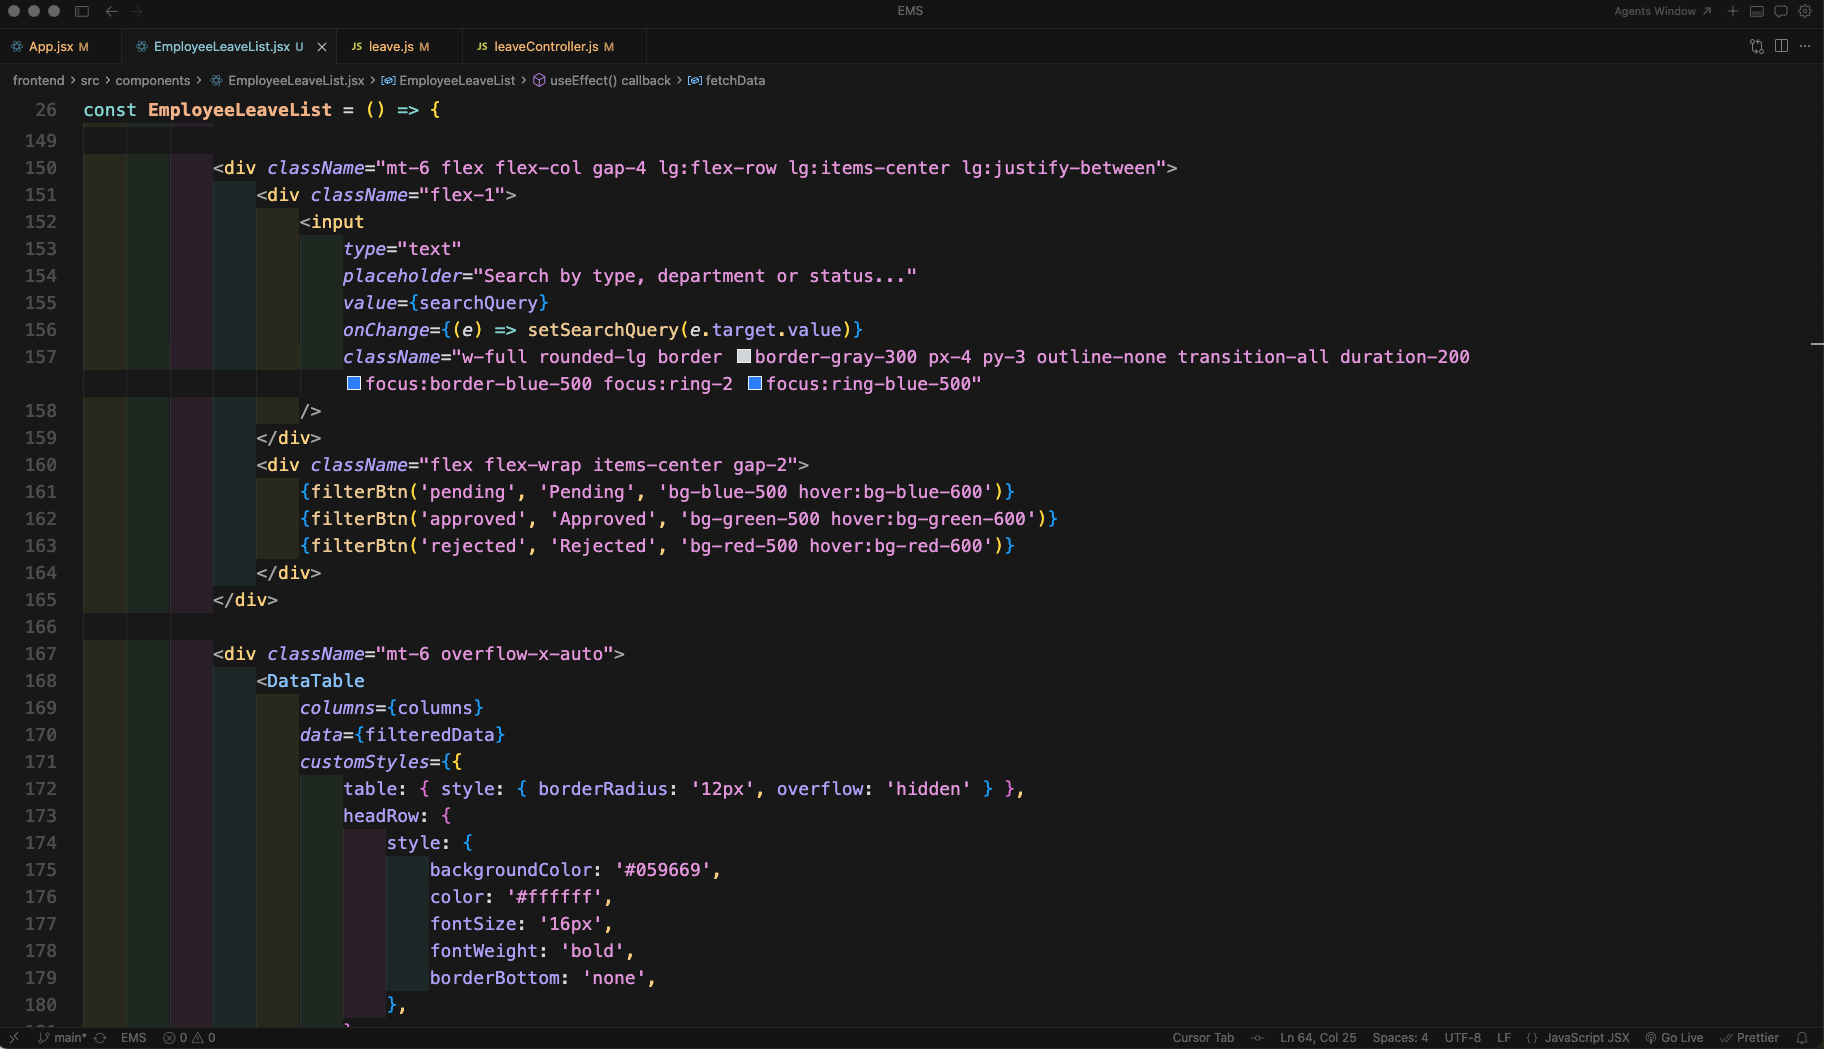
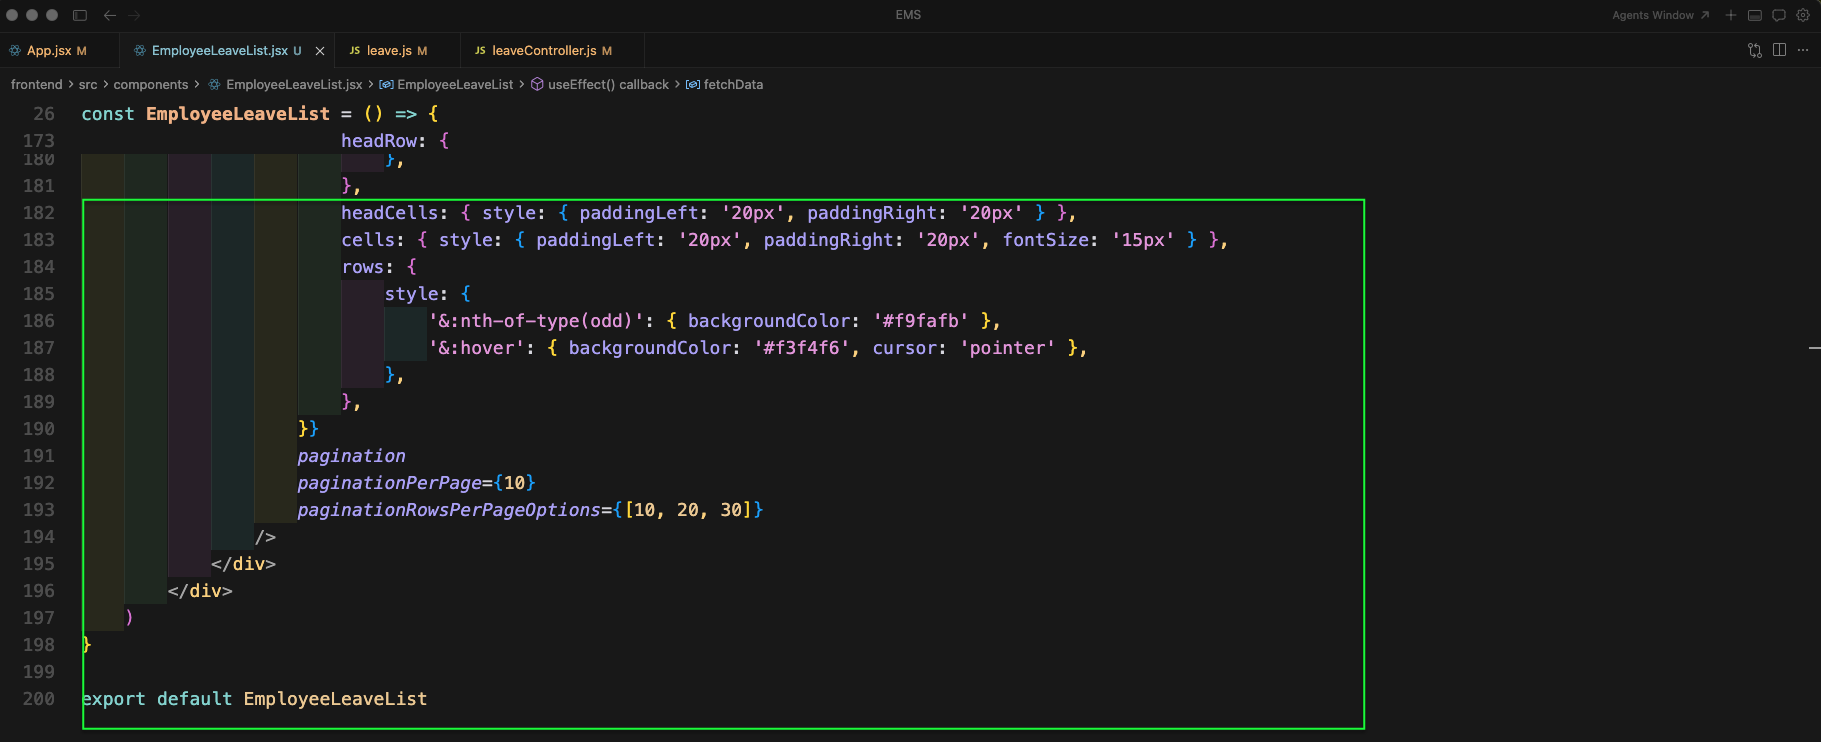
Now, we are completing the DataTable setup by configuring row styles and pagination options (10 / 20 / 30).
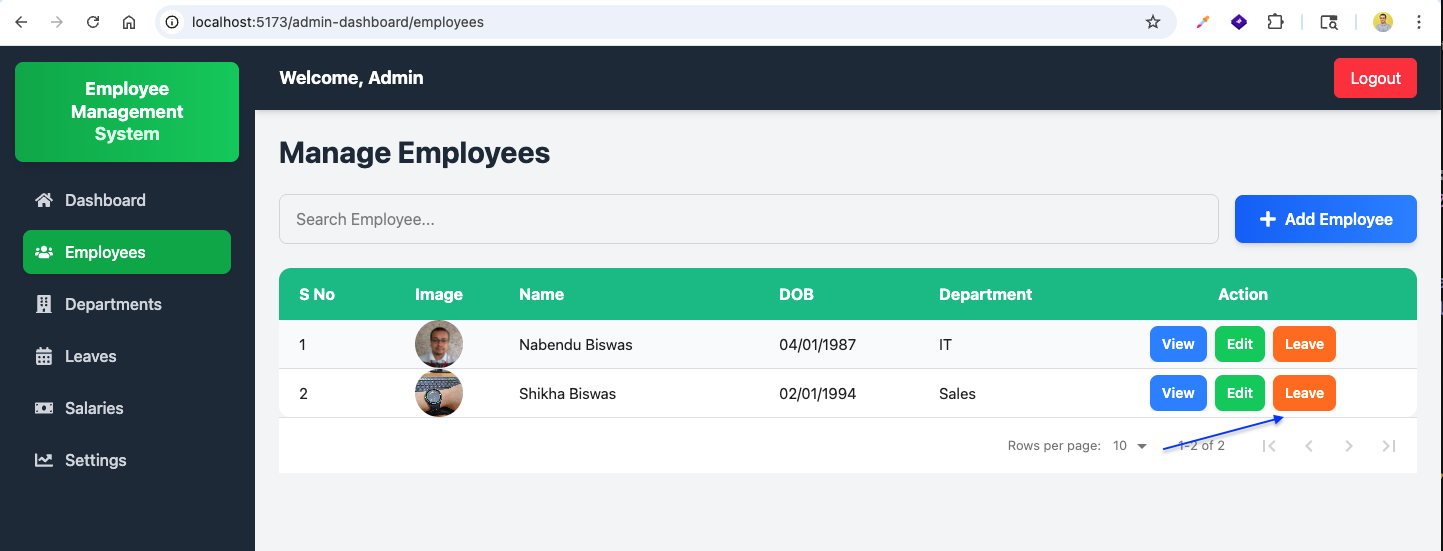
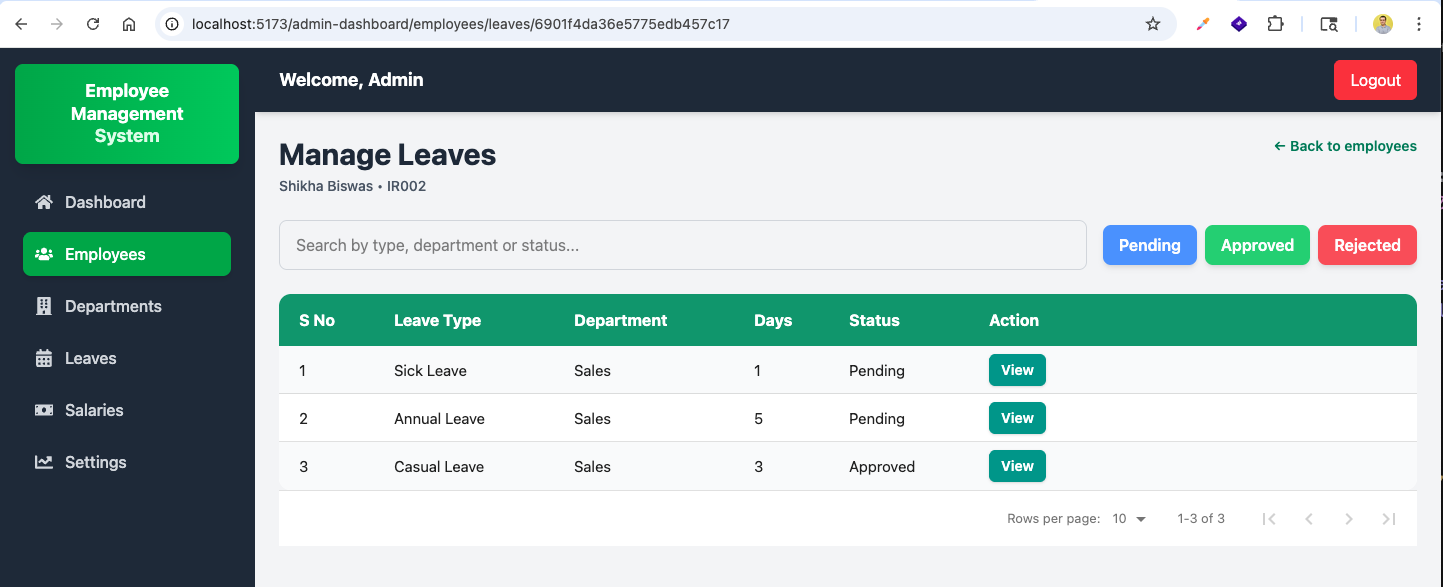
Now, from admin Employees page, clicking on the Leave button will take us to the employee leave list page.
Here, we can see the employee specific Manage Leaves page with search, status filters and the leave table.
Now, in AdminSidebar.jsx file we will add the Settings link for admin dashboard.

In App.jsx file we will add the admin route for settings:
/admin-dashboard/settingsand render the existing Settings component.

Now, go to http://localhost:5173/admin-dashboard/settings and you will see the same password change UI for admin.

After changing the password successfully, it will redirect to dashboard and show the success message.
If the new password and confirm password do not match, it will show the error message on admin settings page as well.
This completes part 2 of the series. You can find the code for the same here