Netflix Clone Frontend and Backend Integration
NodeJS
In the last three posts, we have created a ReactJS dashboard, Netflix App with ReactJS and Netflix backend with JWT authentication. In this post we are going to integrate the frontend and backend part of the application.
You can find the post in video format here.
In the backend code from earlier post, i have added the ReactJS code in a client folder.

Before moving forward with the integration with backend, we need to complete some pages and other features in our React application.
First we will show a dropdown in our Featured component, if a props of movie or series is passed. So, add the code to show a drop-down in Featured.js if a props type is passed.
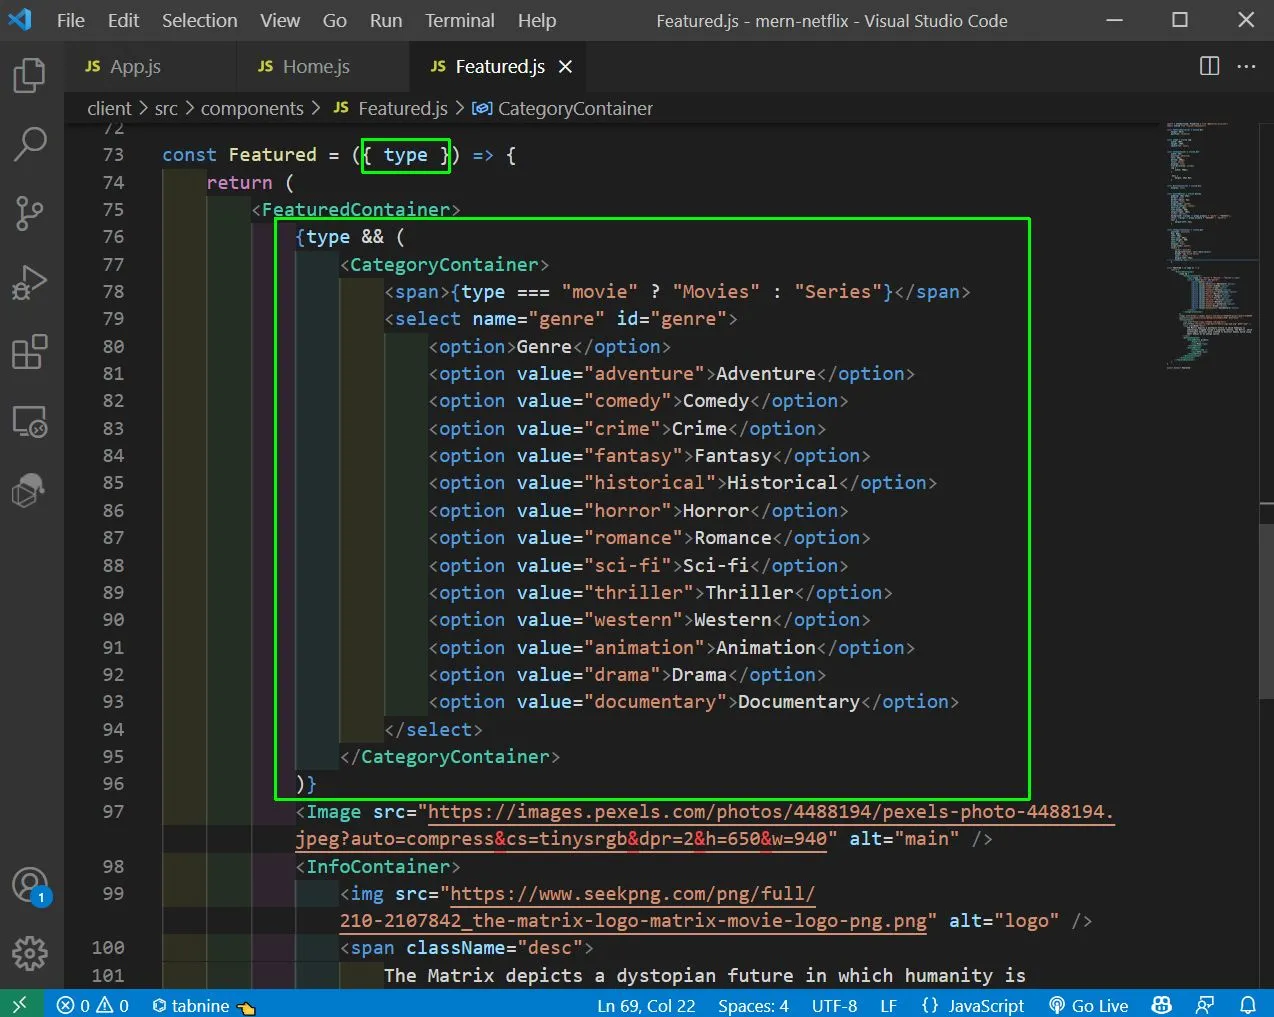
Next, we are also going to add the styled components for the same in Featured.js
    const CategoryContainer = styled.div`
        position: absolute;
        top: 80px;
        left: 50px;
        font-size: 30px;
        font-weight: 500;
        color: white;
        display: flex;
        align-items: center;
        select {
            cursor: pointer;
            background-color: var(--main-color);
            border: 1px solid white;
            color: white;
            margin-left: 20px;
            padding: 5px;
        }
    `
Before showing it, we will also include React Router DOM version 5 in our client folder, by below command.
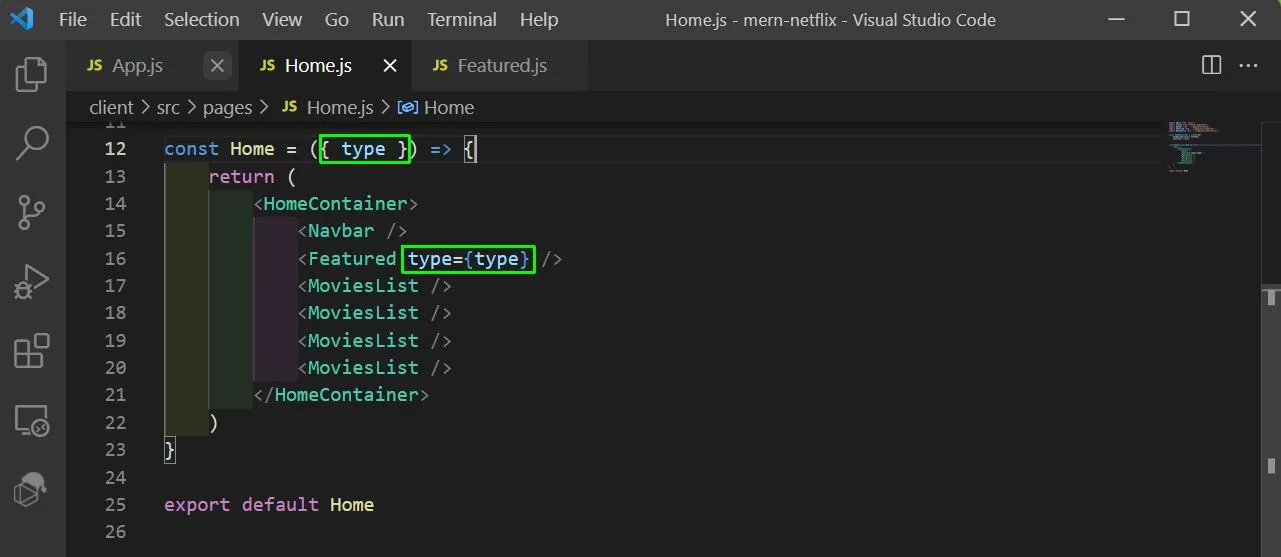
npm i react-router-dom@5Now, in Home.js we will add props of type and also send it to the Featured component.
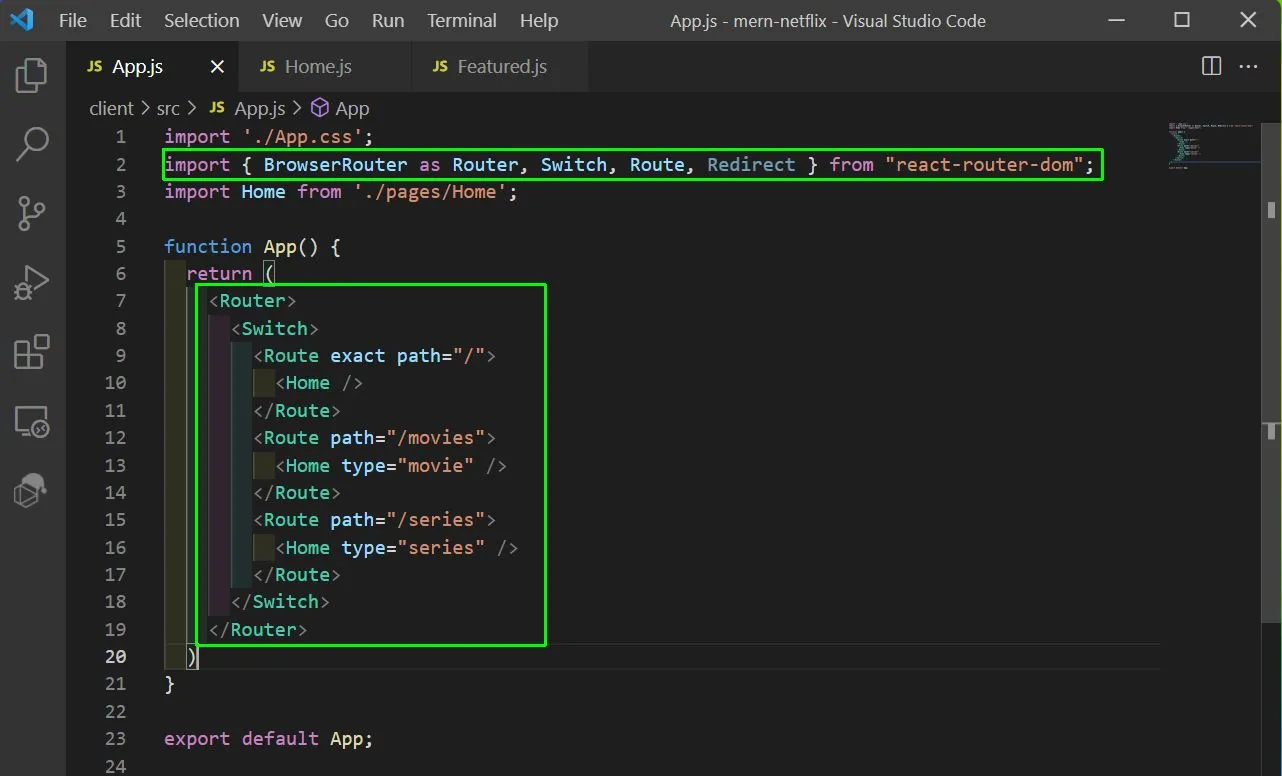
Now, in the App.js we will first import the required things for Router and then create three routes. One for Home, one for movies and one for series.
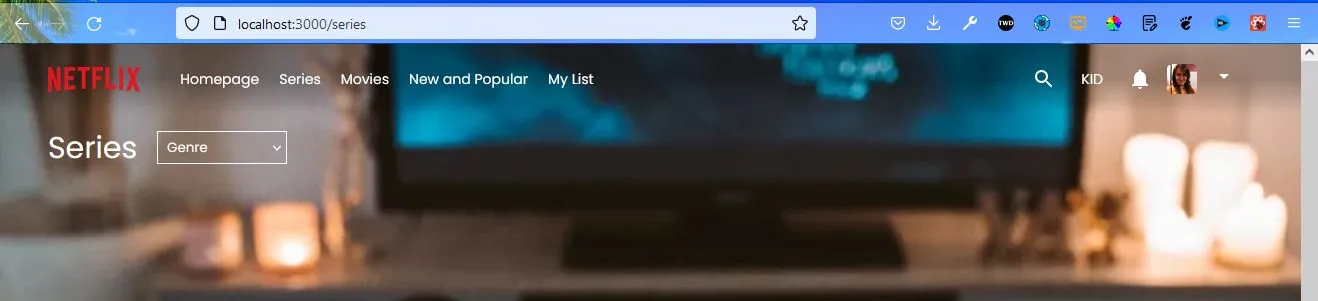
Now, if we go to http://localhost:3000/series we will see the Series dropdown and in movies the Movies dropdown.
Now, we will create a new Player.js file in the pages folder and add the below content in it. It is just playing a video and have a Back icon.
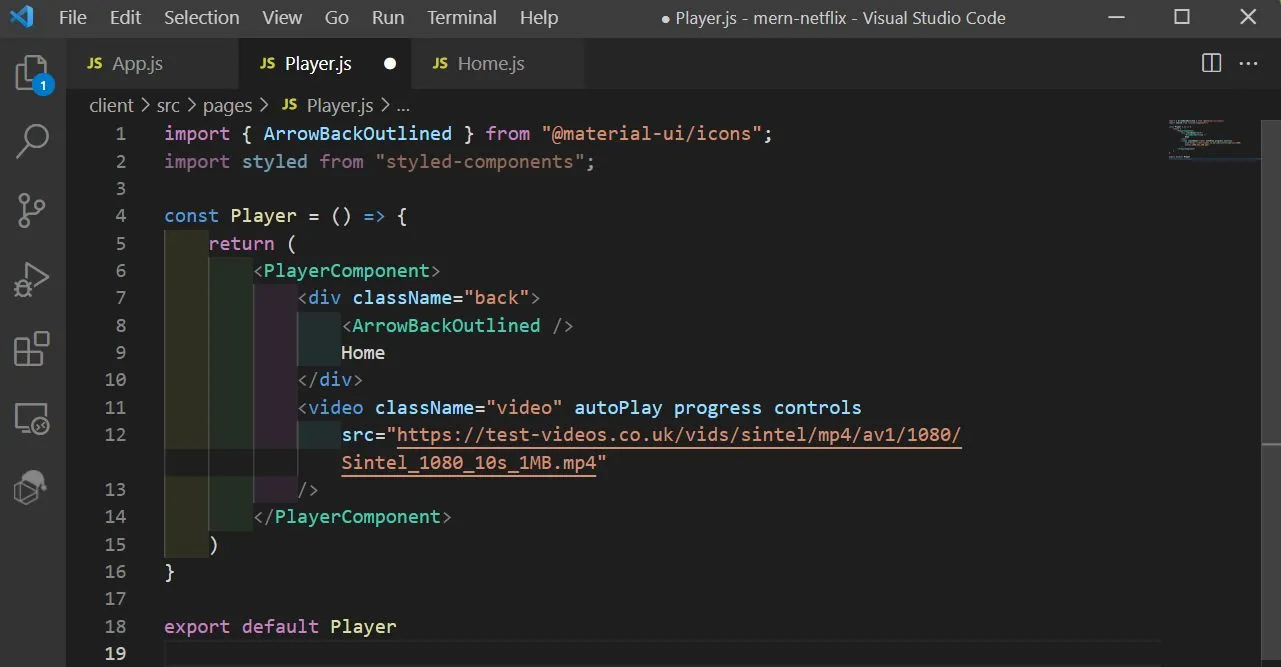
Also add the below styled components in it.
    const PlayerComponent = styled.div`
        width: 100vw;
        height: 100vh;
        .back {
            display: flex;
            align-items: center;
            position: absolute;
            top: 10px;
            left: 10px;
            color: white;
            cursor: pointer;
            z-index: 2;
        }
        .video {
            width: 100%;
            height: 100%;
            object-fit: cover;
        }
    `
Also add the Player component in App.js file.
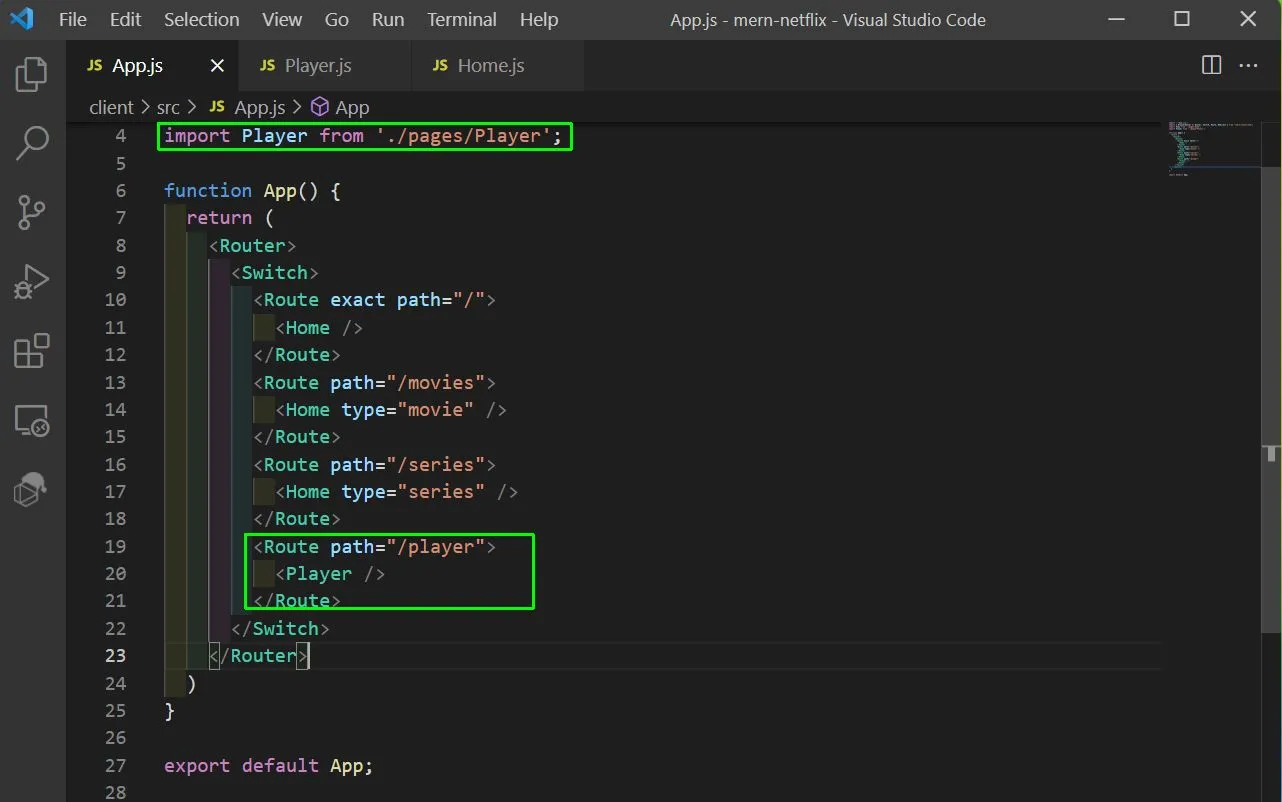
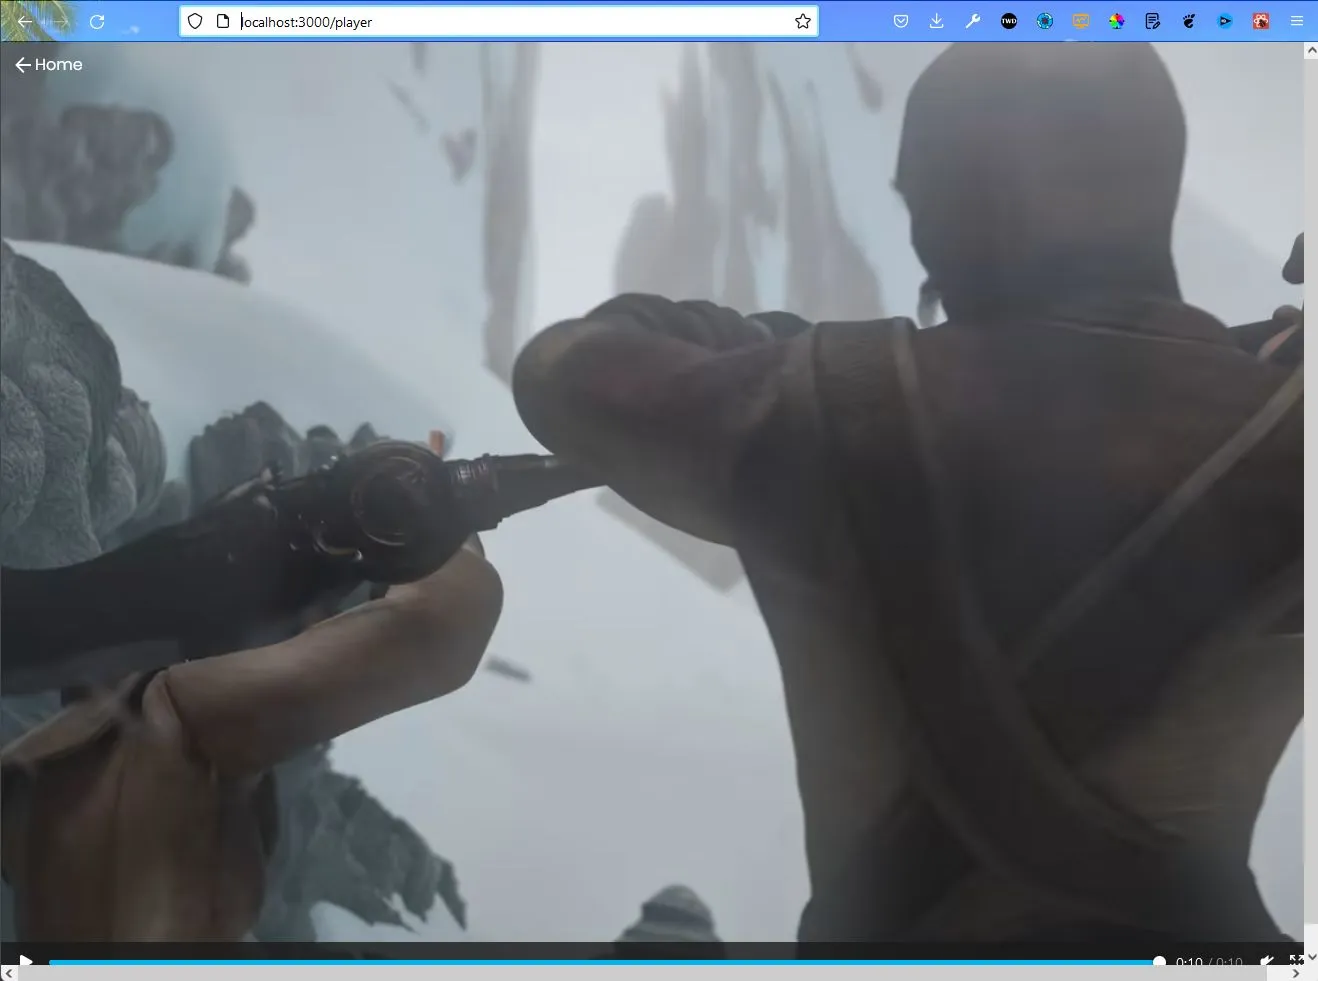
Now, go to the path http://localhost:3000/player and you will see the nice movie been played.
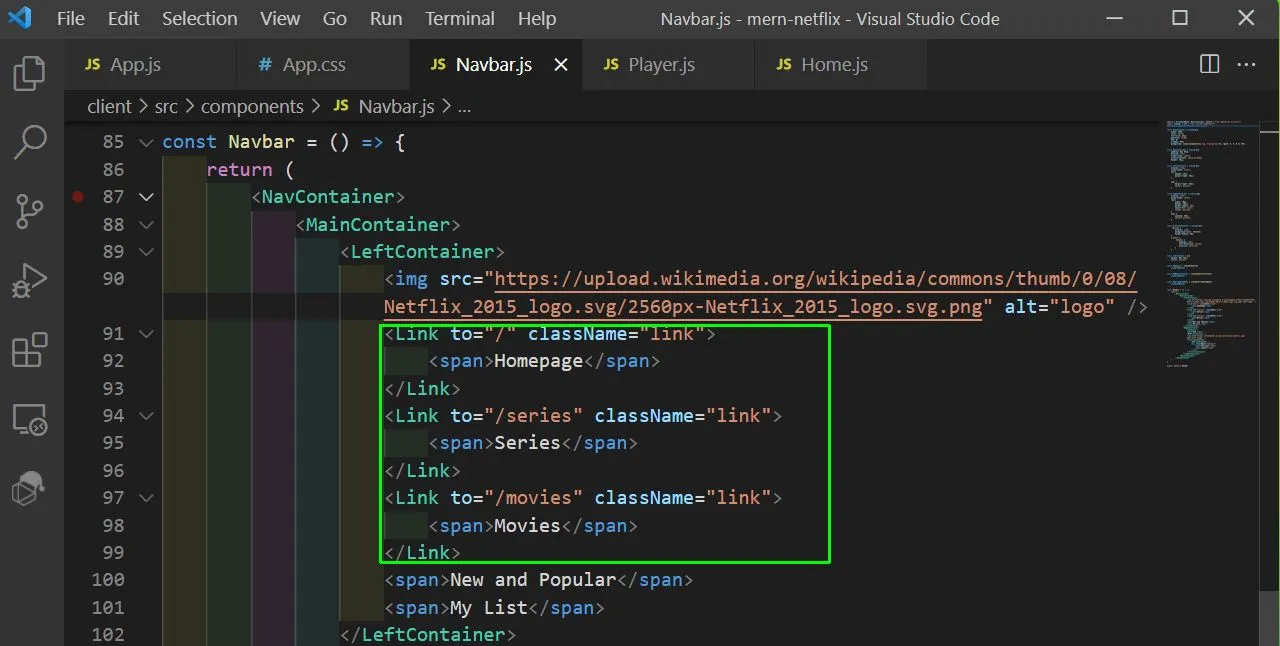
Now, to be able to click and go to the Home, Movies and Series page, we will goto the Navbar.js file and first import the React Router DOM, with below command.
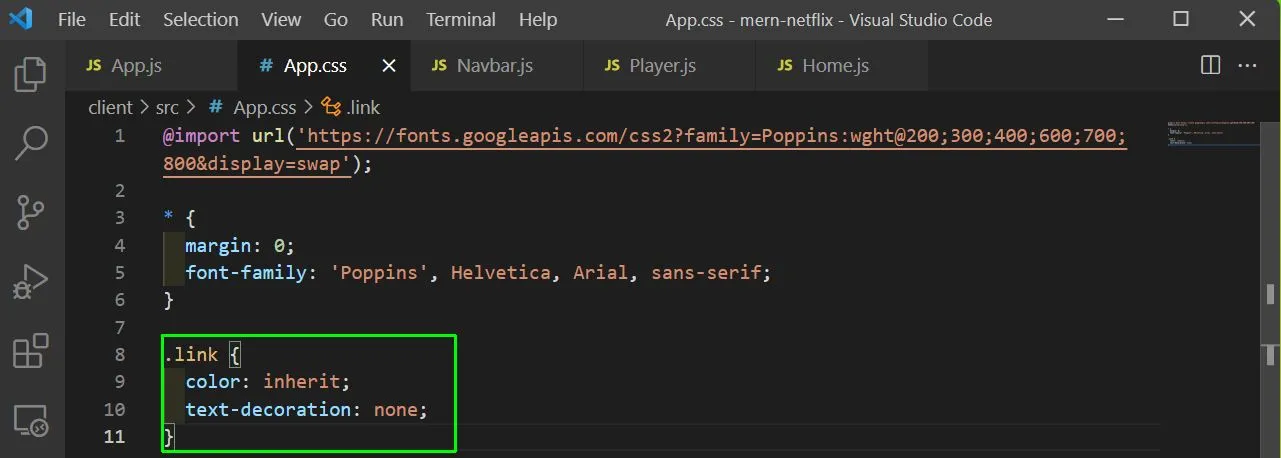
import { Link } from "react-router-dom";After that we will wrap this Link in the different title. Also, notice that we have added a className of link, because by default every link is blue and we want to override it.
Also, in the App.css we will add the link class and make the text-decoration as none. Now all the Links are working properly.
Next, we will create a Login.js file inside the pages component. Here, we basically have a TopContainer containing an image and the BottomContainer contains a form.
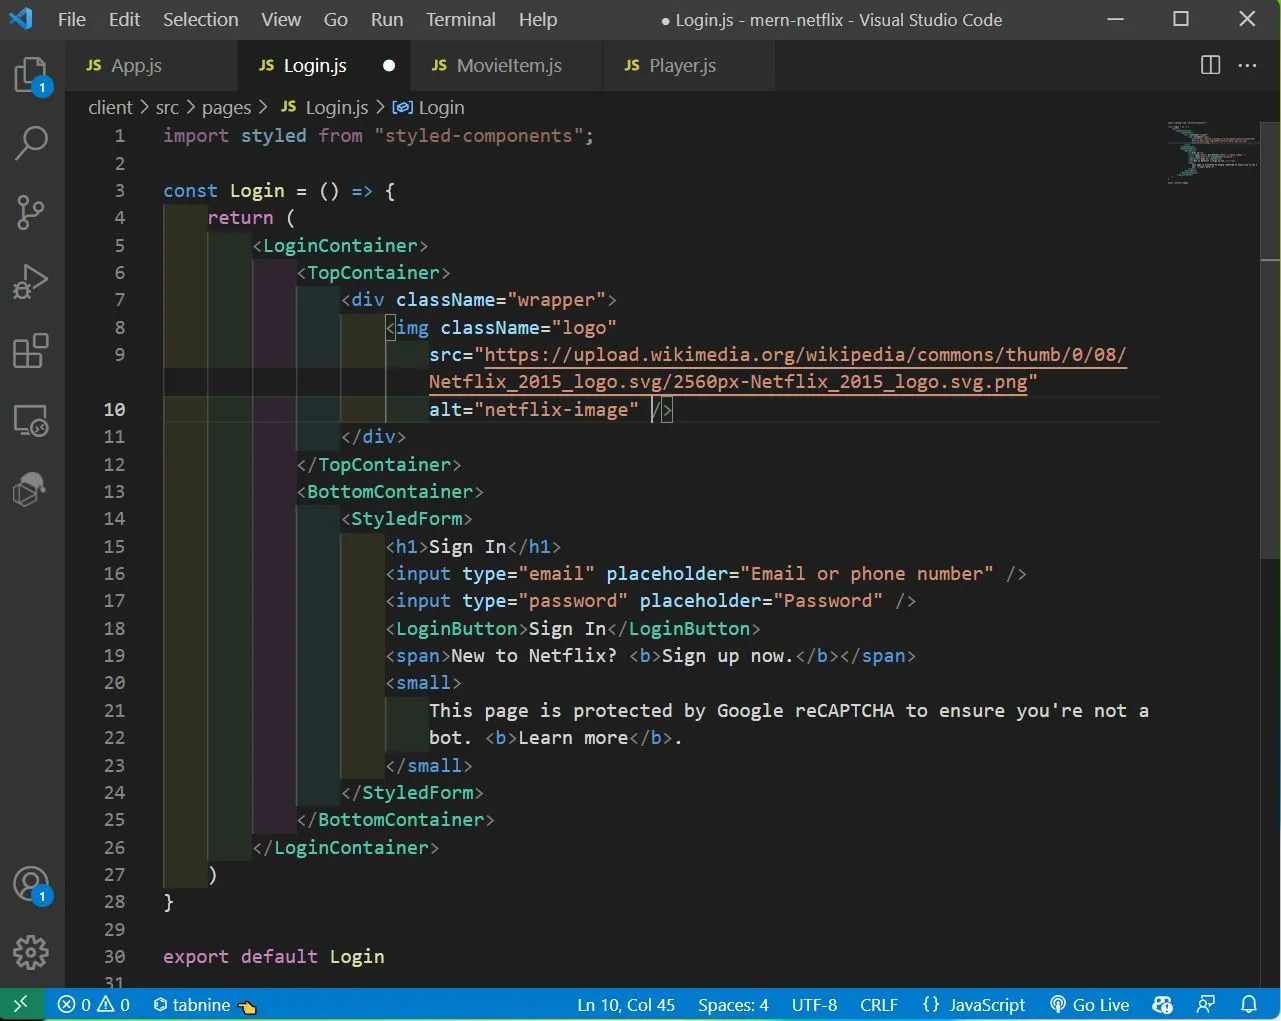
Next, we will add the below styled components in our file. The famous image of Netflix background is used here.
    const LoginContainer = styled.div`
        width: 100vw;
        height: 100vh;
        background: linear-gradient(
            to bottom,
            rgba(0, 0, 0, 0) 0%,
            rgba(0, 0, 0, 1) 100%
            ),
            url("http://mppmduse2pmpovwapp.azurewebsites.net/wp-content/uploads/2019/09/netflix-background-9.jpg");
        background-size: cover;
        position: relative;
    `const TopContainer = styled.div`
        .wrapper {
            padding: 20px 50px;
            display: flex;
            align-items: center;
            justify-content: space-between;
        }
        .logo {
            height: 40px;
        }
    `const BottomContainer = styled.div`
        width: 100%;
        height: 100%;
        position: absolute;
        top: 0;
        left: 0;
        display: flex;
        flex-direction: column;
        align-items: center;
        justify-content: center;
        color: white;
    `const StyledForm = styled.form`
            width: 300px;
            height: 300px;
            padding: 30px;
            border-radius: 5px;
            background-color: #0b0b0b;
            display: flex;
            flex-direction: column;
            justify-content: space-around;input {
            height: 40px;
            border-radius: 5px;
            background-color: gray;
            color: white;
            padding-left: 10px;
        }span {
            color: lightgray;
            b {
                color: white;
            }
        }
    `
Next, we will add the Login component in our App.js file. Here, we will show it if the user is not logged in and using a dummy variable of user as false.
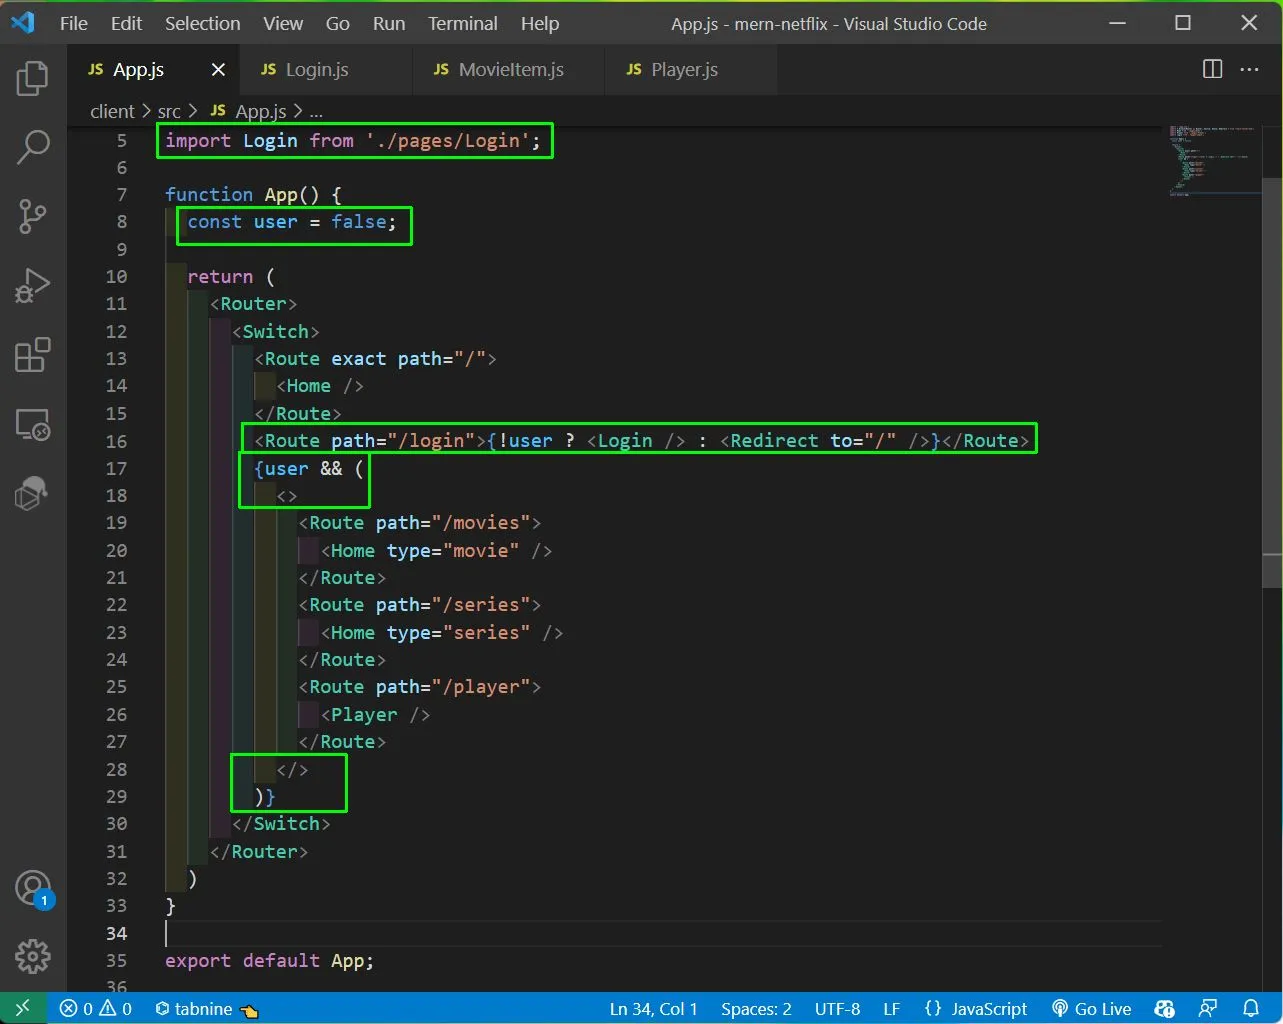
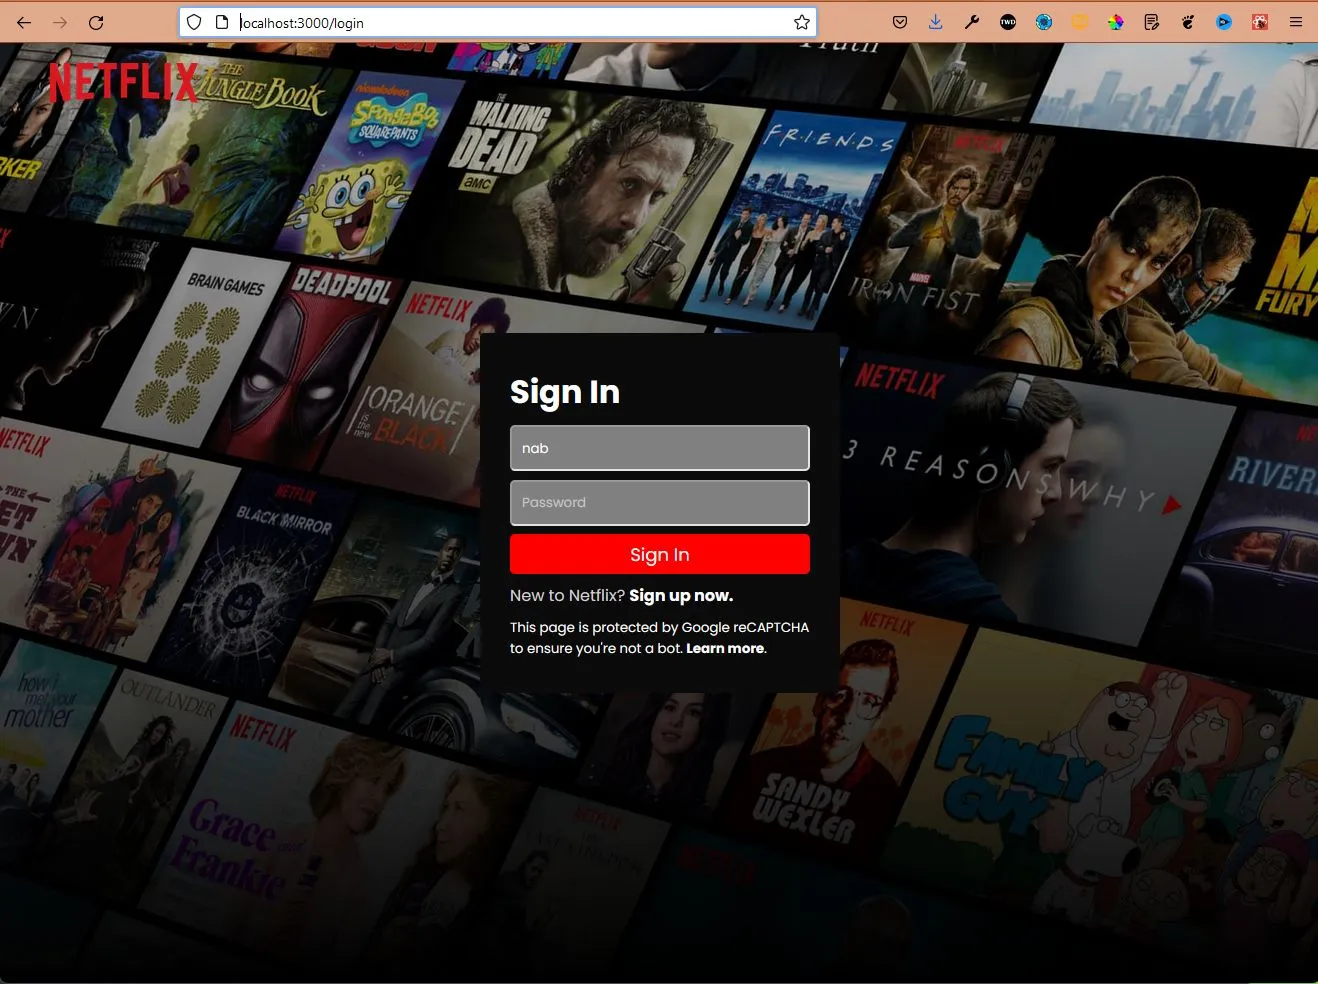
Now, go to http://localhost:3000/login and we will see the beuatiful netflix login screen.
Now, we will create the Register page, which will be quite similar to the Login page. So, in a file Register.js inside pages folder add the below content. Note that we are also using state here to take the input from the user.
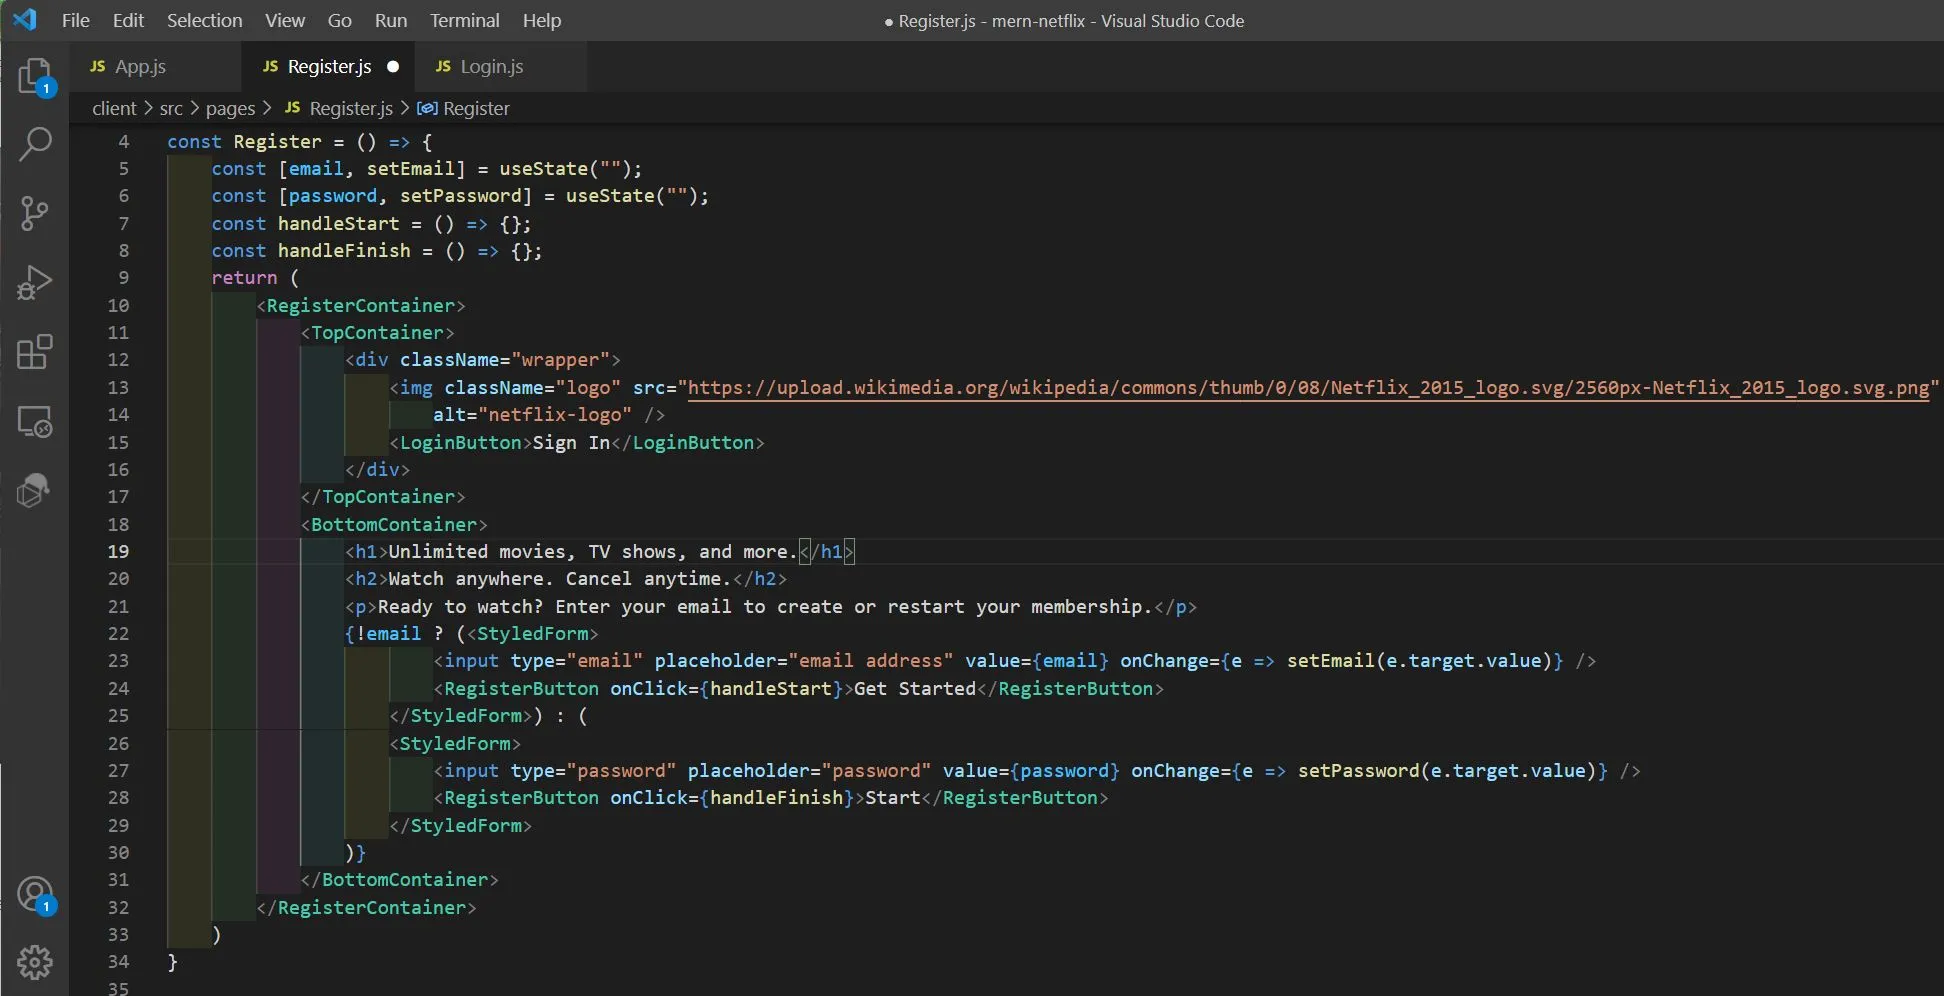
Now, we will add the styled components for our Register.js page.
    const RegisterContainer = styled.div`
        width: 100vw;
        height: 100vh;
        background: linear-gradient(
            to bottom,
            rgba(0, 0, 0, 0) 0%,
            rgba(0, 0, 0, 1) 100%
            ),
            url("https://cdn.hipwallpaper.com/i/98/21/dUyCkp.jpg");
        background-size: cover;
        position: relative;
    `;const TopContainer = styled.div`
        .wrapper {
            padding: 20px 50px;
            display: flex;
            align-items: center;
            justify-content: space-between;
        }
        .logo {
            height: 40px;
        }
    `const BottomContainer = styled.div`
        width: 100%;
        height: 100%;
        position: absolute;
        top: 0;
        left: 0;
        display: flex;
        flex-direction: column;
        align-items: center;
        justify-content: center;
        color: white;
        h1 { font-size: 50px; }
        h2 { margin: 20px; }
        p { font-size: 20px; }`const LoginButton = styled.button`
        background-color: red;
        border: none;
        color: white;
        border-radius: 5px;
        padding: 5px 15px;
        font-size: 16px;
        font-weight: 500;
        cursor: pointer;
    `const RegisterButton = styled.button`
        flex: 3;
        height: 100%;
        background-color: red;
        border: none;
        color: white;
        font-size: 22px;
        cursor: pointer;
    `const StyledForm = styled.form`
        width: 50%;
        background-color: white;
        display: flex;
        align-items: center;
        justify-content: space-between;
        margin-top: 20px;
        height: 50px;
        border-radius: 5px;
        input{
            flex: 9;
            height: 100%;
            border: none;
            padding: 0 10px;
        }
    `
Now, in our App.js we will include the Register page.
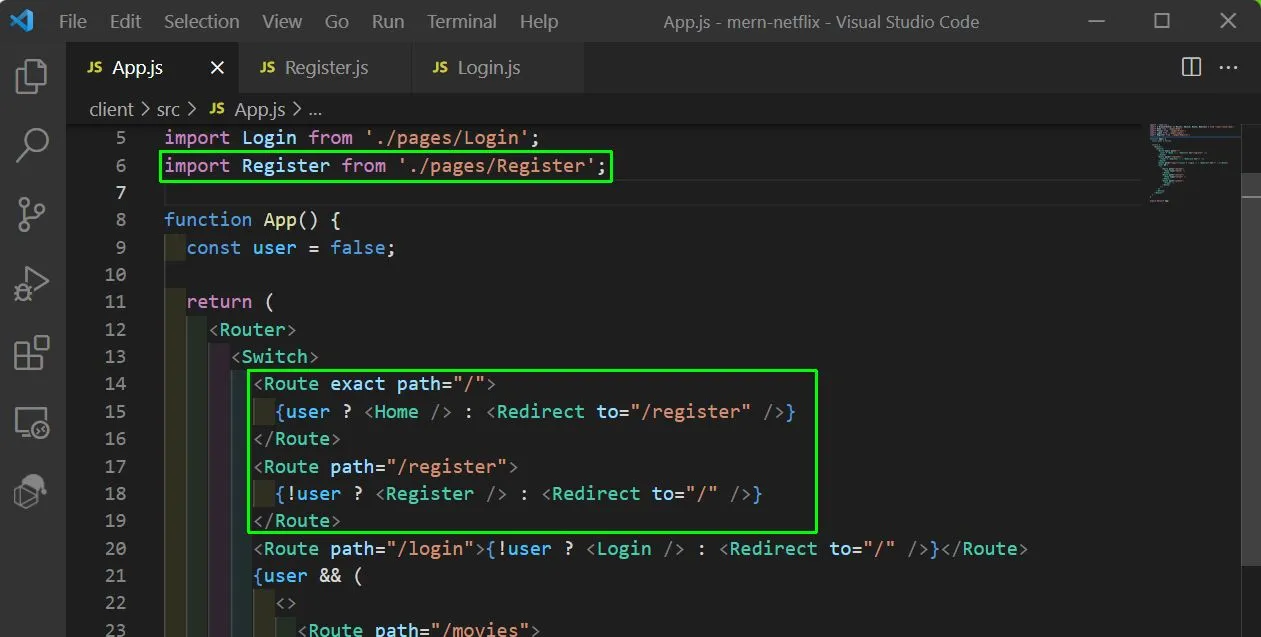
Since, the user is false we will be taken to the Register page.

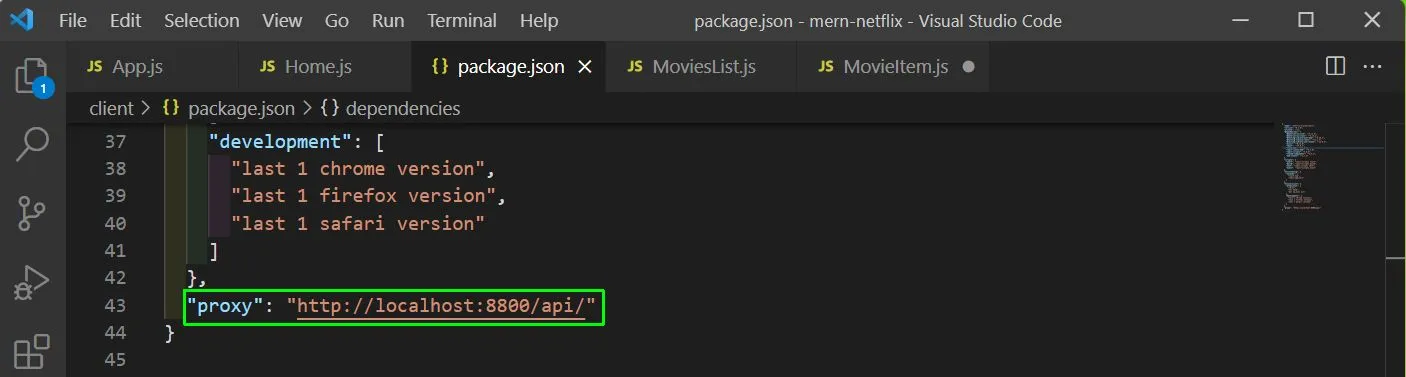
Now, we will do the API call to our backend to get all the lists. But for that we need to first install axios in our client folder.
npm i axiosAfter that we need to add a proxy in the package.json file for our backend.
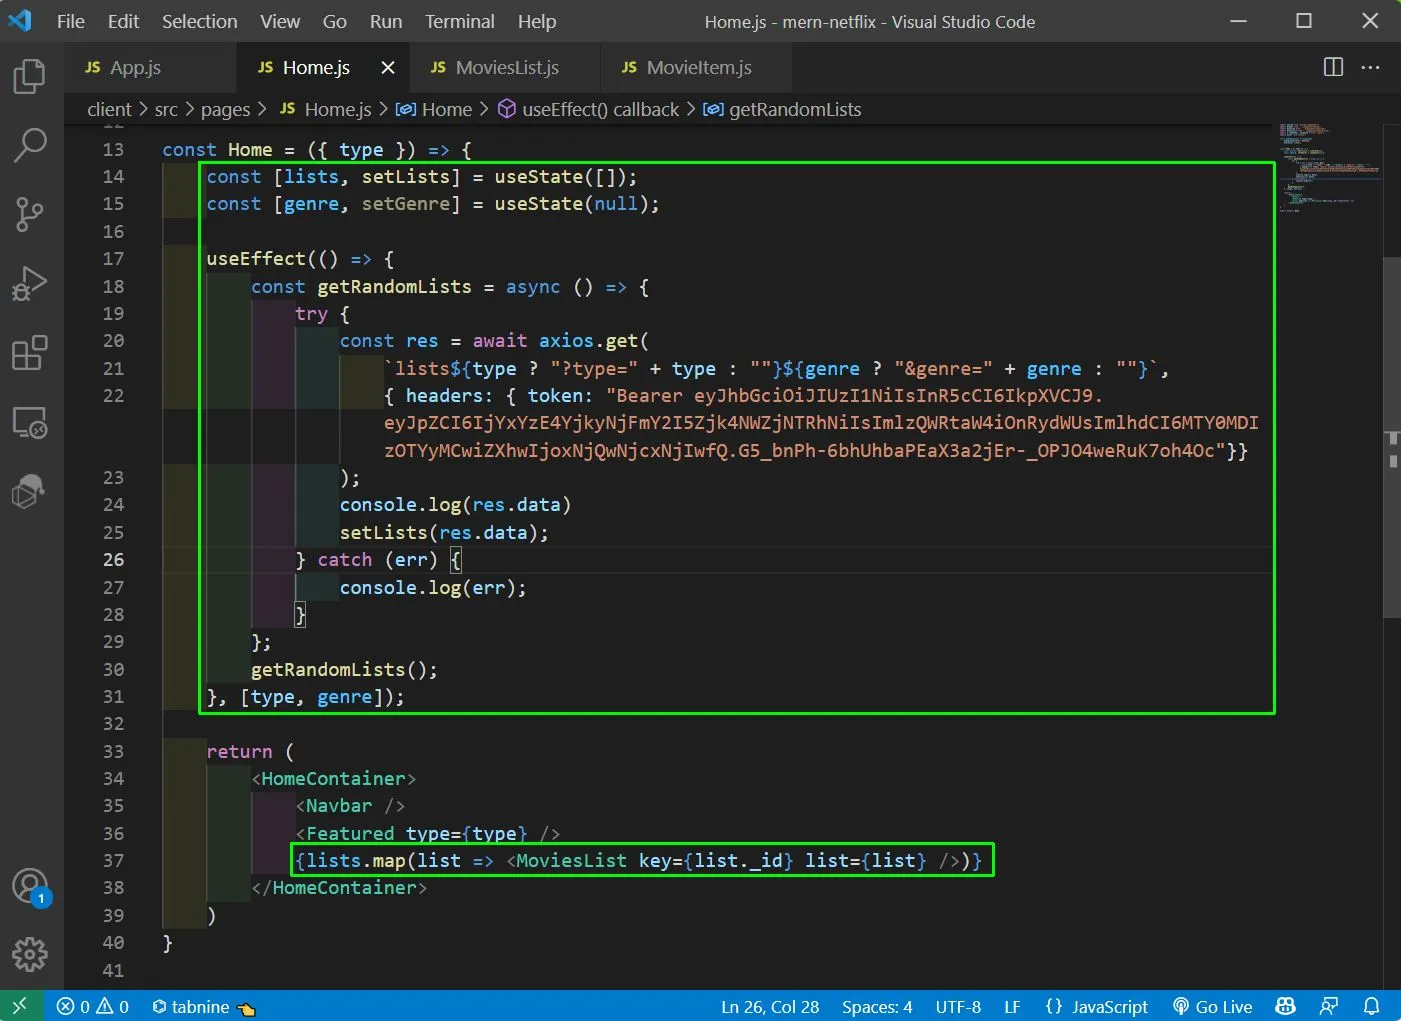
Now, in our Home.js first import the required things.
    import { useEffect, useState } from 'react';
    import axios from "axios";
After that in the Home.js file, we will add two states of lists and genre. Next, in the useEffect, we are doing the API call with axios to lists endpoint which gets type and genre.
We need to pass the token also manually as of now from postman and we are going to change it soon.
Lastly, we are looping through the lists and passing the individual object to the MoviesList component.
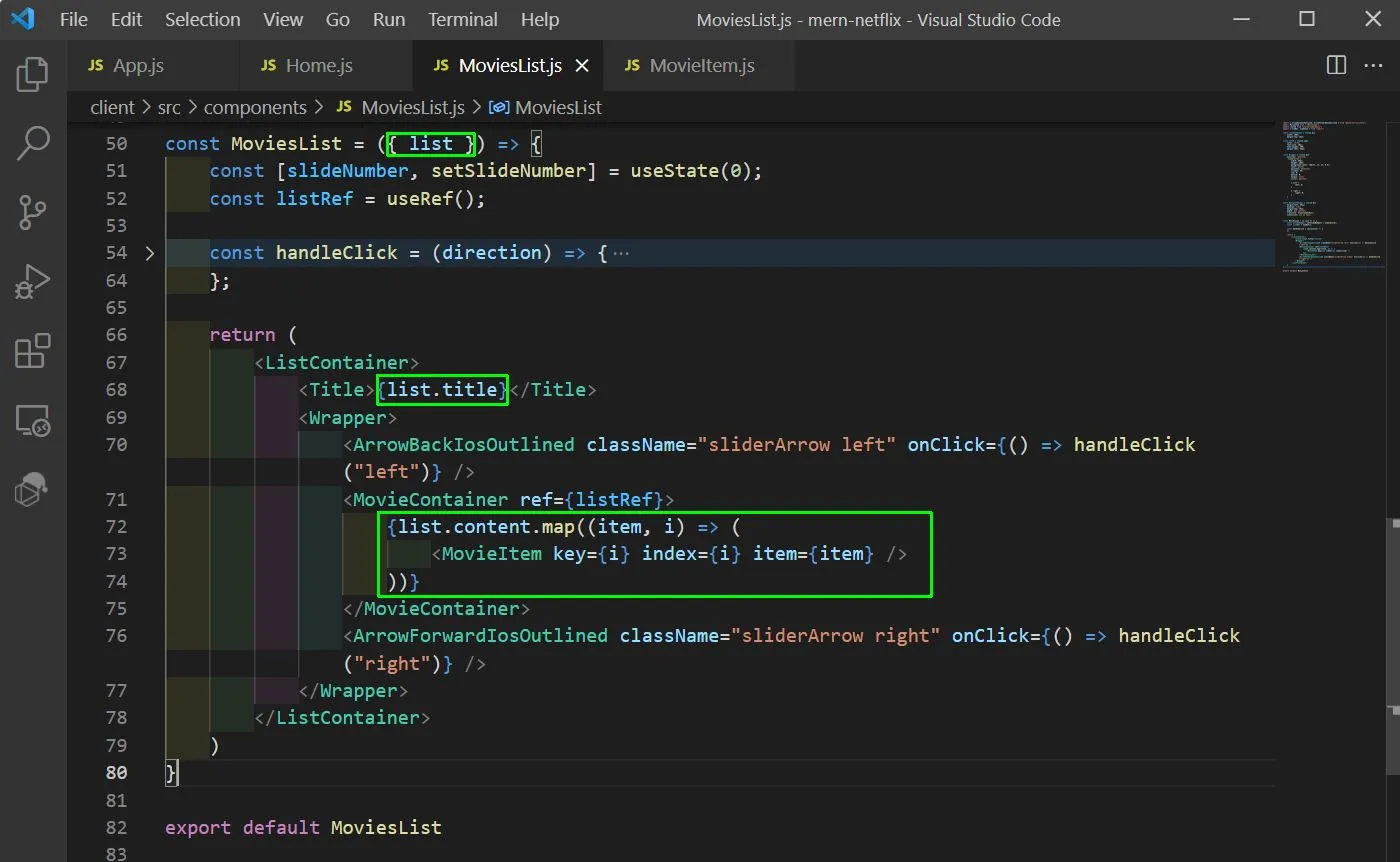
Now, in the MoviesList.js file, we will get the list object and will show the title from it. We are also looping through the content array and passing the individual movie id to MovieItem component.
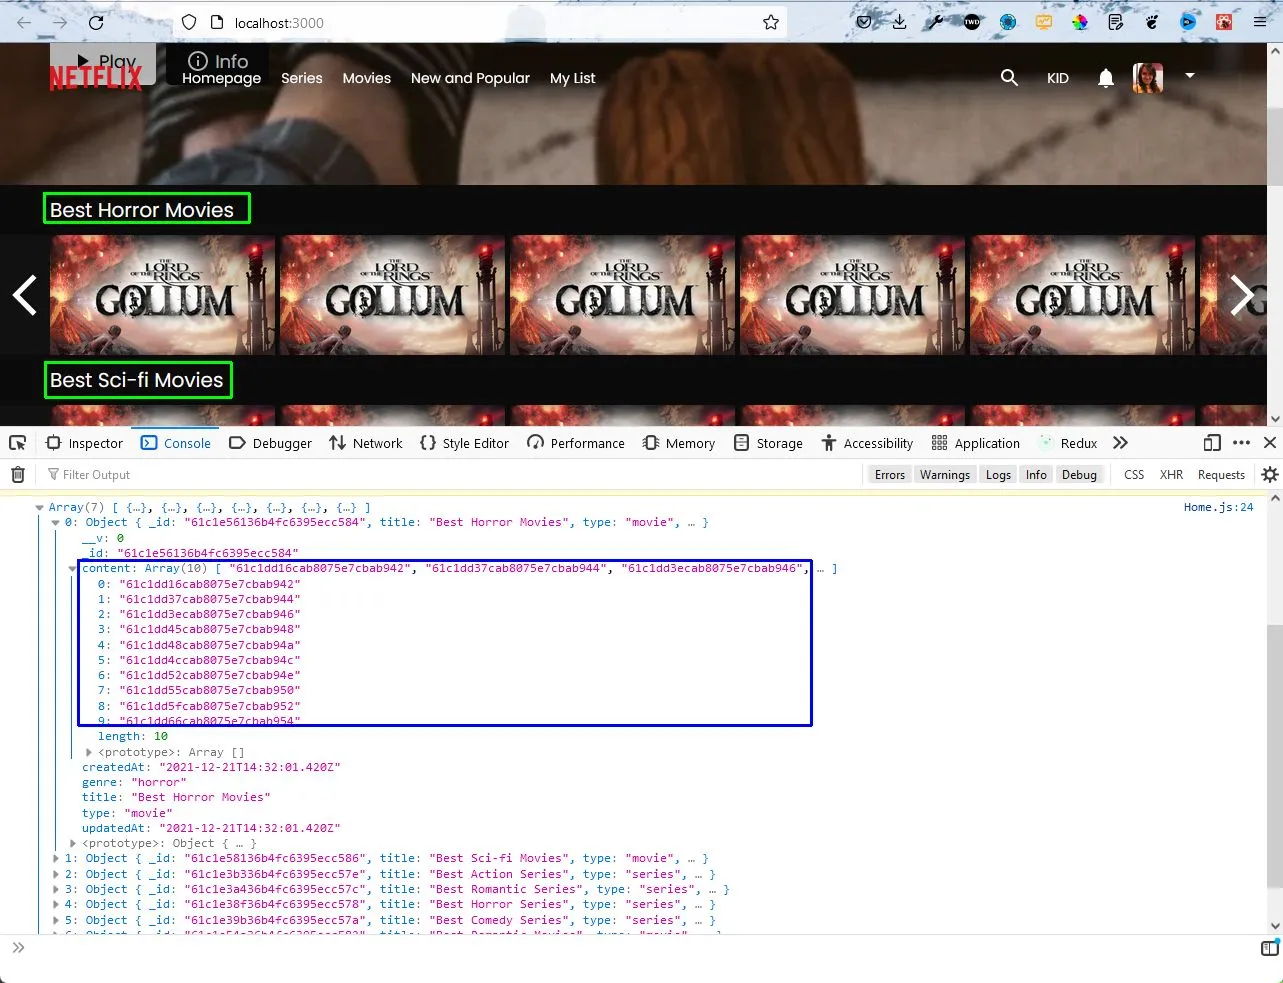
Now in localhost, we can see each title been updated for the list and also in console, we can see the content array.
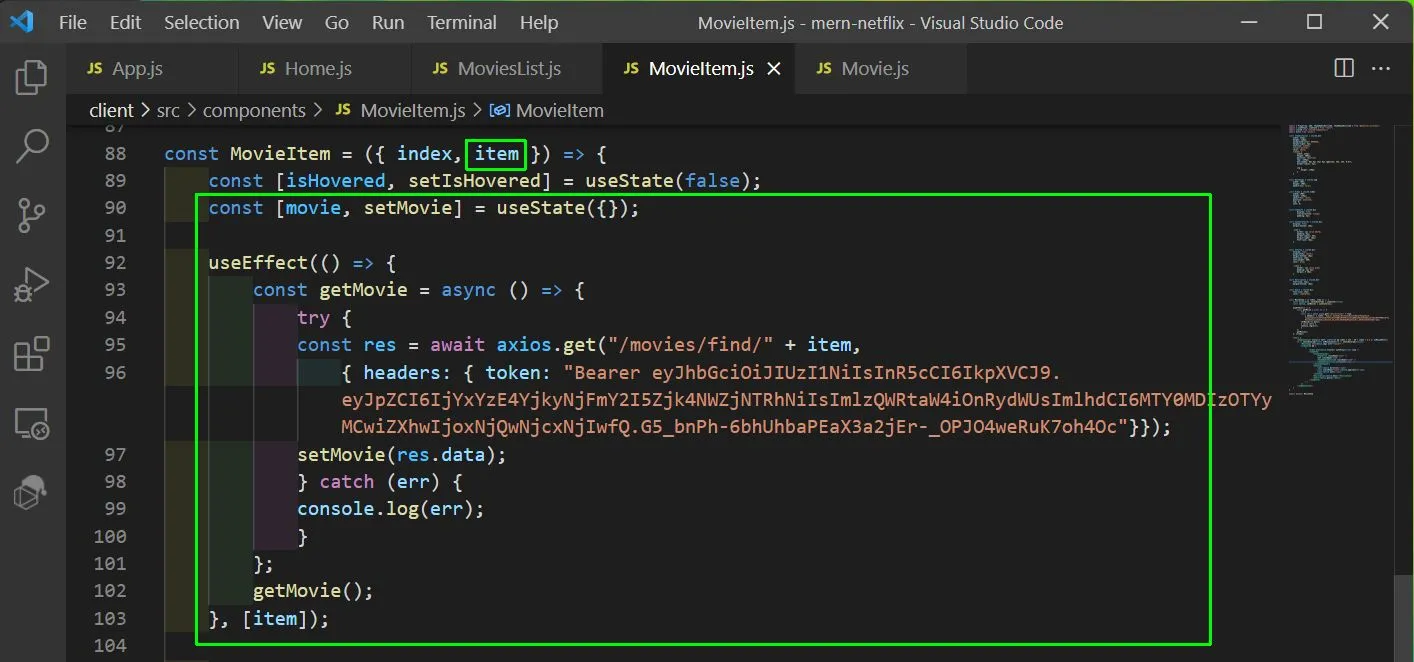
Next, in the MovieItem.js file, we will first get the item props. And after that we will do an API call to find the individual item.
Next, we will update the items MovieItem.js,in our return to show these details.
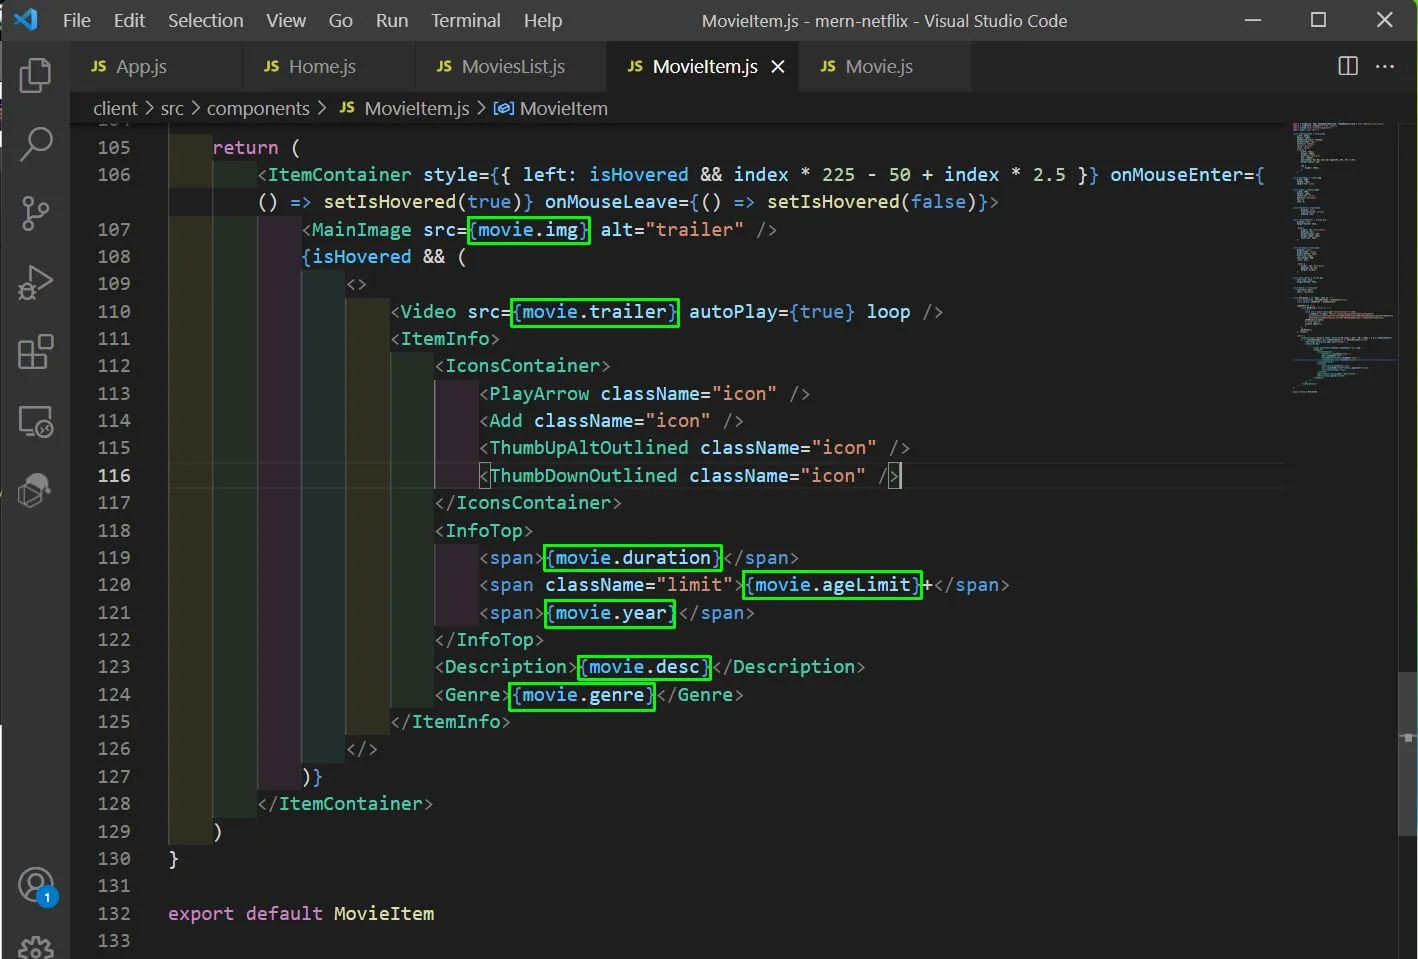
Now, all the Movies are showing from the API endpoint and also the trailer is showing proper information.
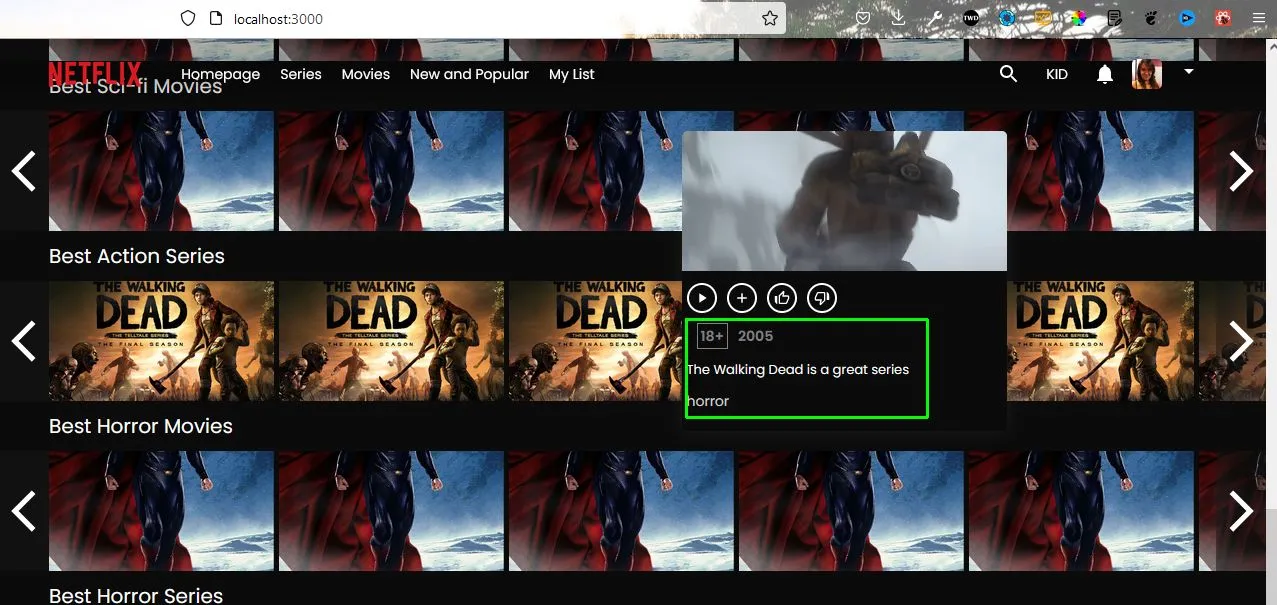
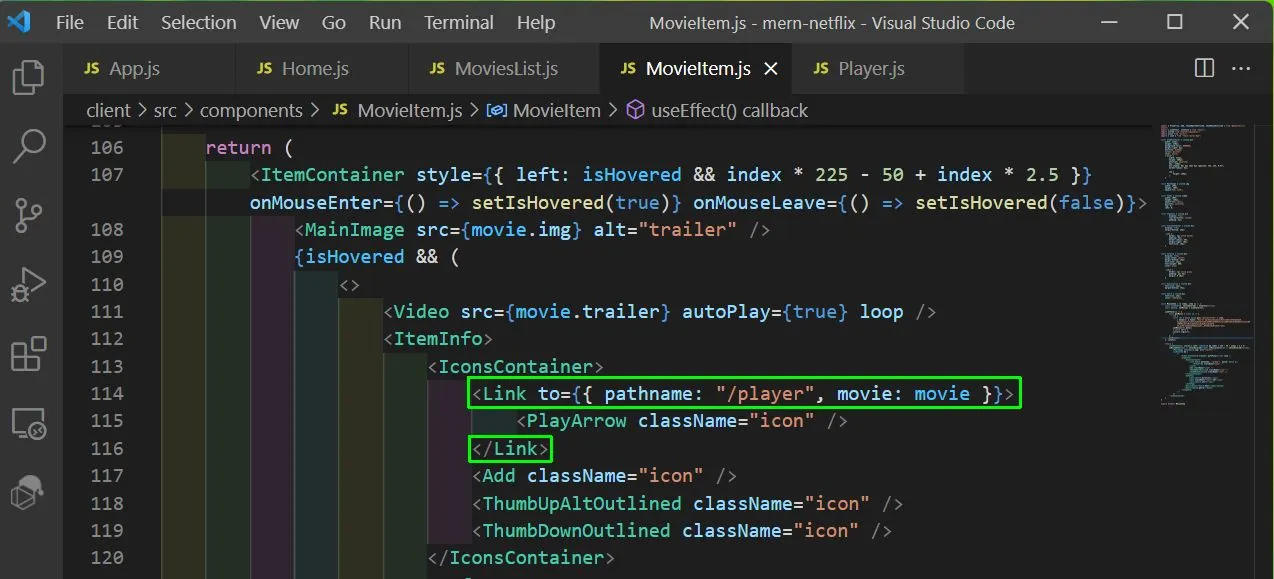
Now, we will wrap the Link tag in the PlayArrow icon and on lcikcing it we will go to the player page and will pass the movie as props in MovieItem.js file.
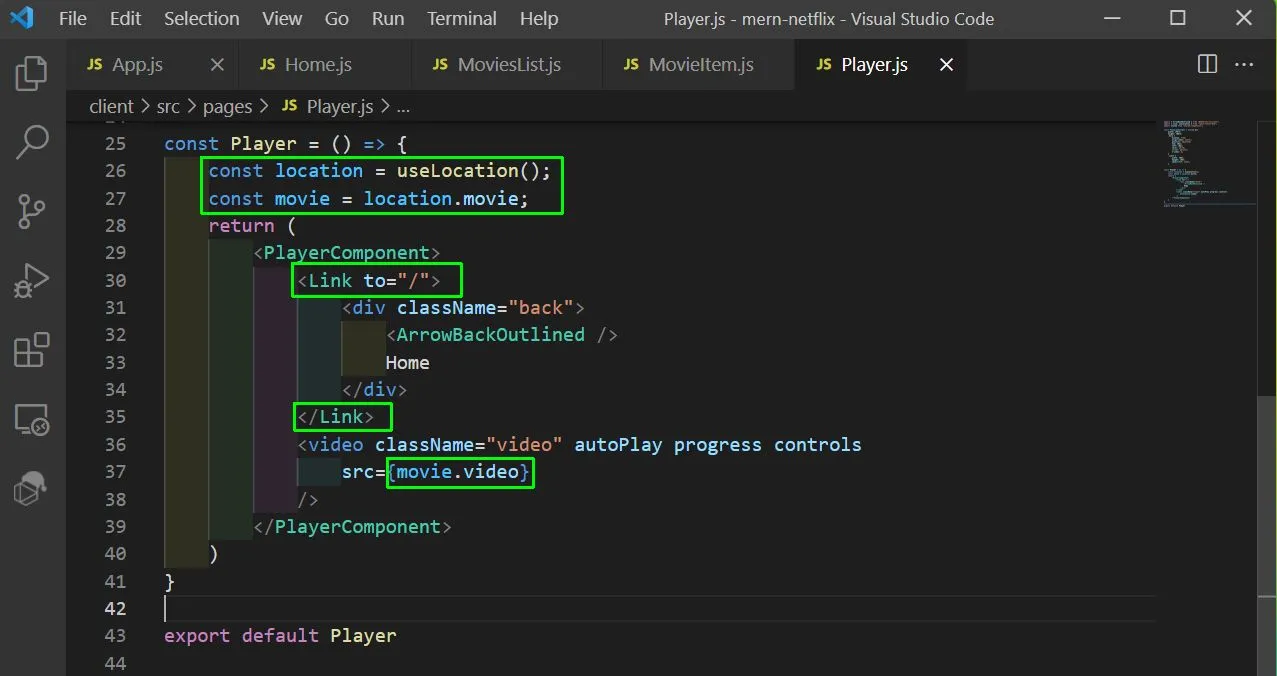
Now, in the Player.js file first import Link and useLocation from reat-router-dom.
import { Link, useLocation } from "react-router-dom";After that we will use the location, to get the movie and the video from it. We are also using the Link to go back to Home page.
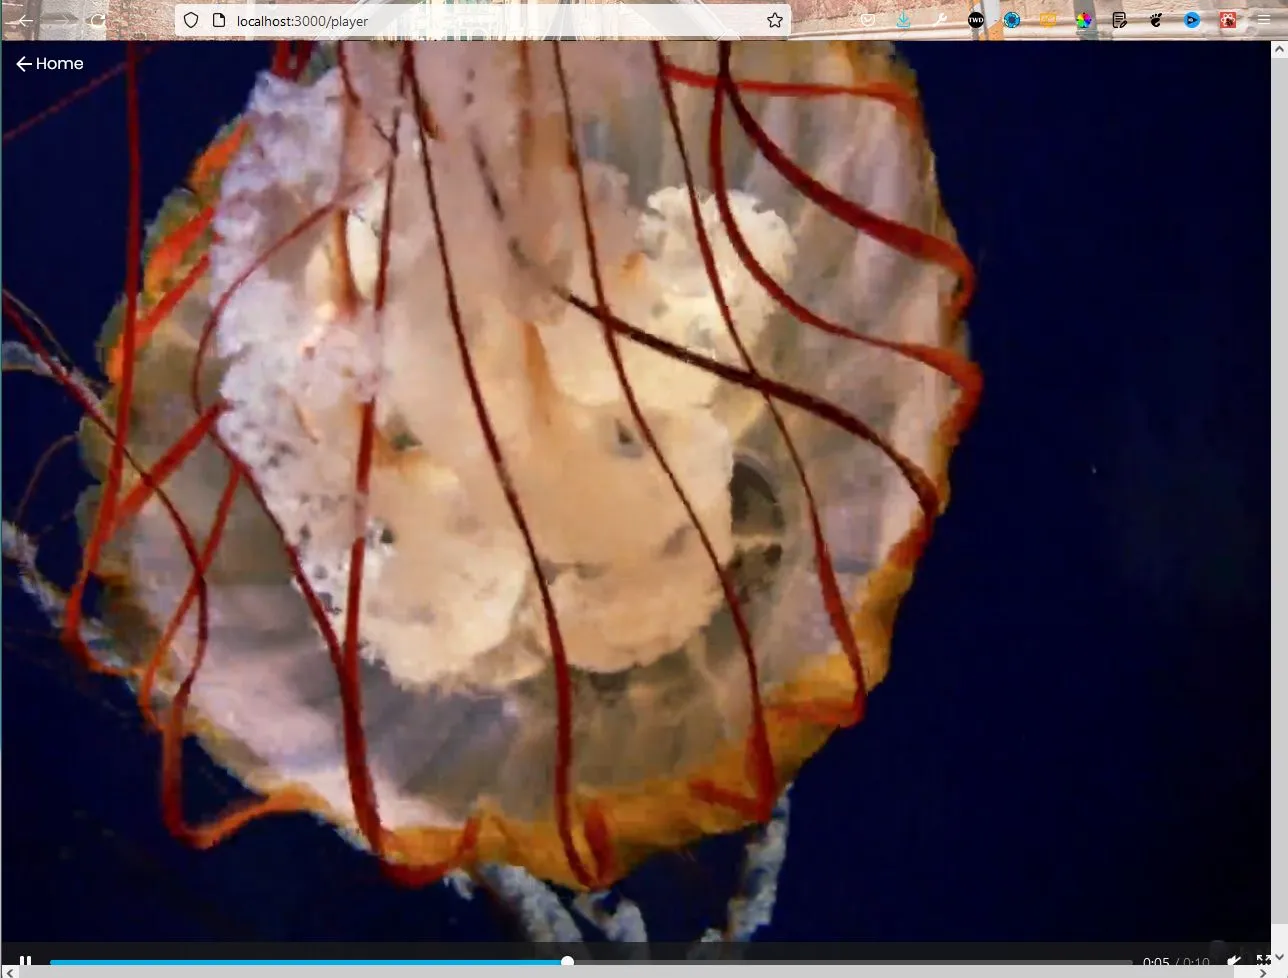
Now, clicking on any trailer will play that movie in the player.
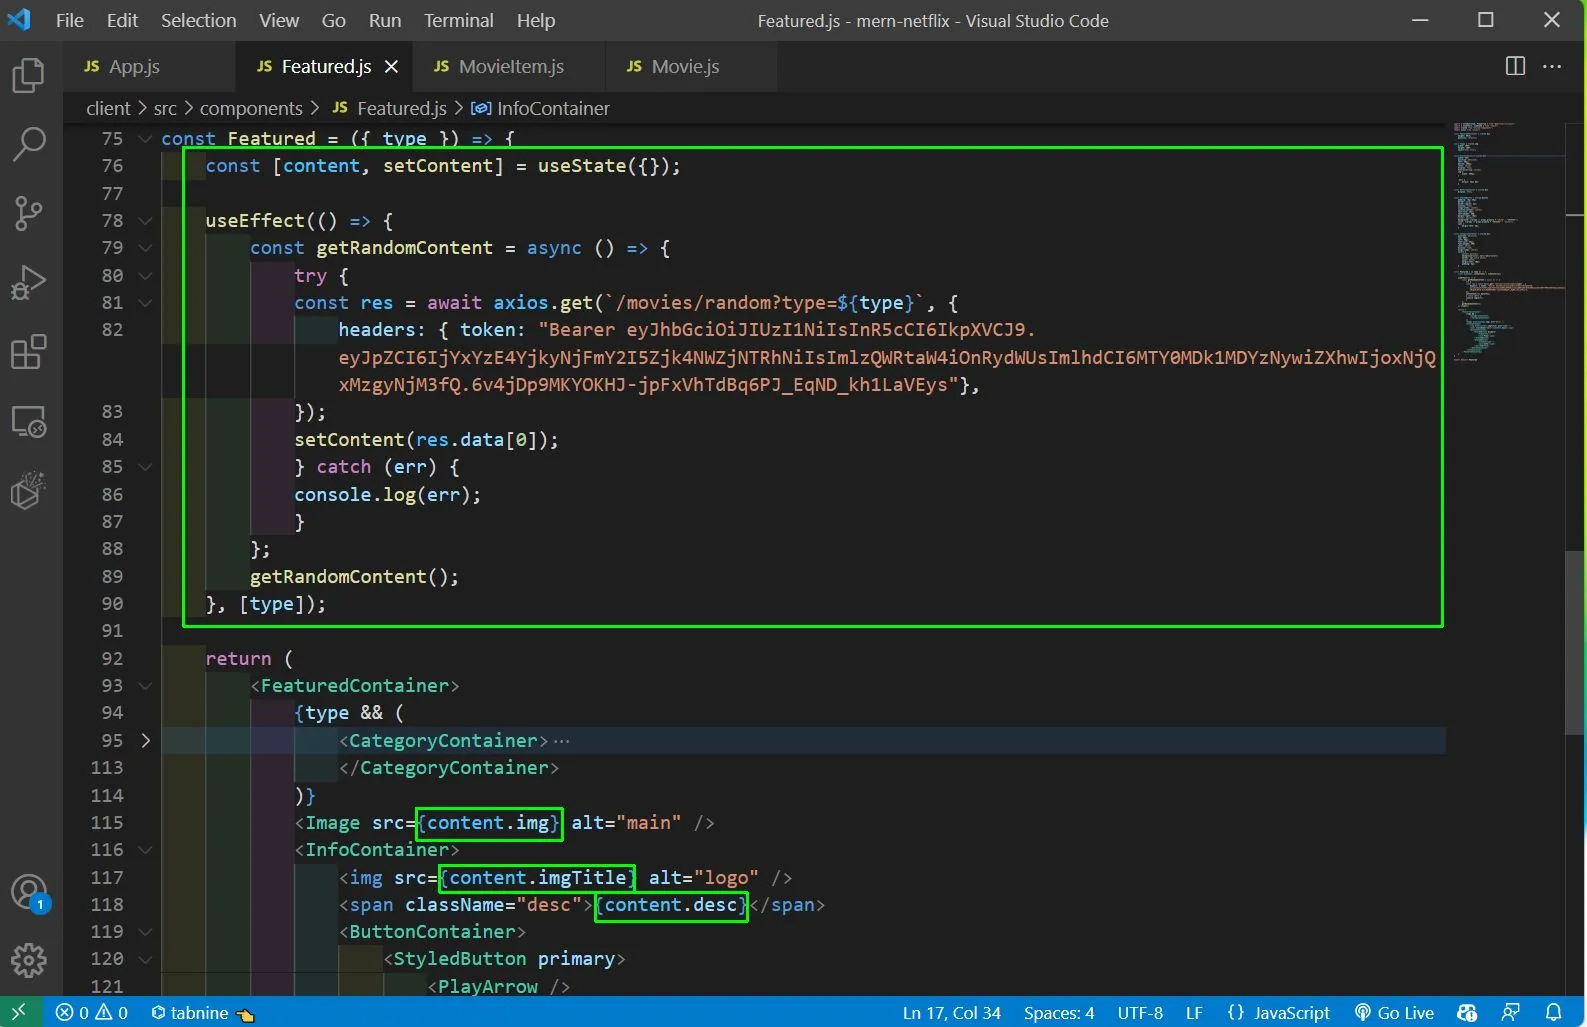
Finally, we will change the Featured.js file, to show the featured movies from movies or series list. First import these in the Featured.js file.
    import { useEffect, useState } from "react";
    import axios from "axios";
Now, we will add the below content in Featured.js file. Here, we are again hitting the movies endpoint and getting the random movies. If the series is passed as type, we will get the series.
After that inside return, we have removed the hard-coded data and getting the img, imgTitle and desc from the API endpoint.
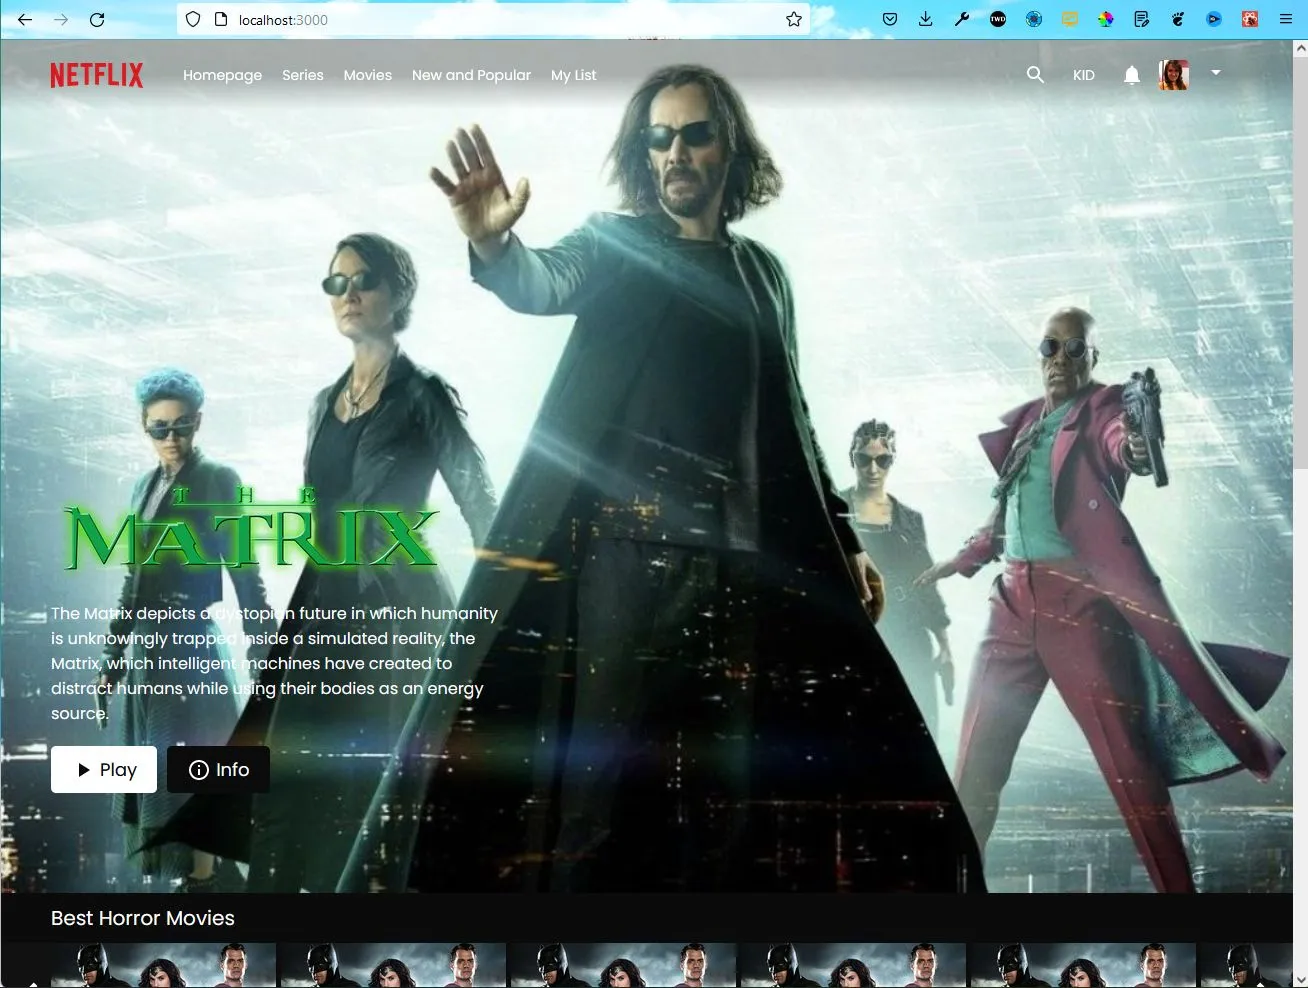
Now, we when we go to homepage a random image is been shown from the API endpoint.
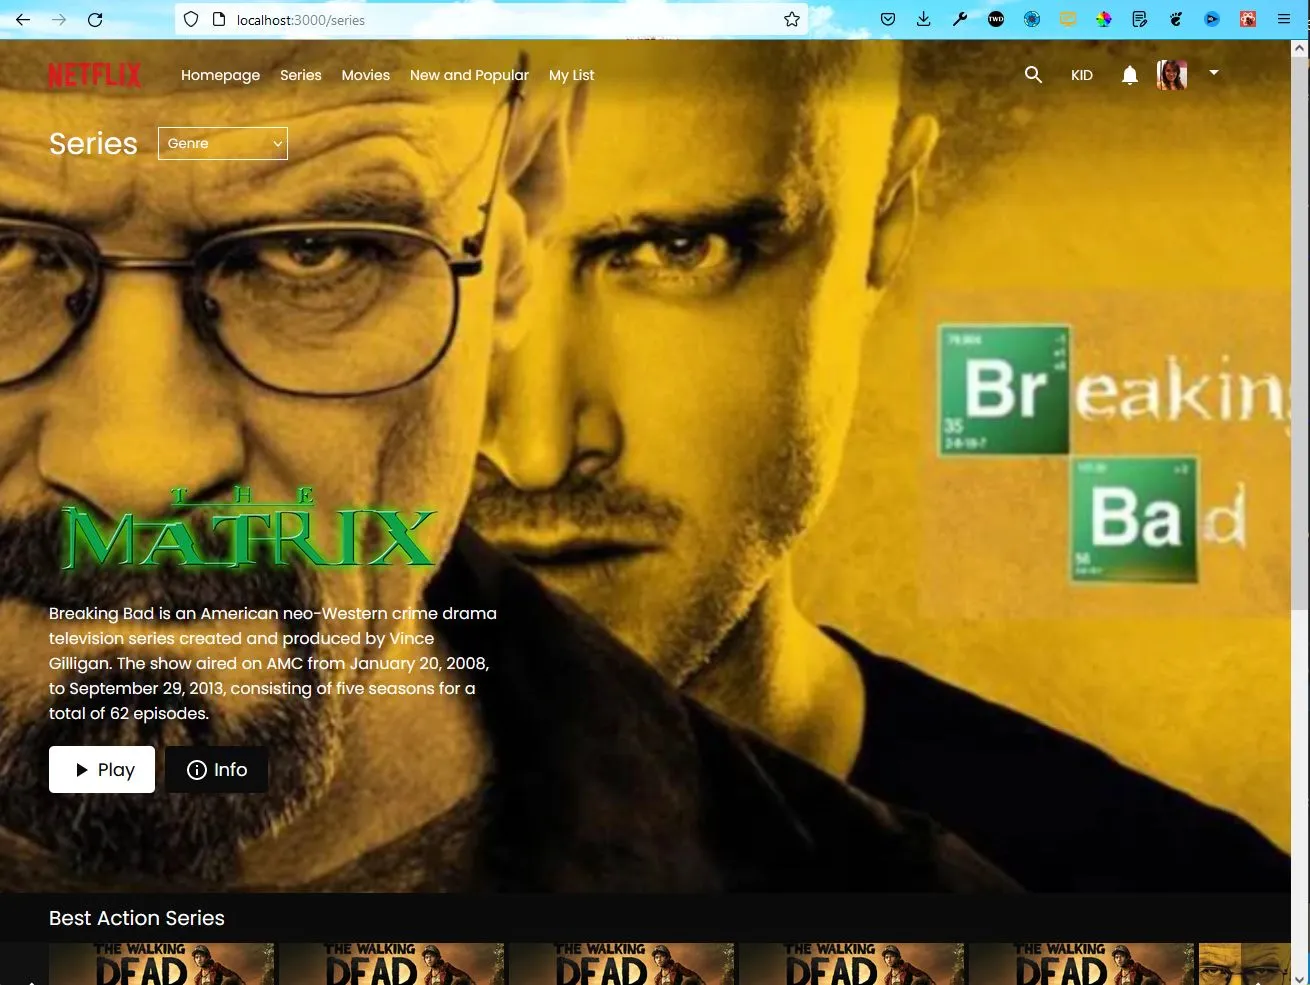
Also, the series page shows a random series image.
This completes our integration of frontend with backend. In the next part, we will integrate backend with Admin API, so that we can do all admin functionalities like posting new movies and getting the details of number of users.