Learn Vue.js by Creating a Basic App
VueJS
In this basic project we will learn all about VueJS. This project have been inspired by this awesome Udemy course by Maximillian.
To start with this project get the basic boiler plate of a VueJS app from this file.
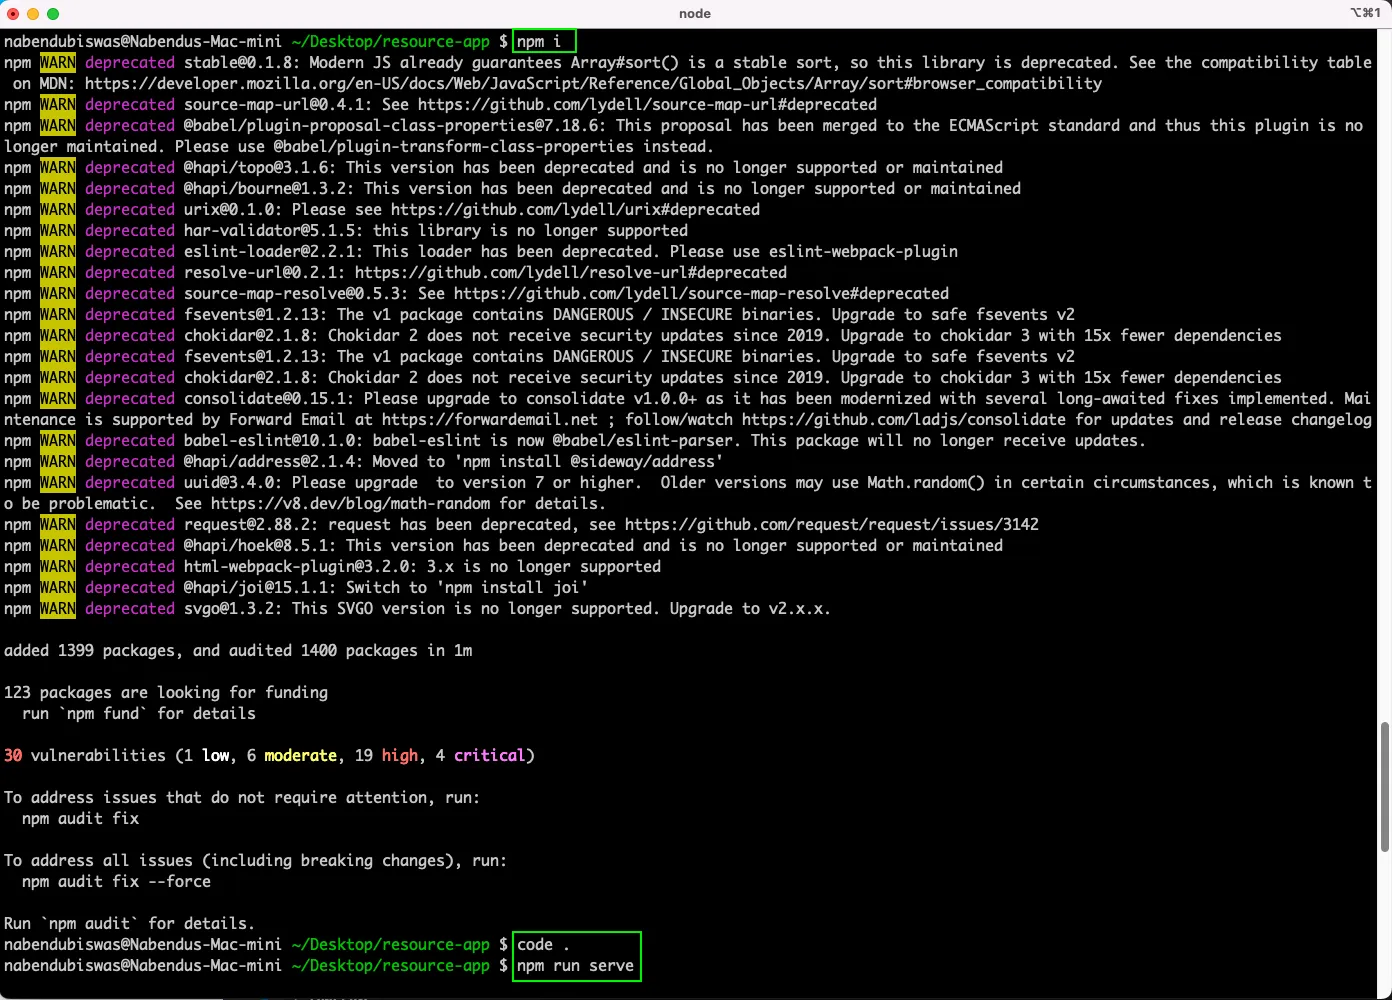
After extracting the zip file, open the folder in terminal. Then do npm i to install all the dependencies.
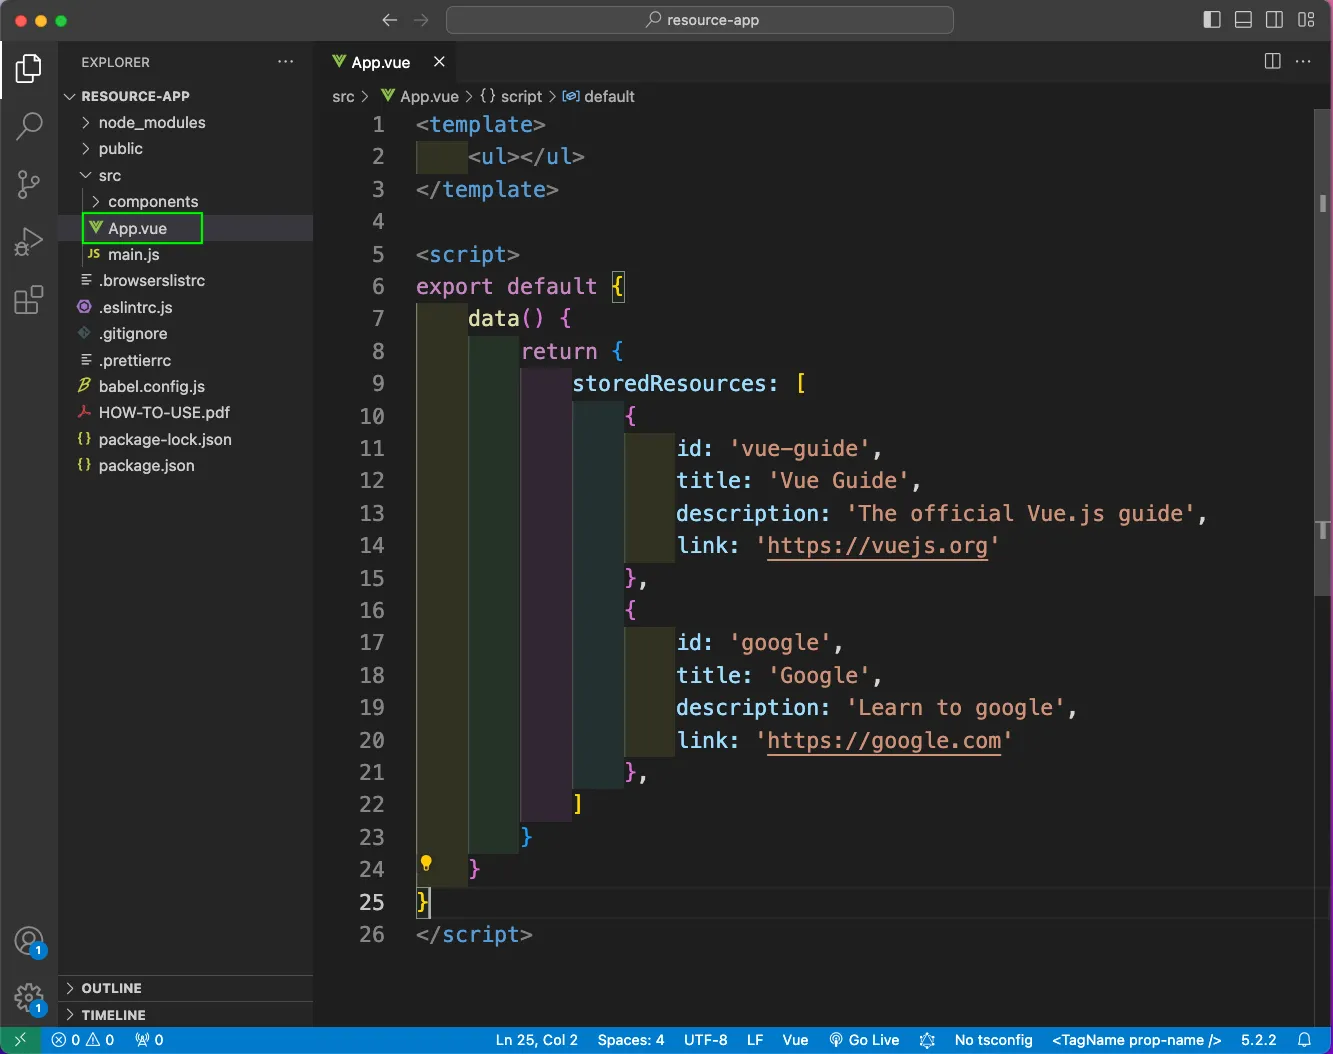
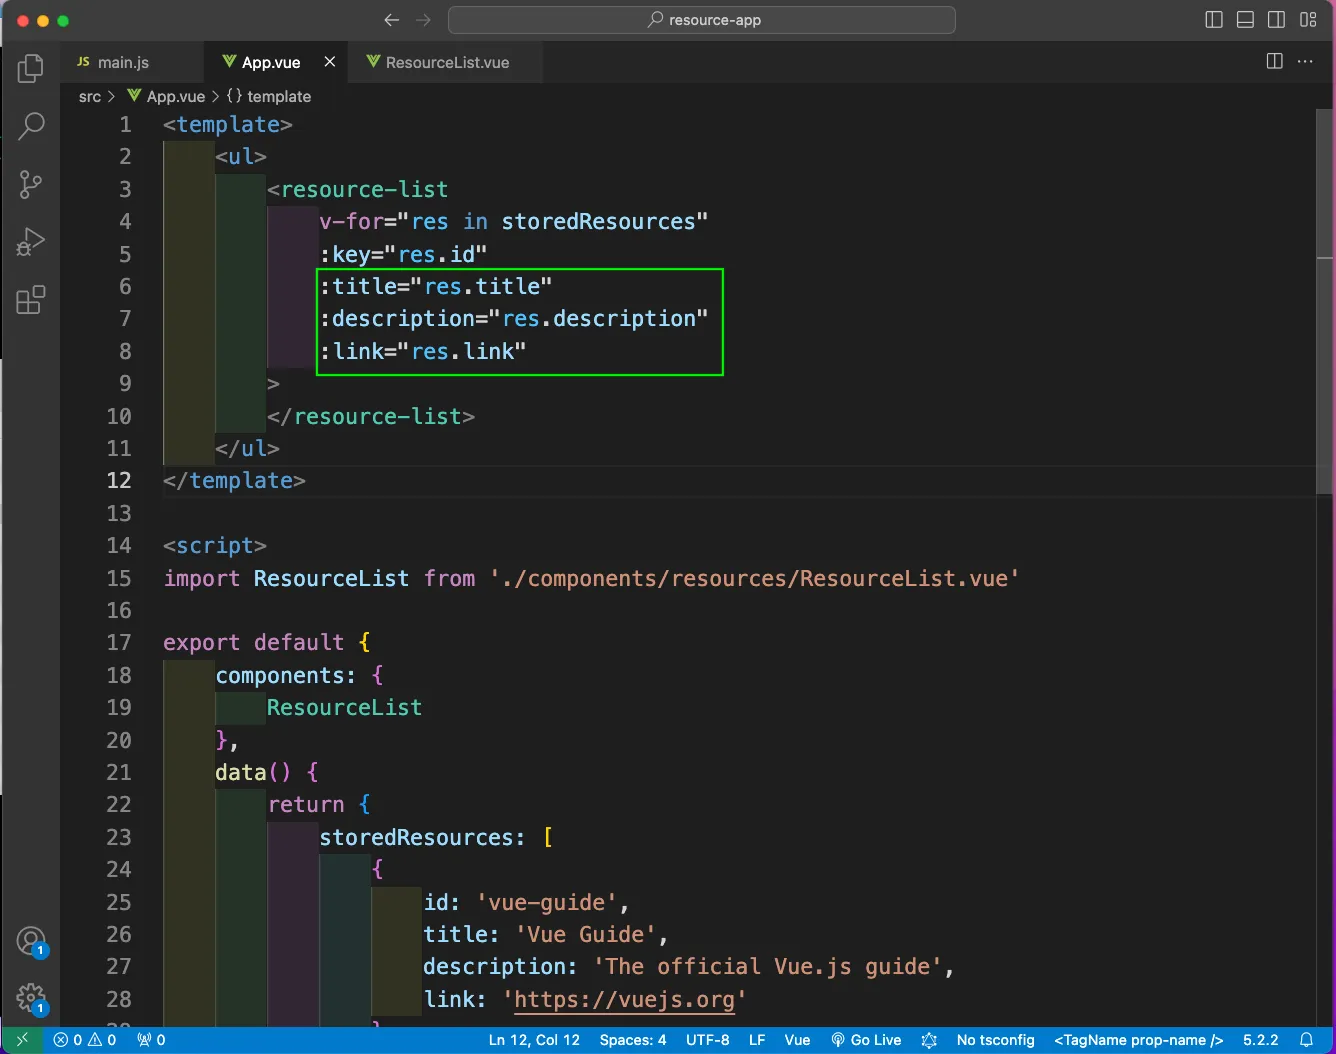
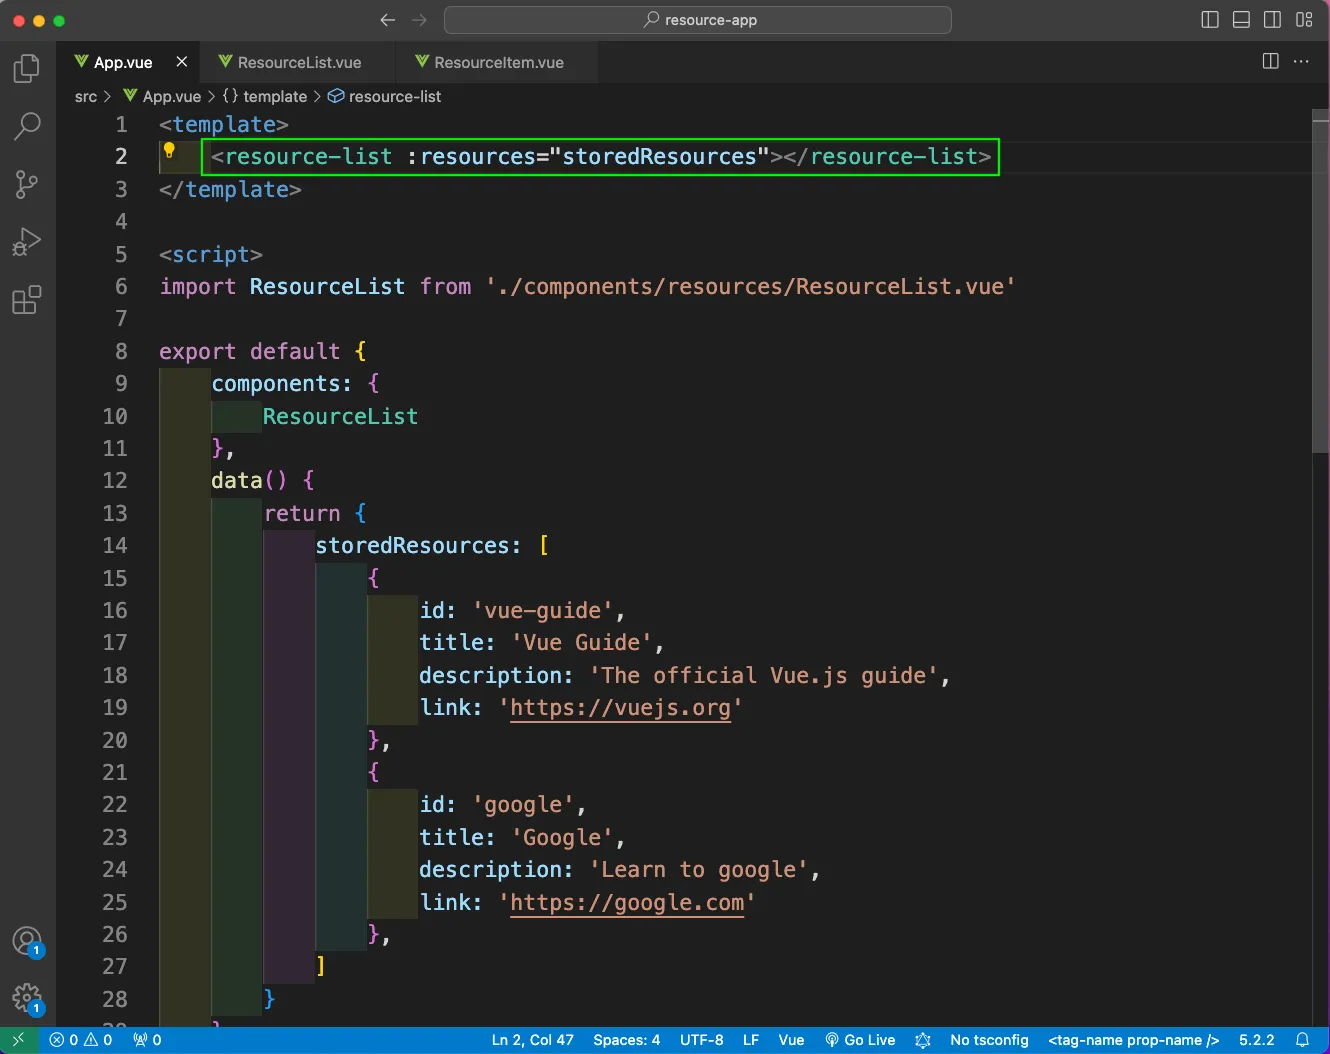
Now, in the App.vue file, inside the script, we will have our data(). Here, we are returning and array of object called storedResources.
Now, we will add a component ResourceList in App.vue. From the template we will use a v-for to loop through the storedResources and call the resource-list.
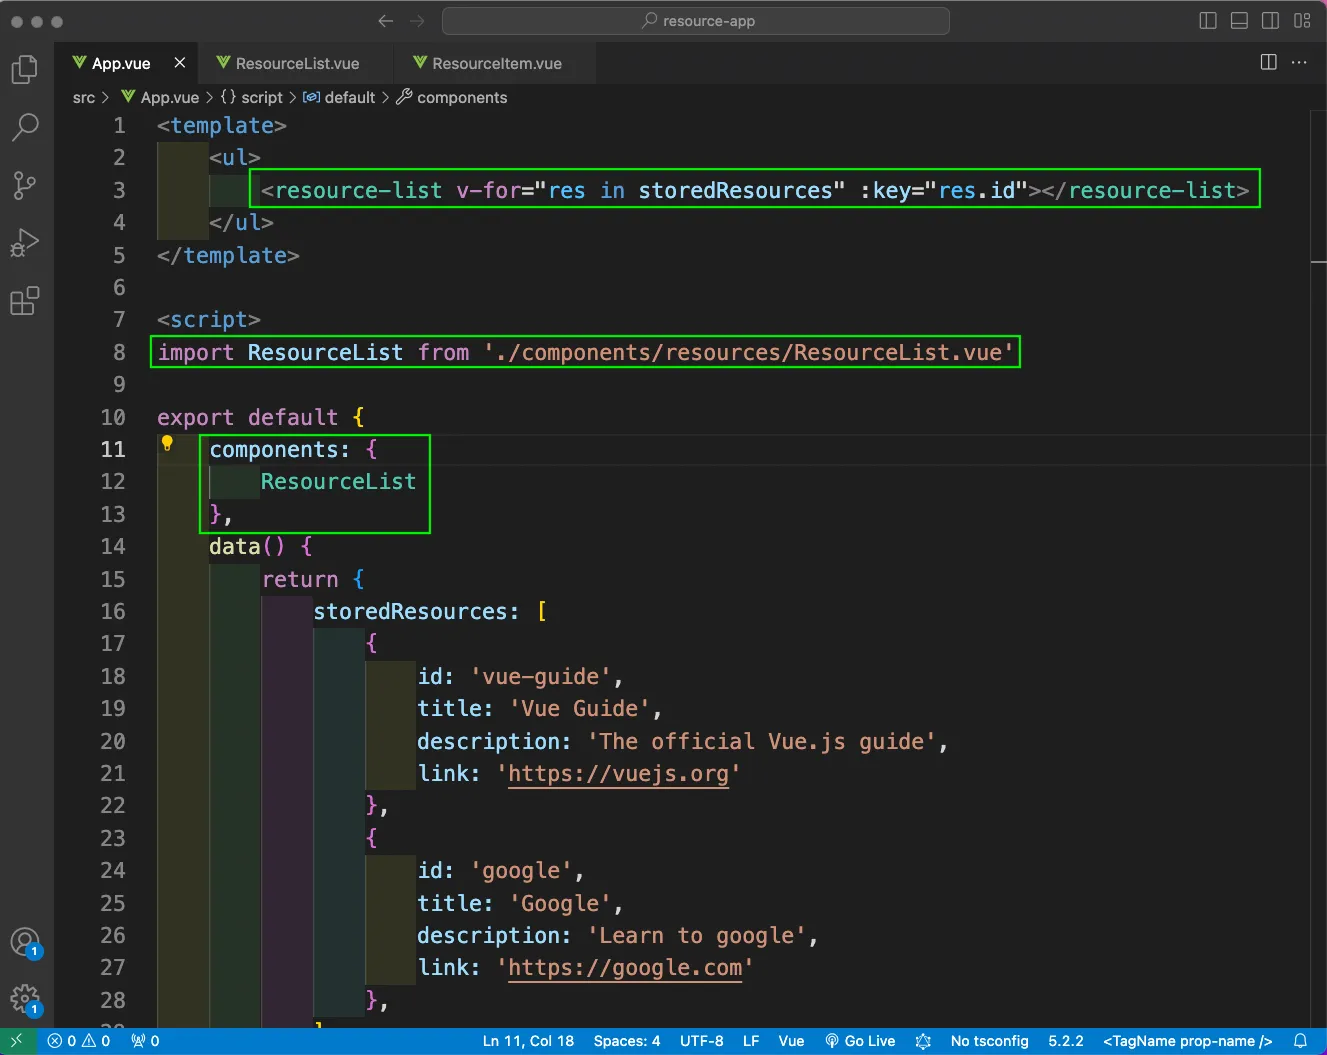
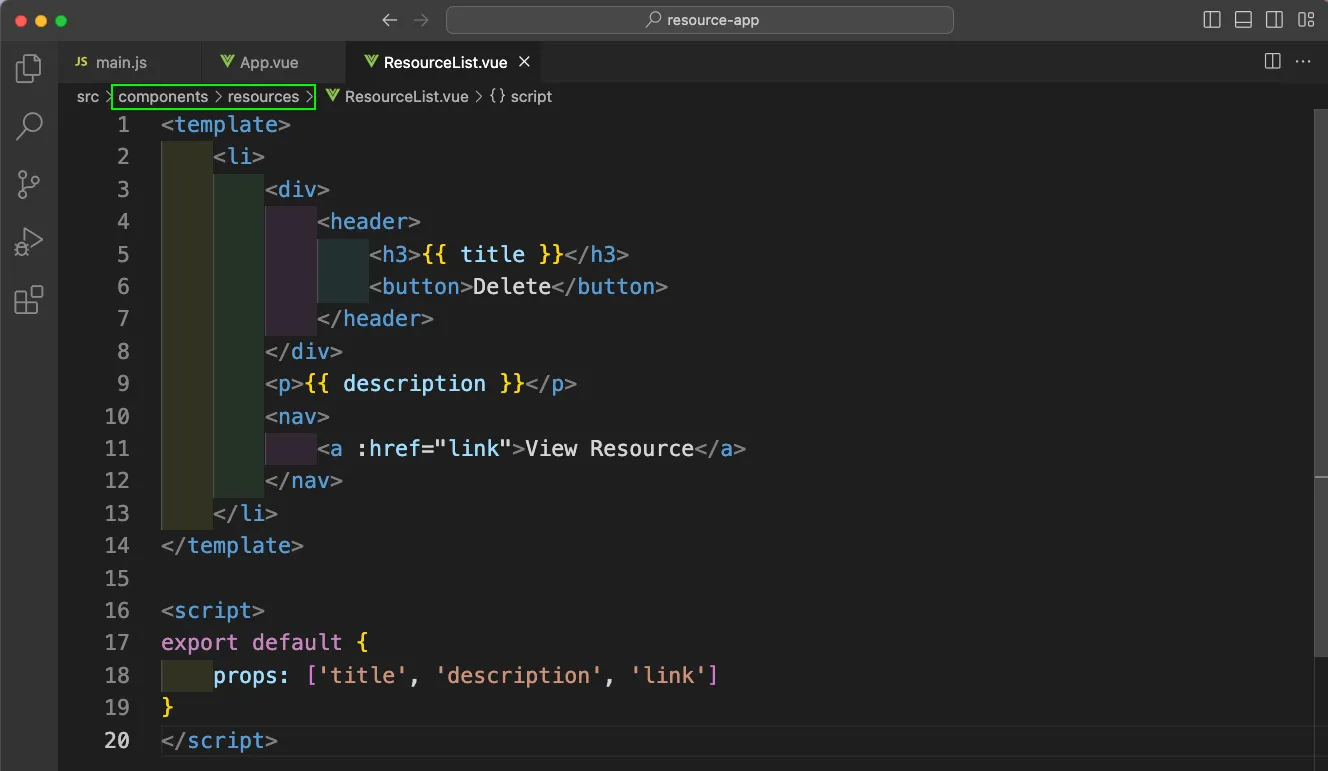
Now, we will create a components folder inside the src folder. And inside it we will create the resources folder. Here, we will create a ResourceList.vue file.
Here, we are taking the title, description and link from the props and showing it inside the template.
Back in the App.vue we will pass the title, description and link props. Notice, the : at the start, which is to bind the data.
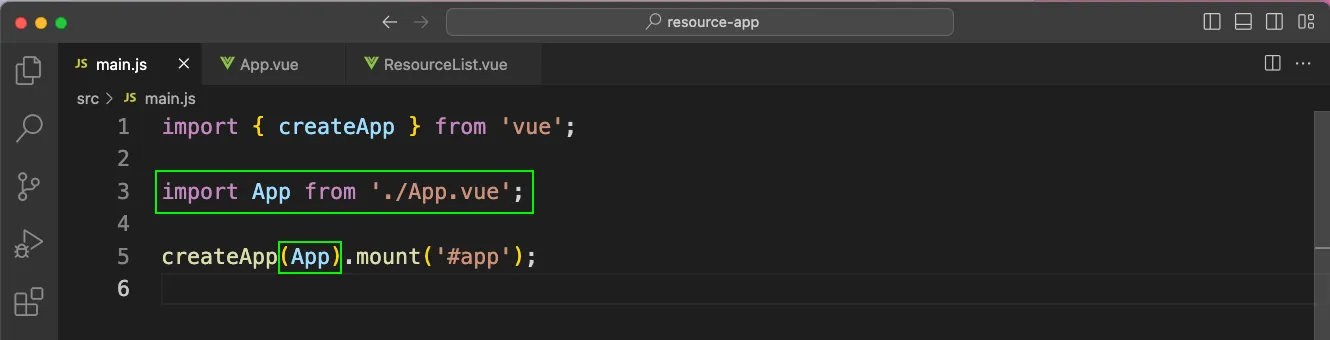
The starting point of our VueJS app is main.js. So, in it we will add our App component.
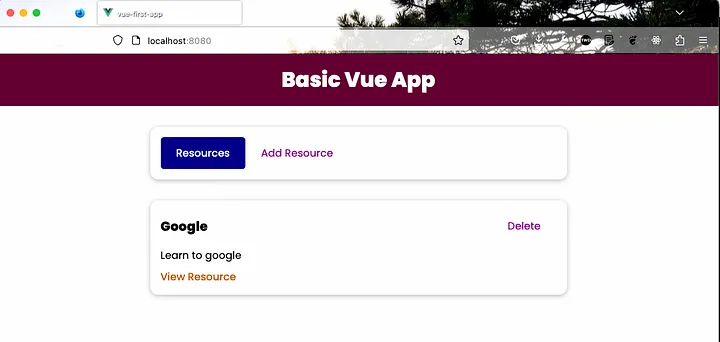
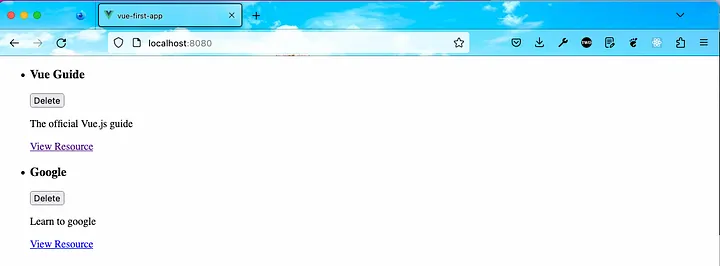
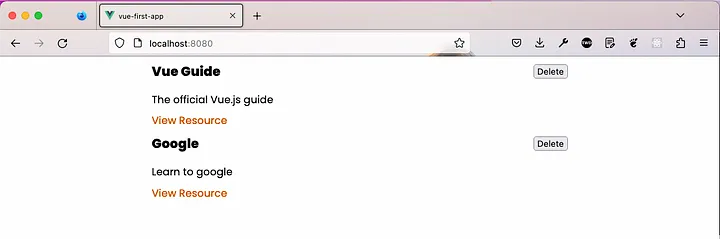
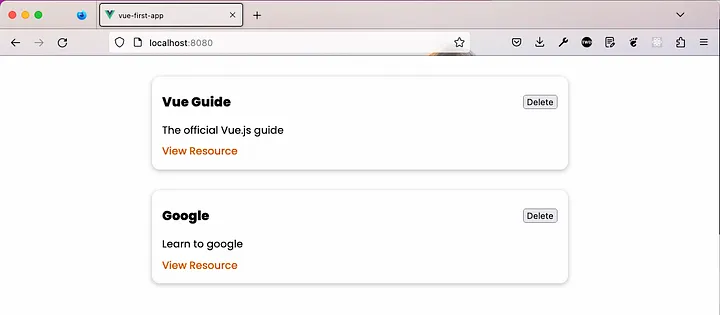
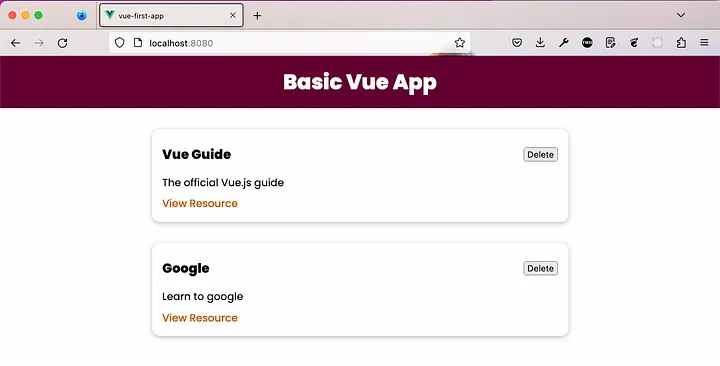
Now, in http://localhost:8080/ we will see the data.
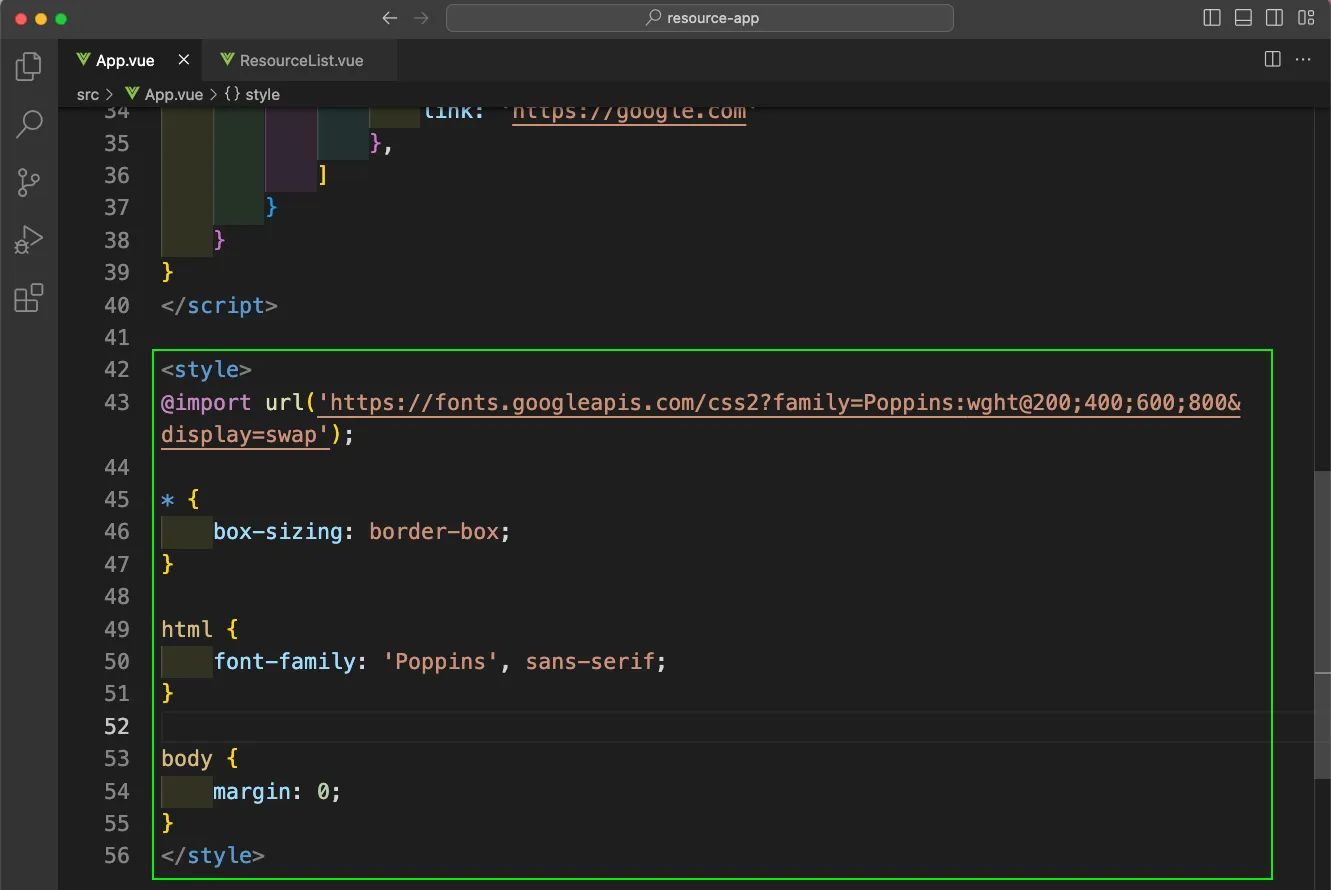
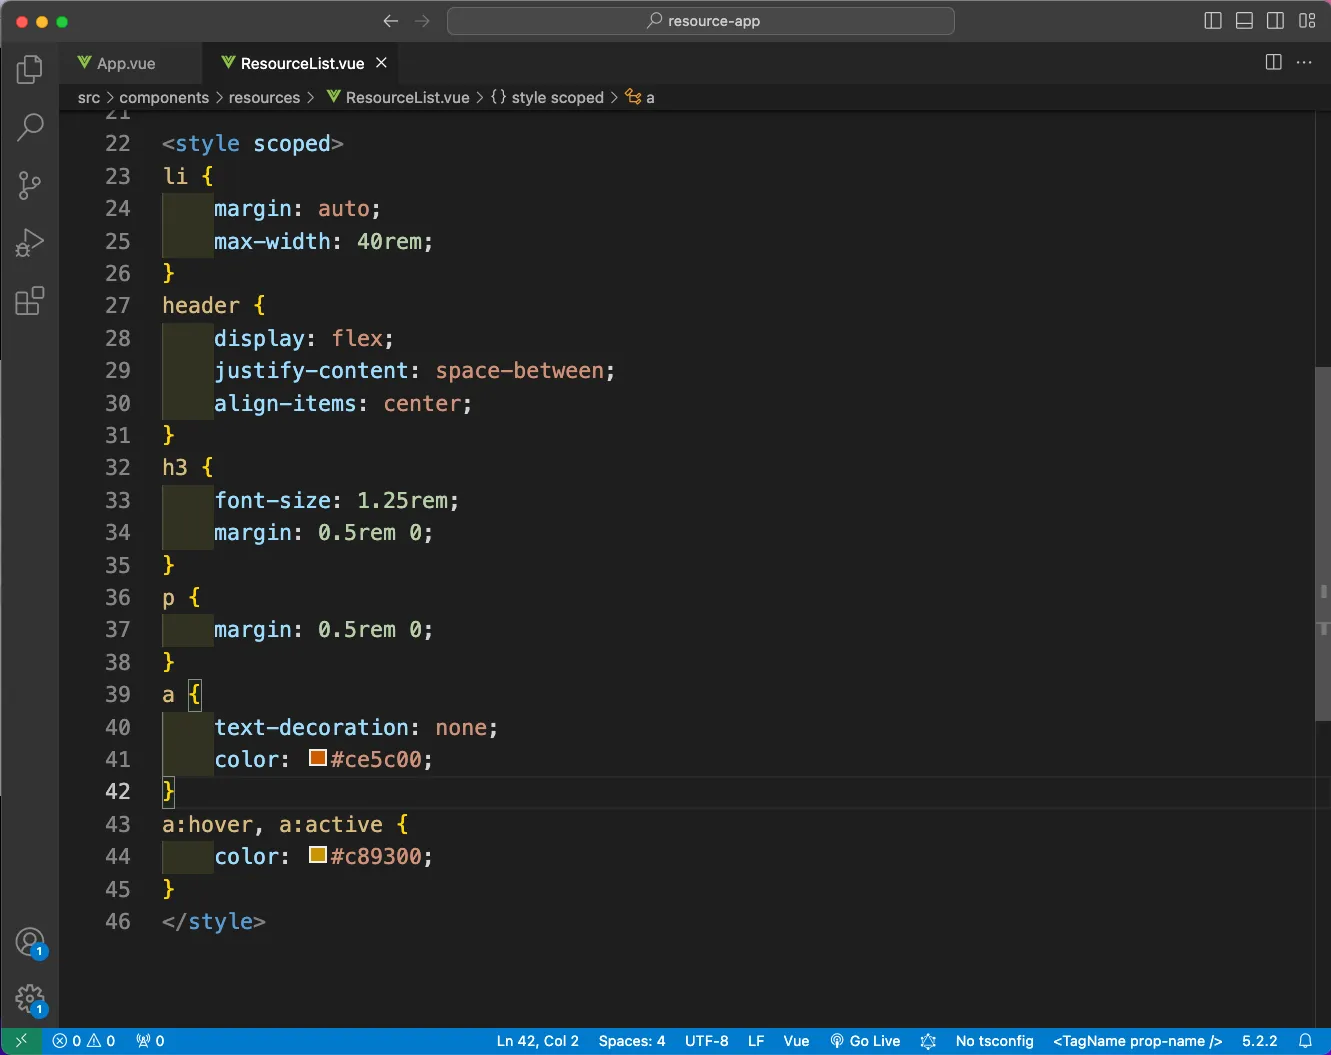
We will also add styles in the ResourceList.vue file. Here, we have added the scoped tag in style. It means the styles will be restricted to this file only.
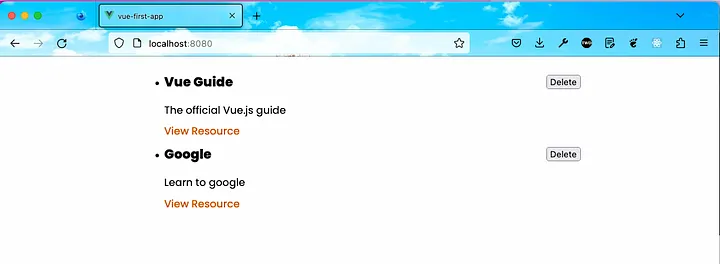
Now, in http://localhost:8080/ our app will have a little of style.
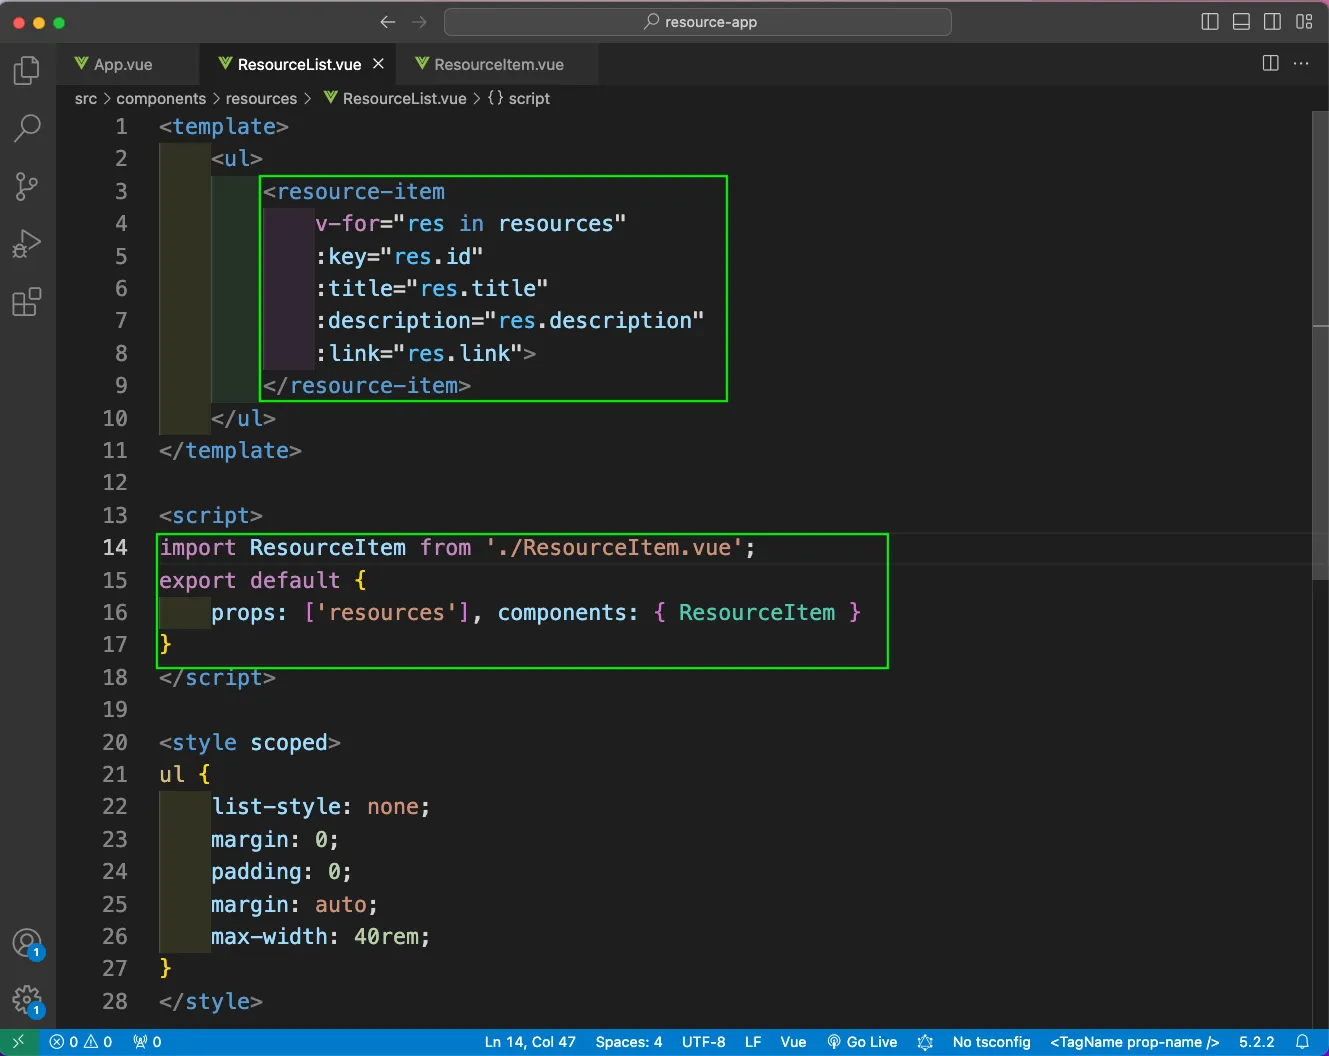
Now, we will refactor our code to have the individual items in a new file of ResourceItem.vue. So, we have moved all of the logic of ResourceList top this file.
Now, in the ResourceList.vue file we will call the ResourceItem component, with all props passed.

Now, in the App.vue file, we will call the resource-list component, with the storedResources been passed as props.
Our app behaves as usual with no error.
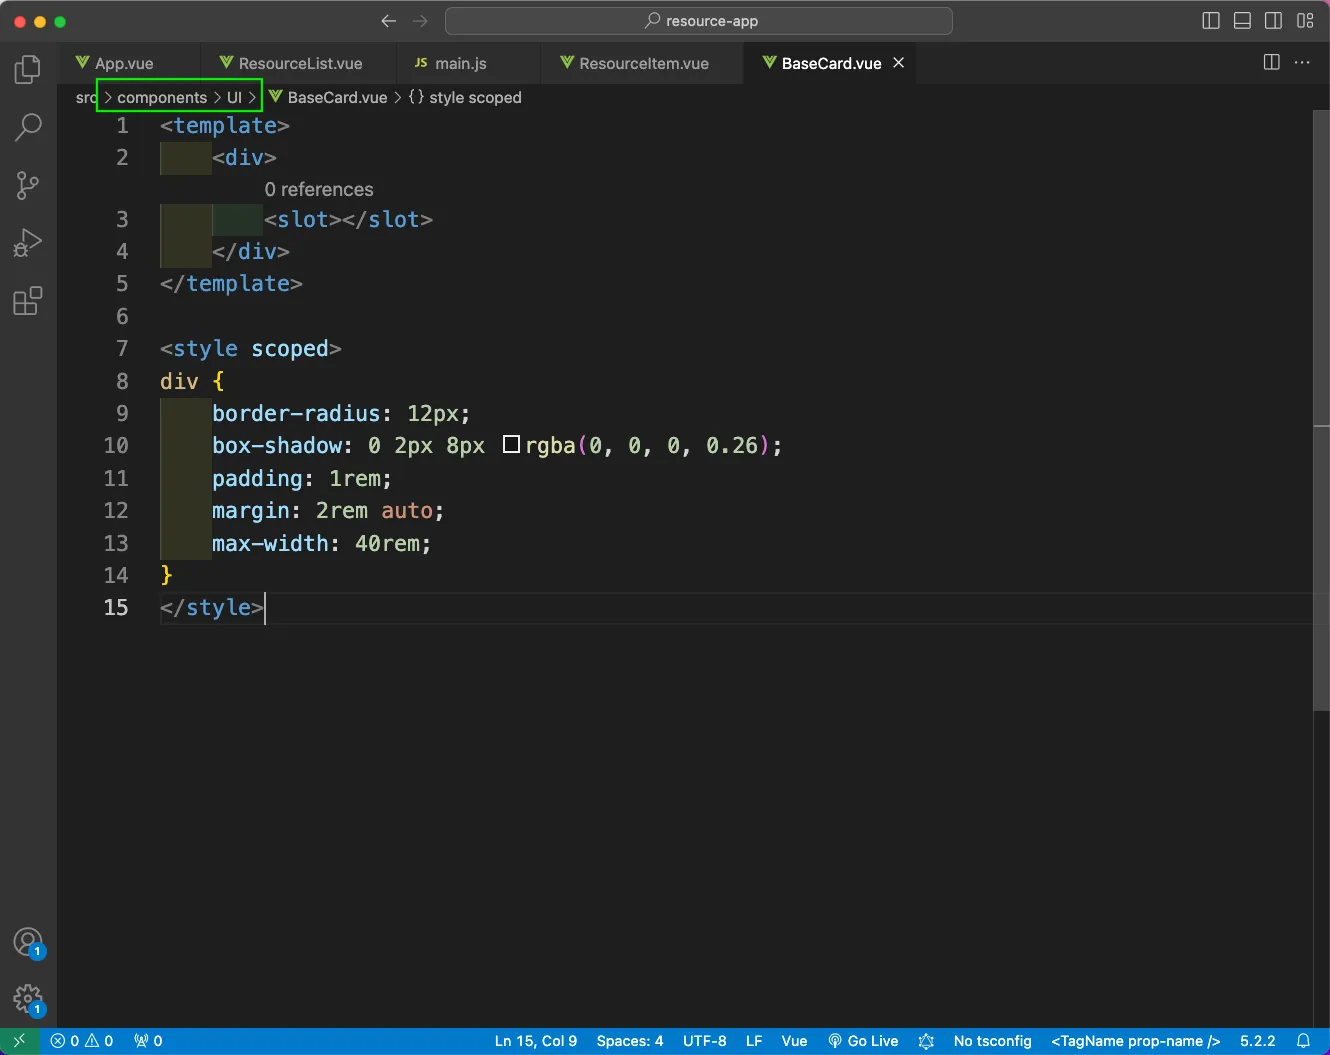
Now, inside the components, we will create an UI folder and a BaseCard.vue file inside it. Here, we have the basic style and a slot. Inside the slot we can pass other component.
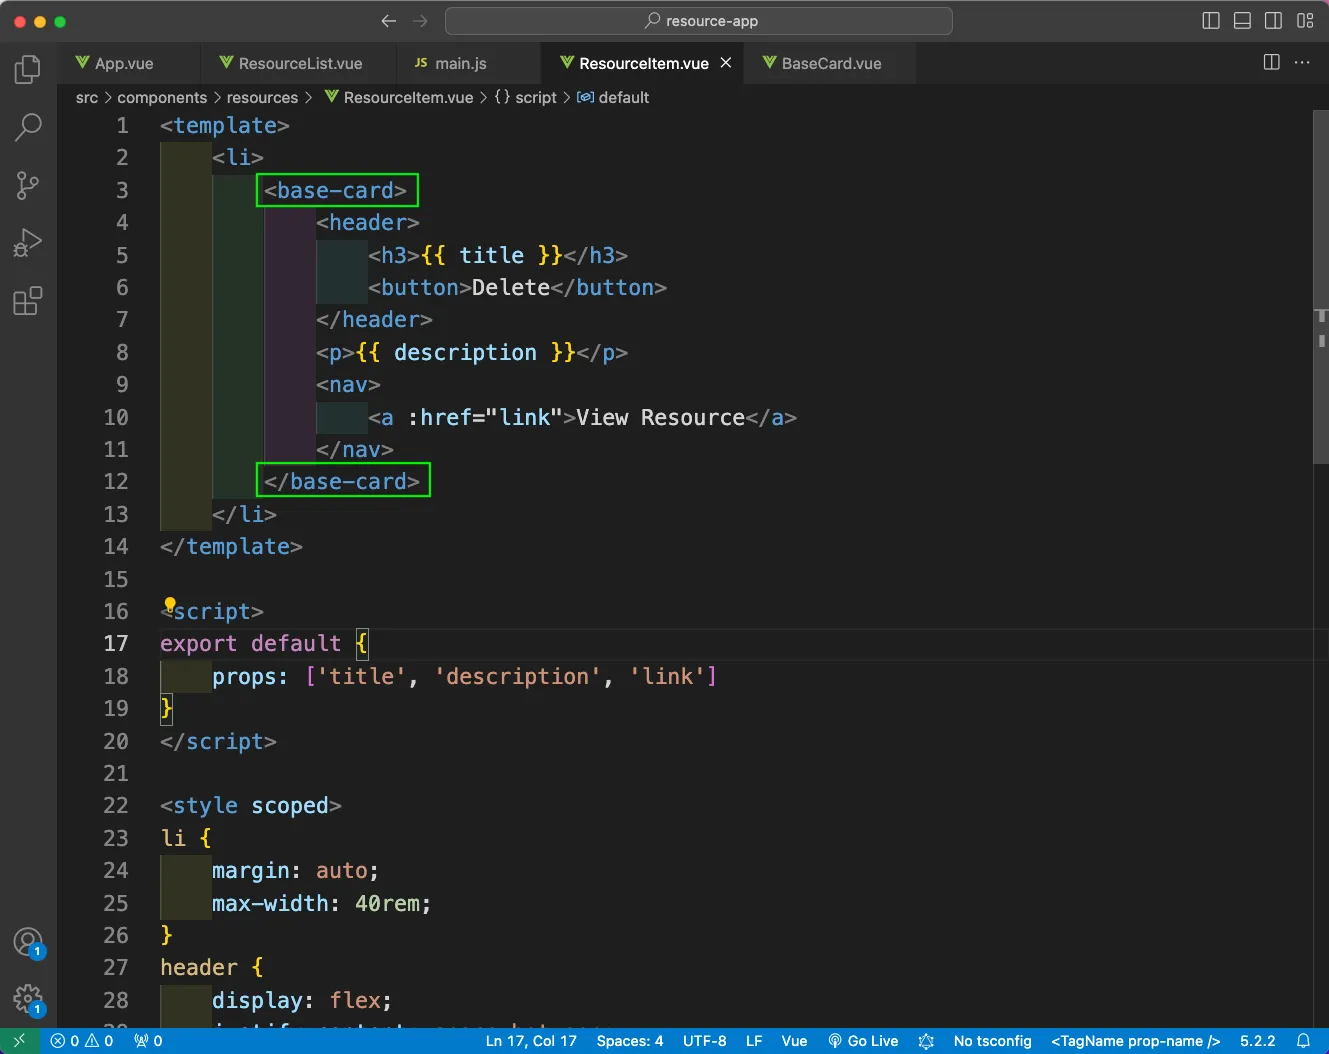
Now, in the ResourceItem.vue component, we will wrap everything with this base-card component.
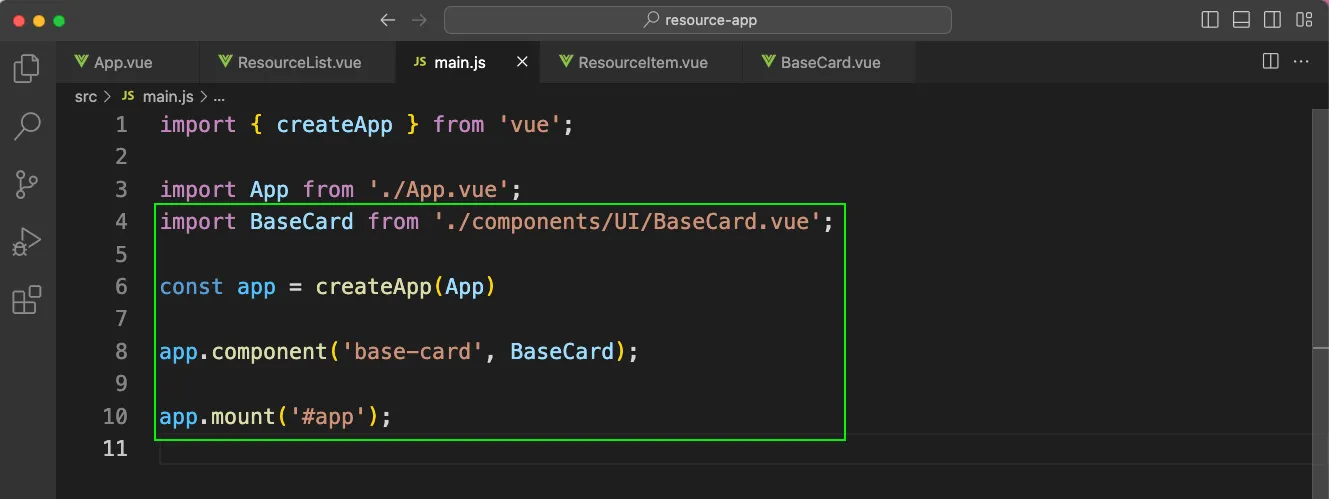
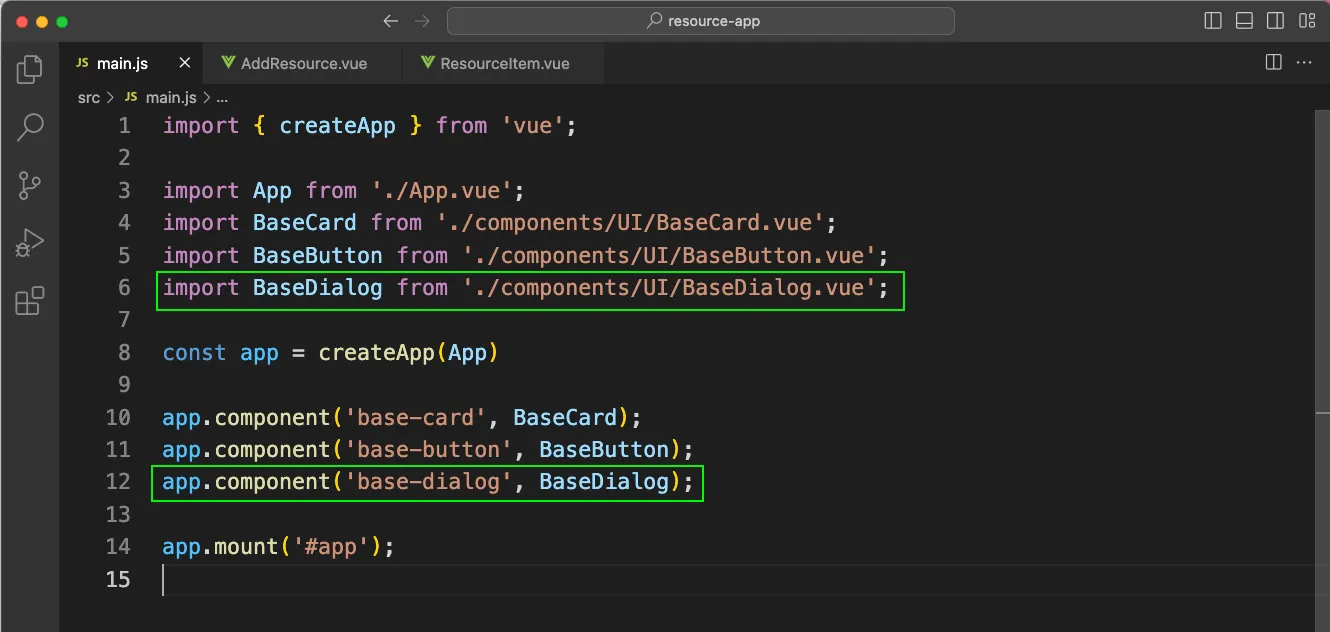
We will import this BaseCard component in the main.js file, so that we can use it in other components also.
Now, we will get nice styles for the individual items.
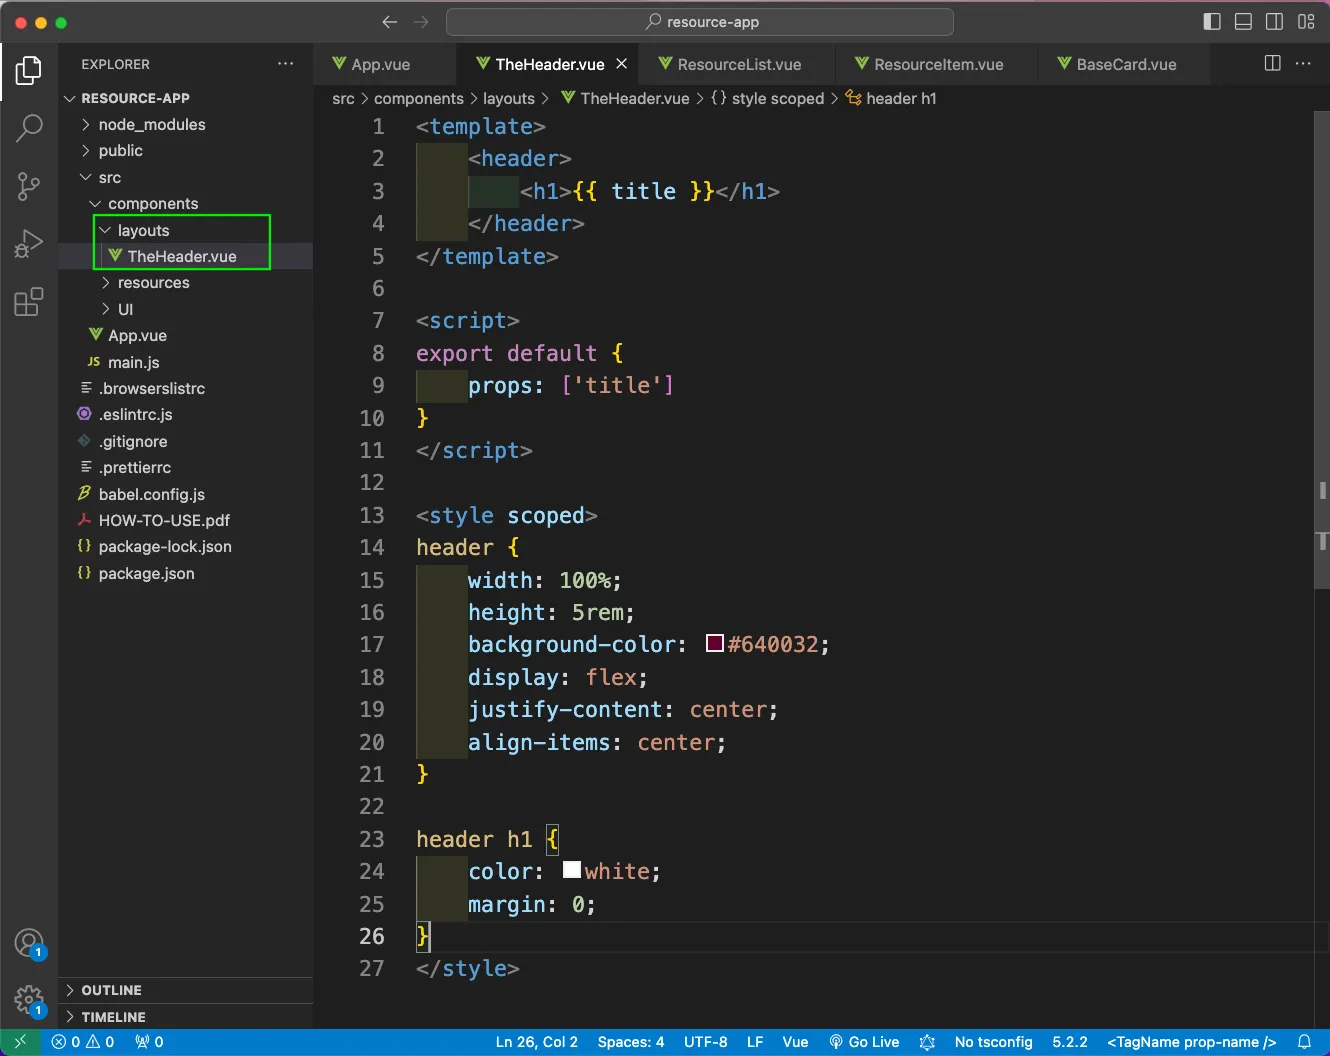
Next, we will create a layouts folder inside the components folder. Inside it we will create TheHeader.vue file. Here, we are taking the title as props and some basic header styling.
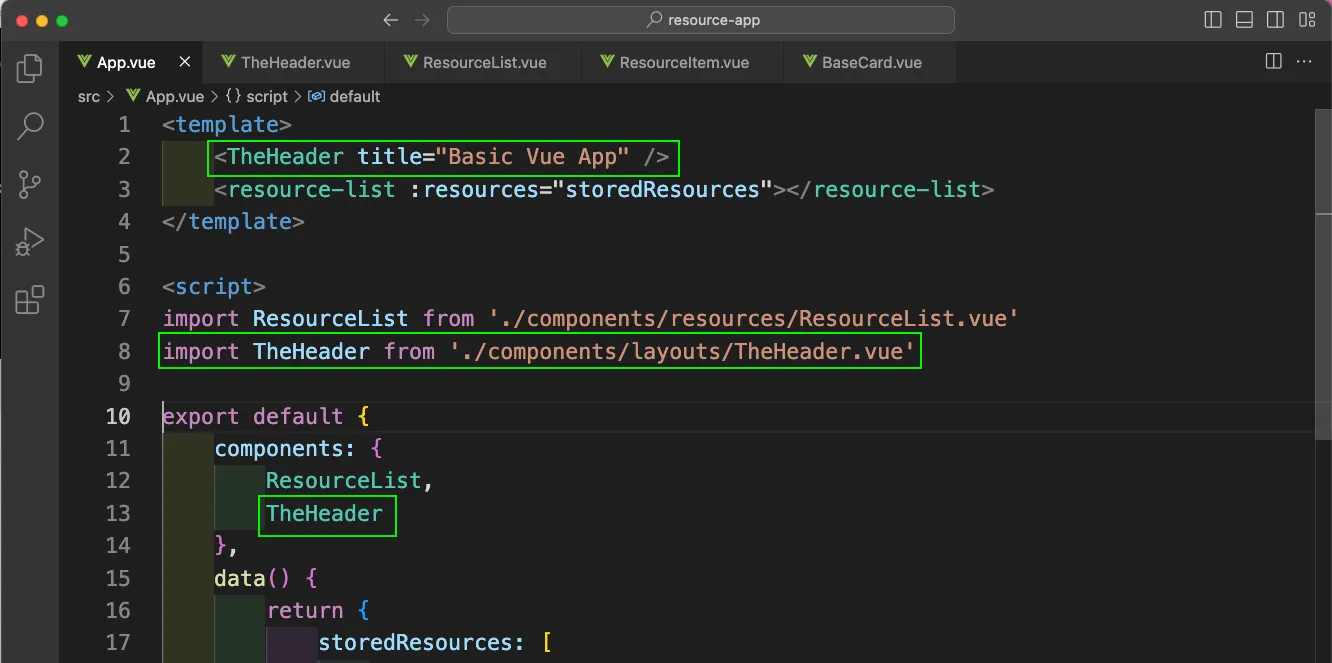
Now, we will add the TheHeader component in our App.vue file and also pass a title in it.
Now, we will get a nice Header in http://localhost:8080/
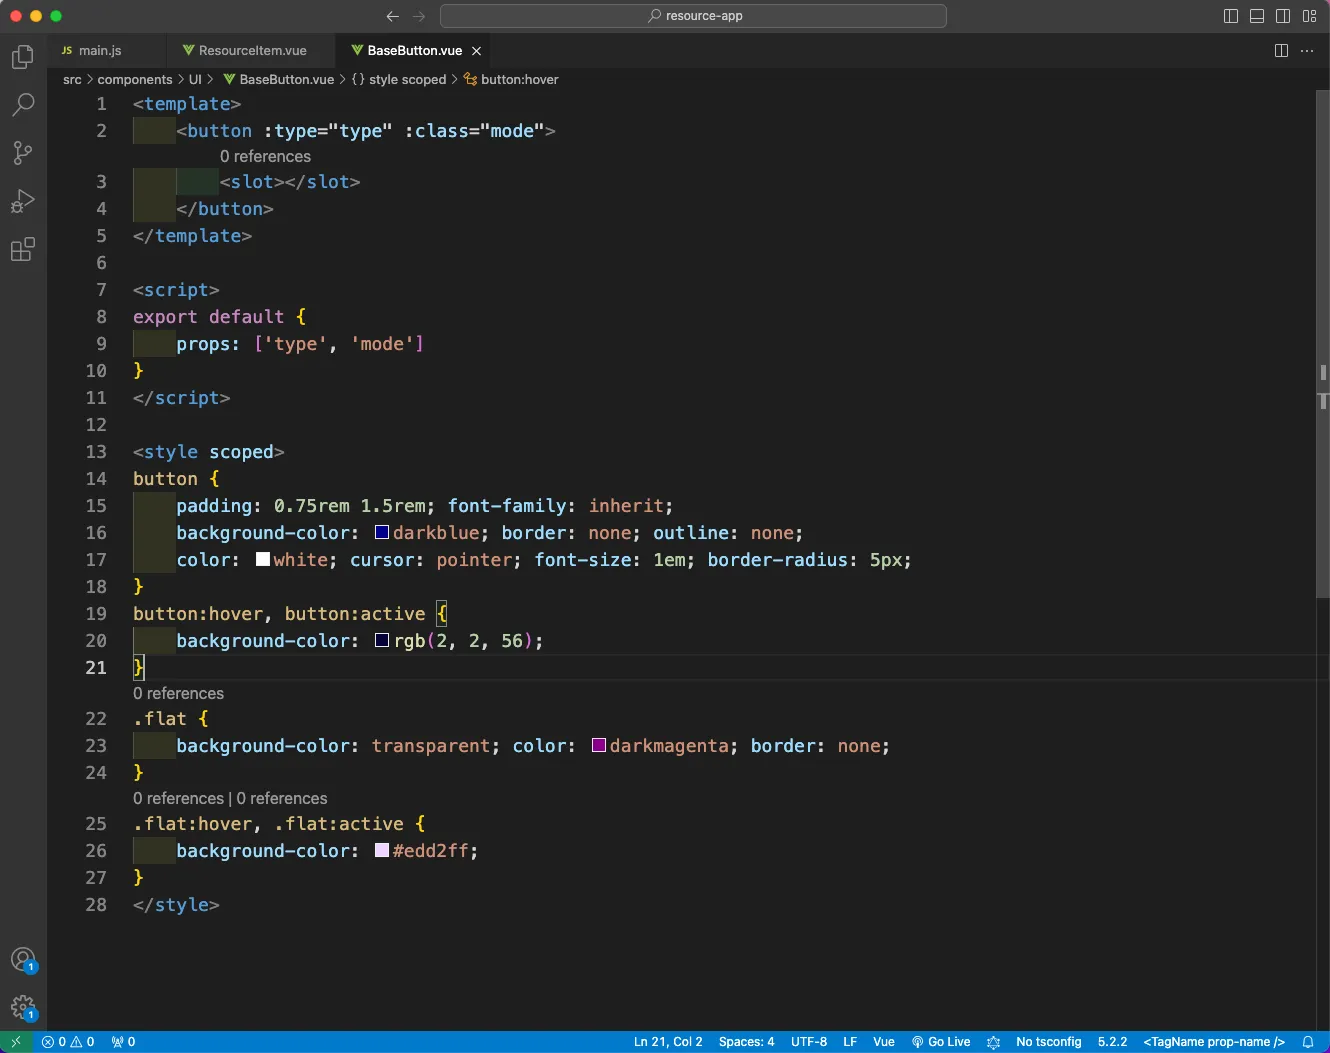
Now, we will create a BaseButton.vue file inside the UI folder. Here, we have the code for a generic button, which takes the props of type and mode. And also slot as children.
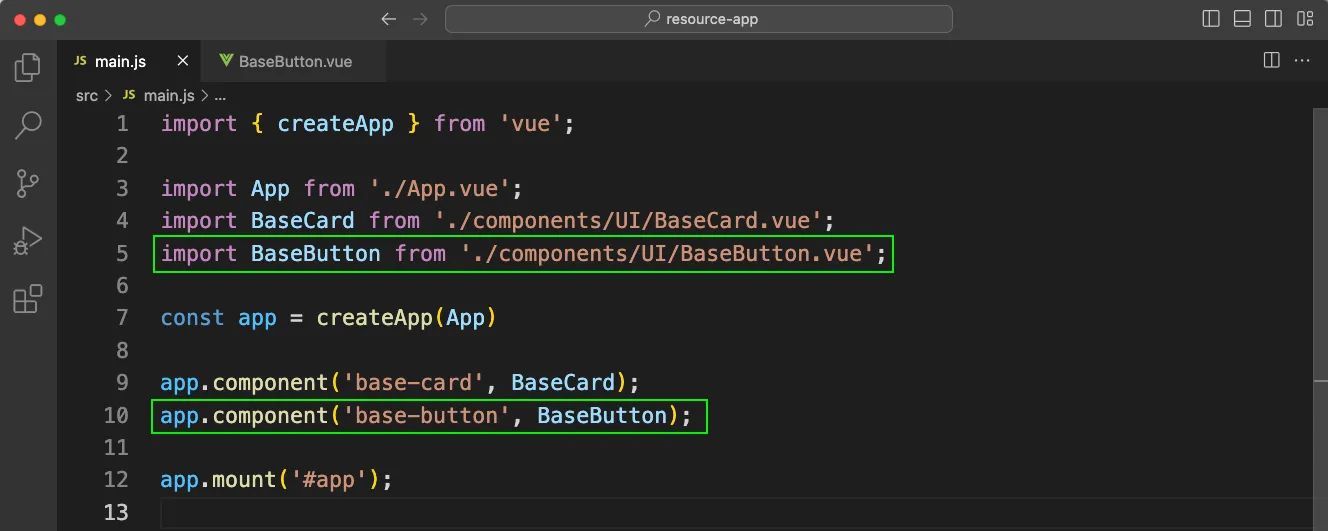
Again, we will add this BaseButton in the main.js file, so that it can be used in different part of the app.
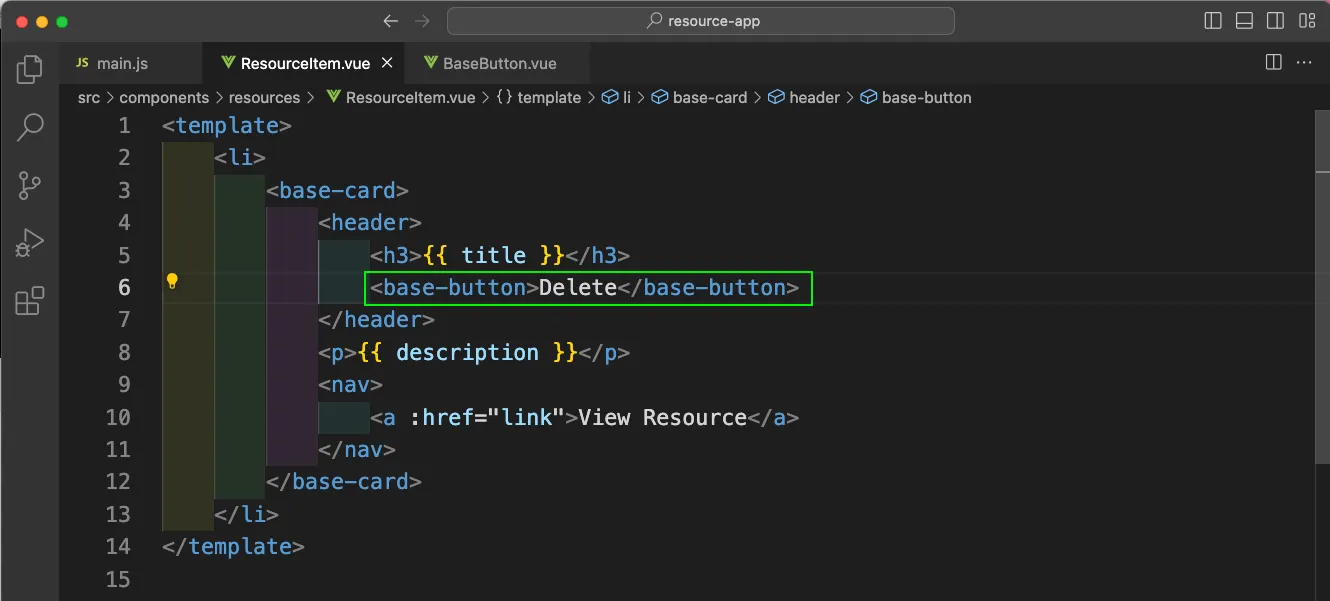
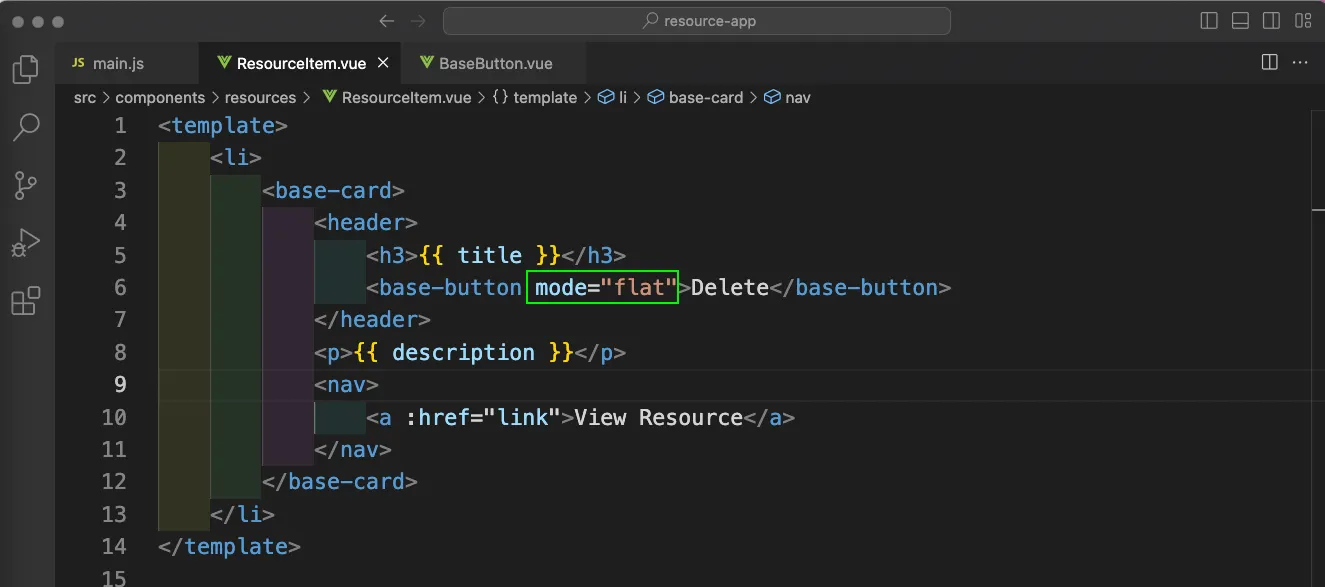
Now, inside the ResourceItem.vue file, we will add this base-button and pass Delete.
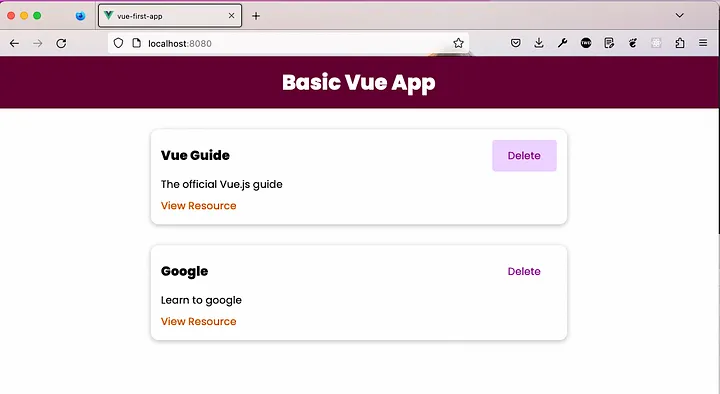
Now, we will see these nice looking button in our app.
We can also pass a prop of mode in the base-button in ResourceItem.vue file.
Now, our buttons have different styles in http://localhost:8080/
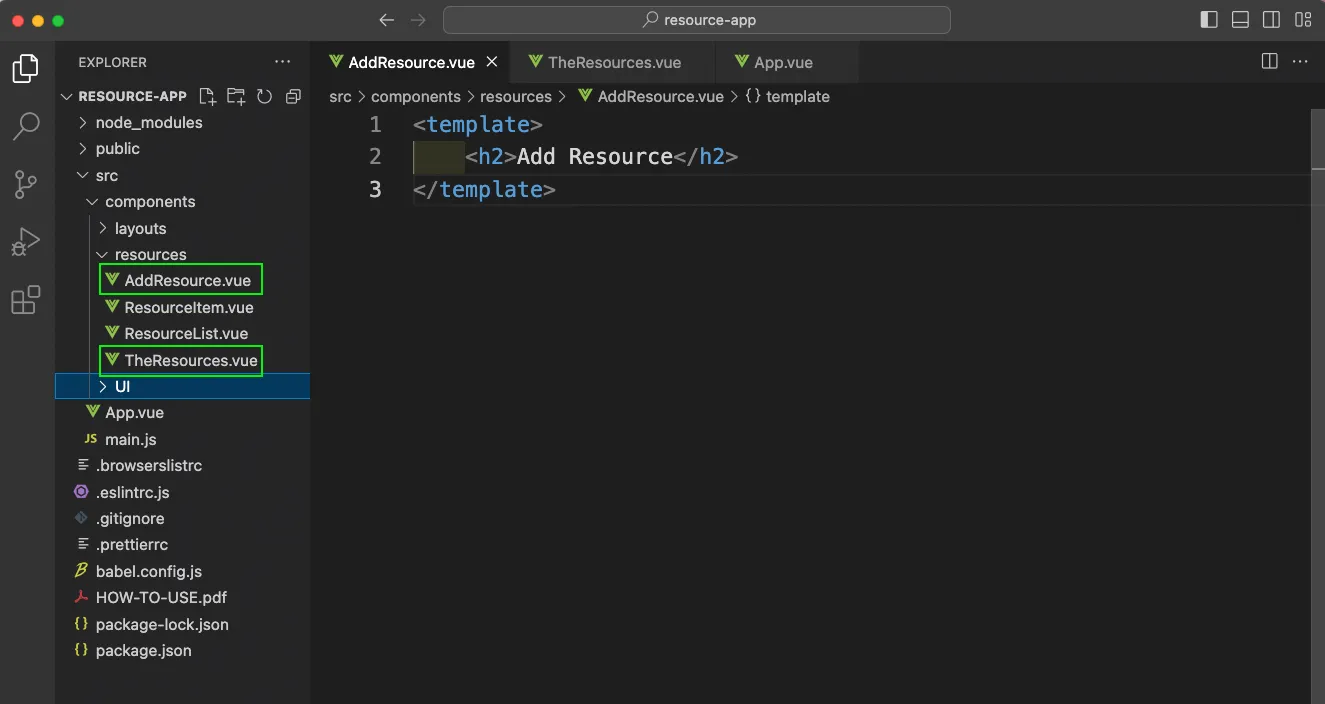
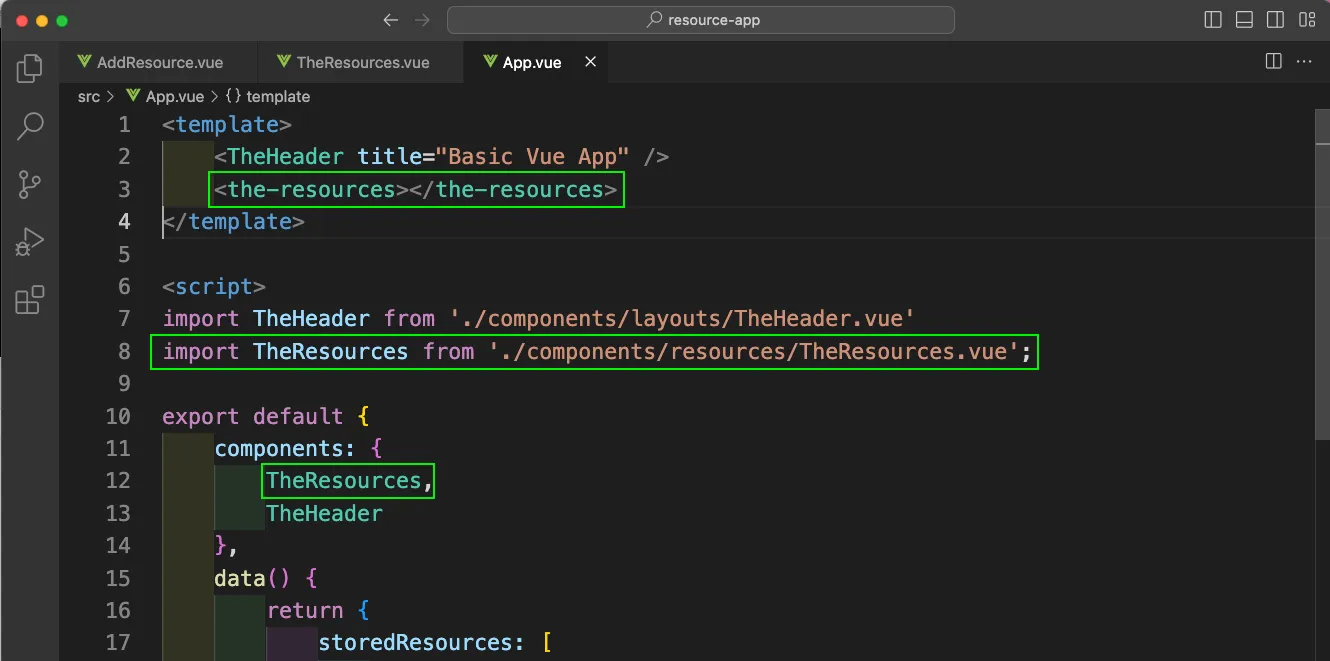
Now, inside the resources folder, we will create an AddResource.vue and TheResources.vue file and add basic code in it.
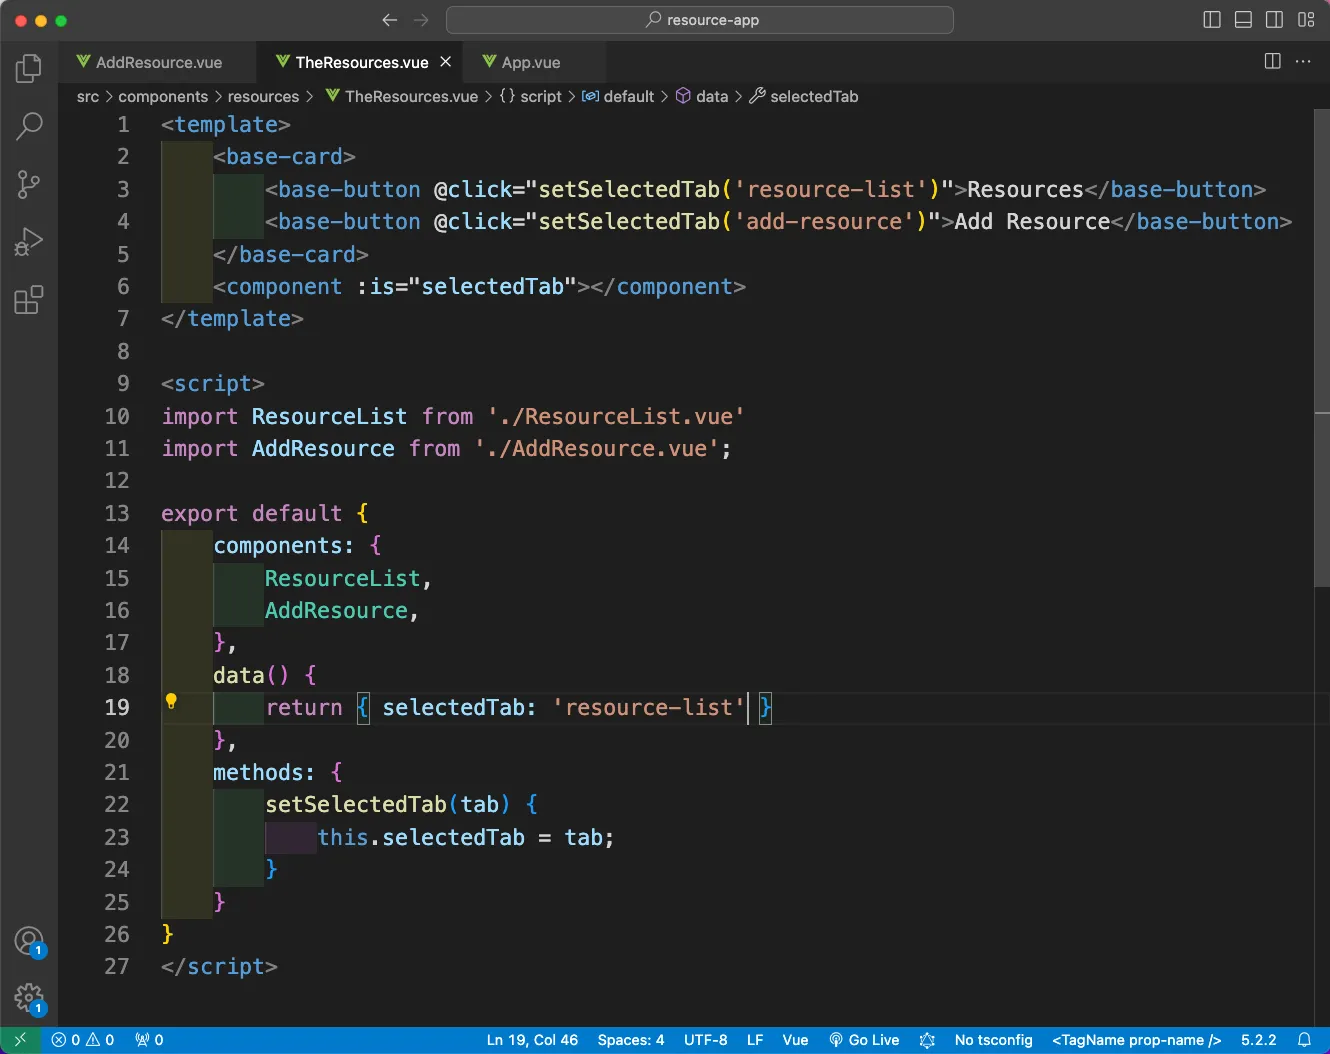
Now, in the TheResources.vue file we will first use the base-card and base-button components. Here, when we click the button, it set the selectedTab to a string of add-resource or resource-list.
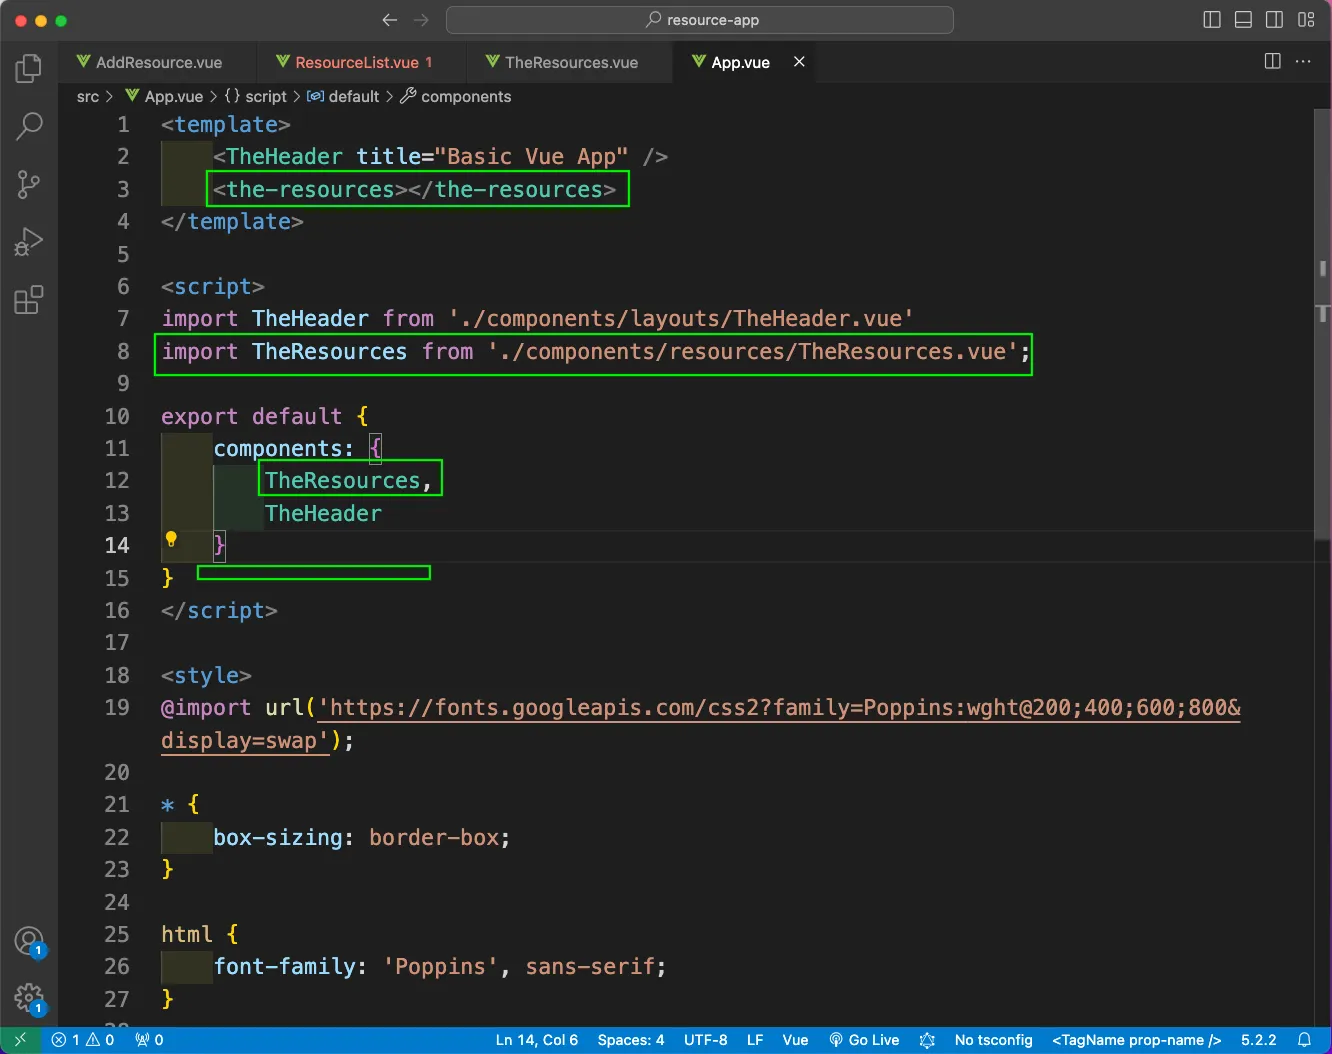
Next, we will include the TheResources component in the App.vue file.
Now, in the App.vue file, we have removed the storedResources data and also calling the TheResources component instead of the ResourceList component.
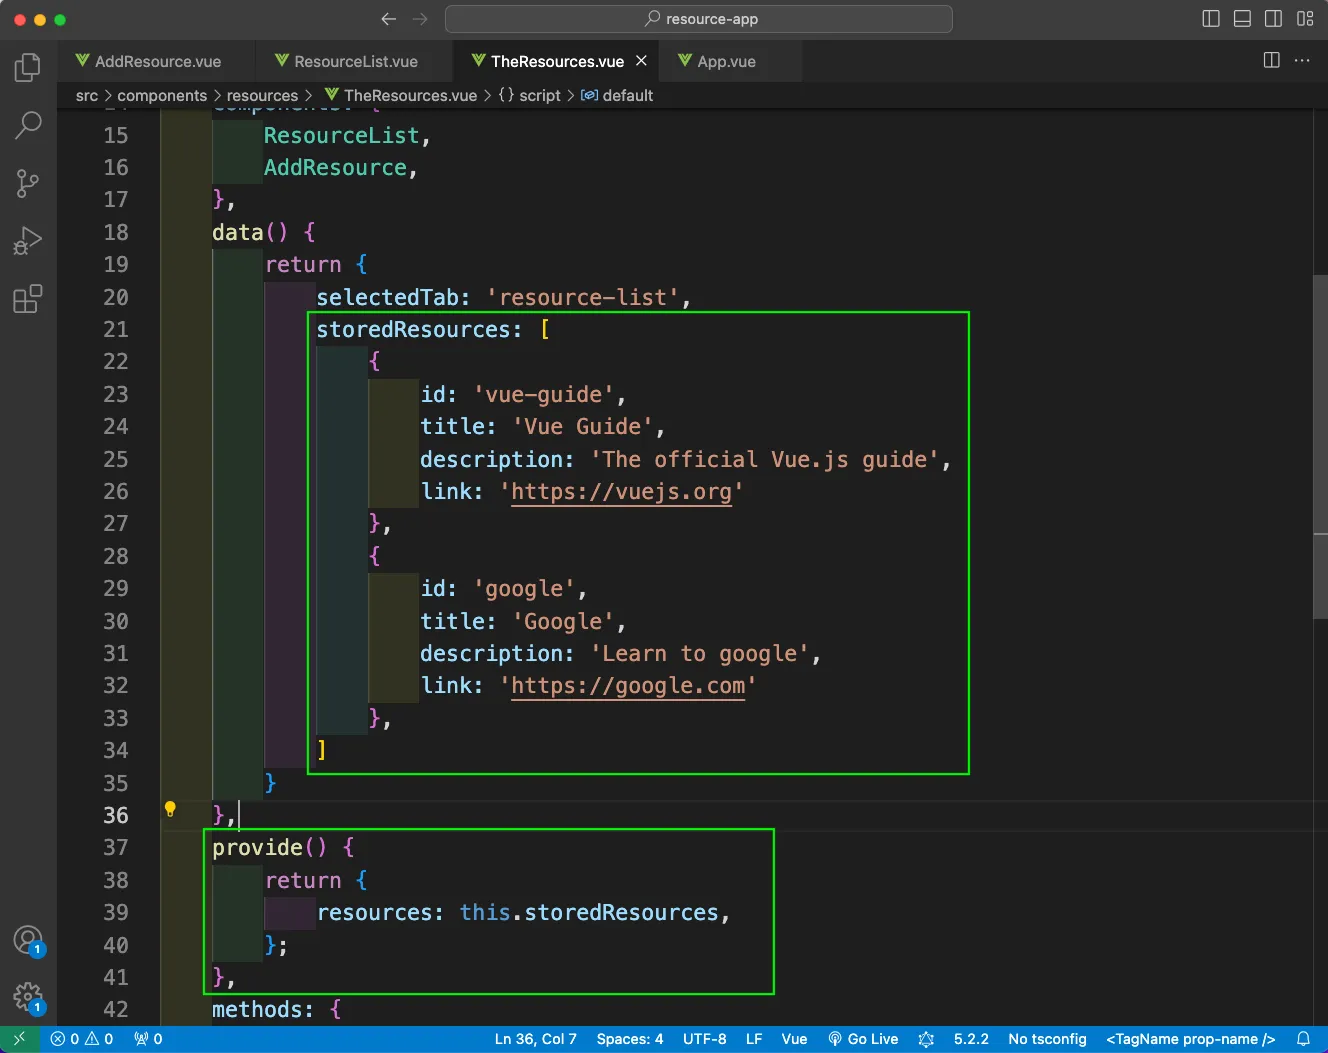
Now, in the TheResources.vue file, we will add the storedResources array in the data(). We will also provide it as resources.
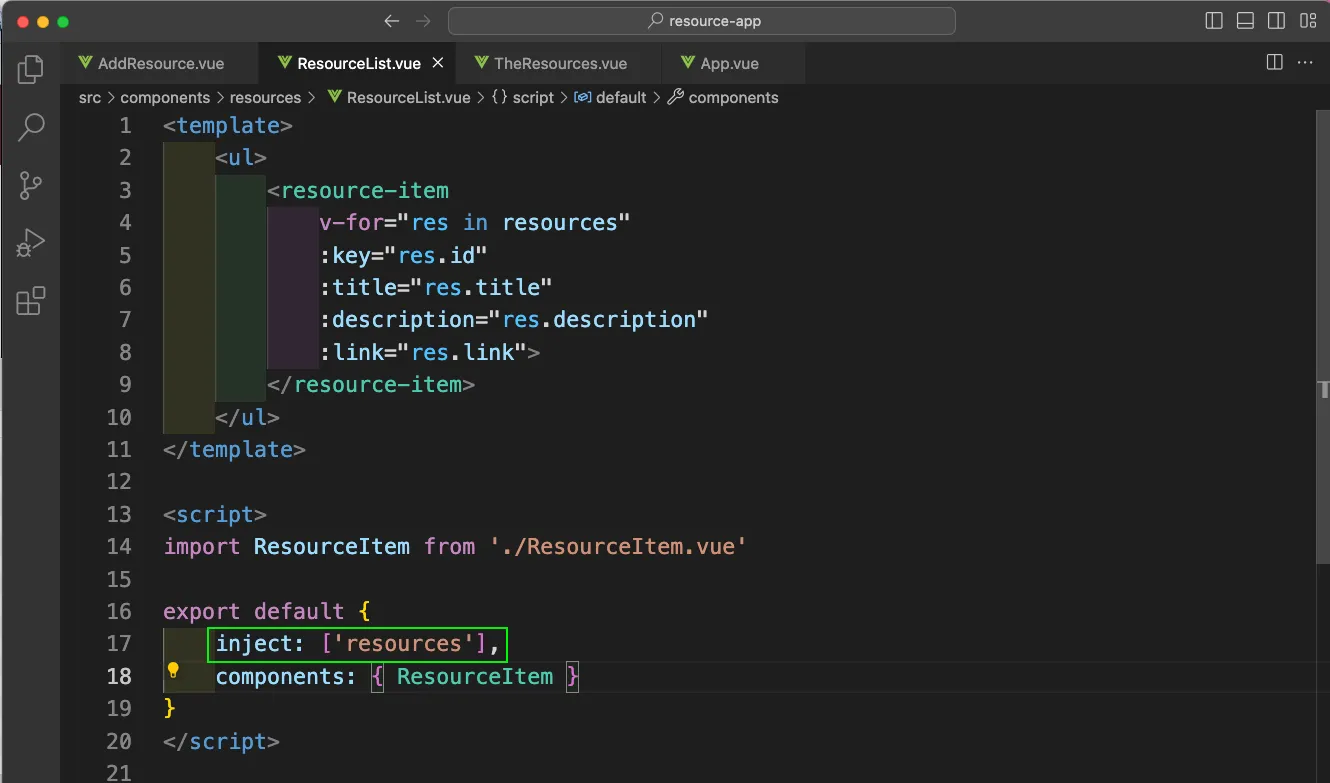
Now, we will inject this in the ResourceList.vue file.
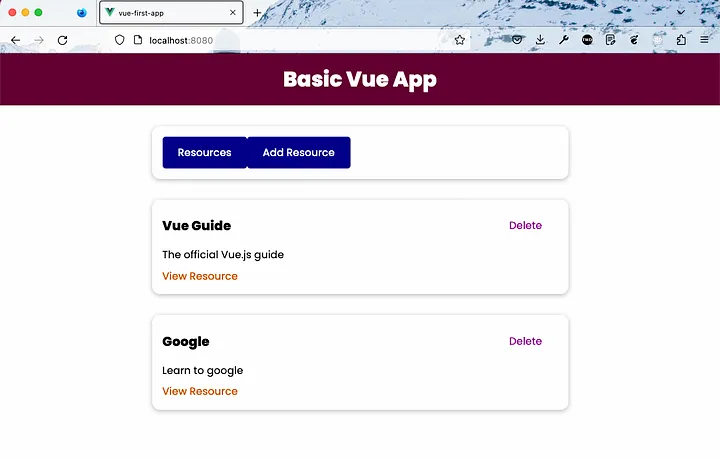
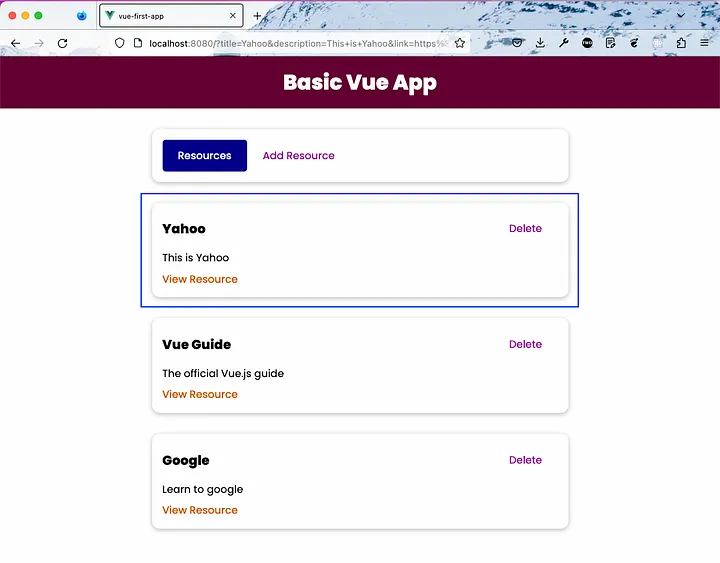
Now, in http://localhost:8080/ we will see two buttons for Resources and Add Resources with all items been shown.
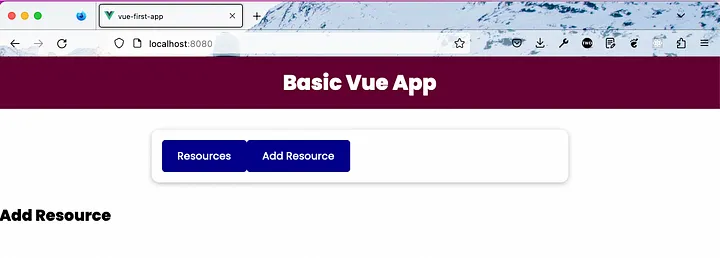
Also, clicking on the Add Resource button will show the text of Add Resource.
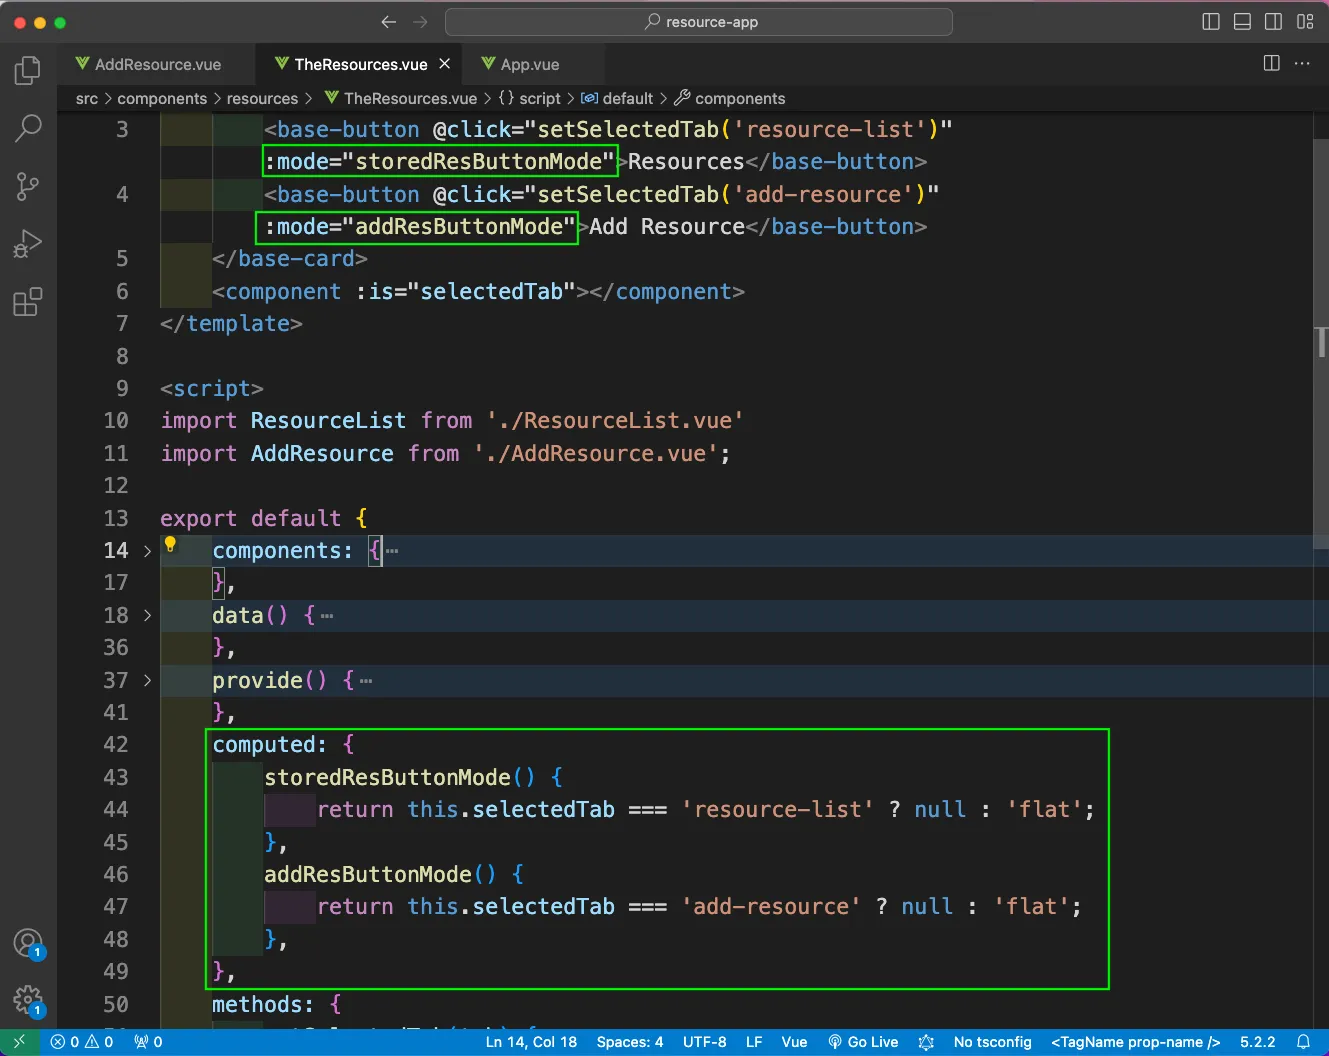
Back in TheResources.vue file, we will add the props of mode in the buttons. Here, using the computed property we are deciding the mode as null or flat.
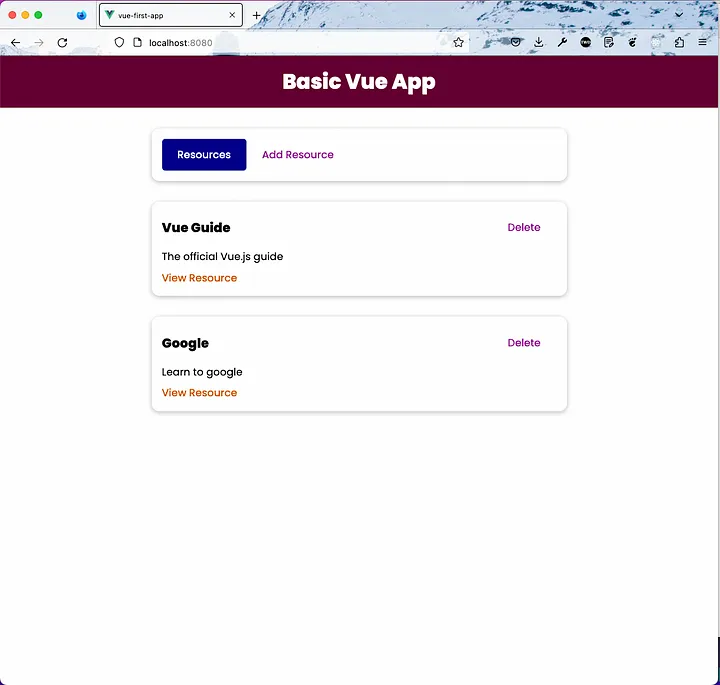
Now, the selected component is shown in a different button style.
Now, we will complete the code for AddResource.vue file to have a form to take the title, description and the link.
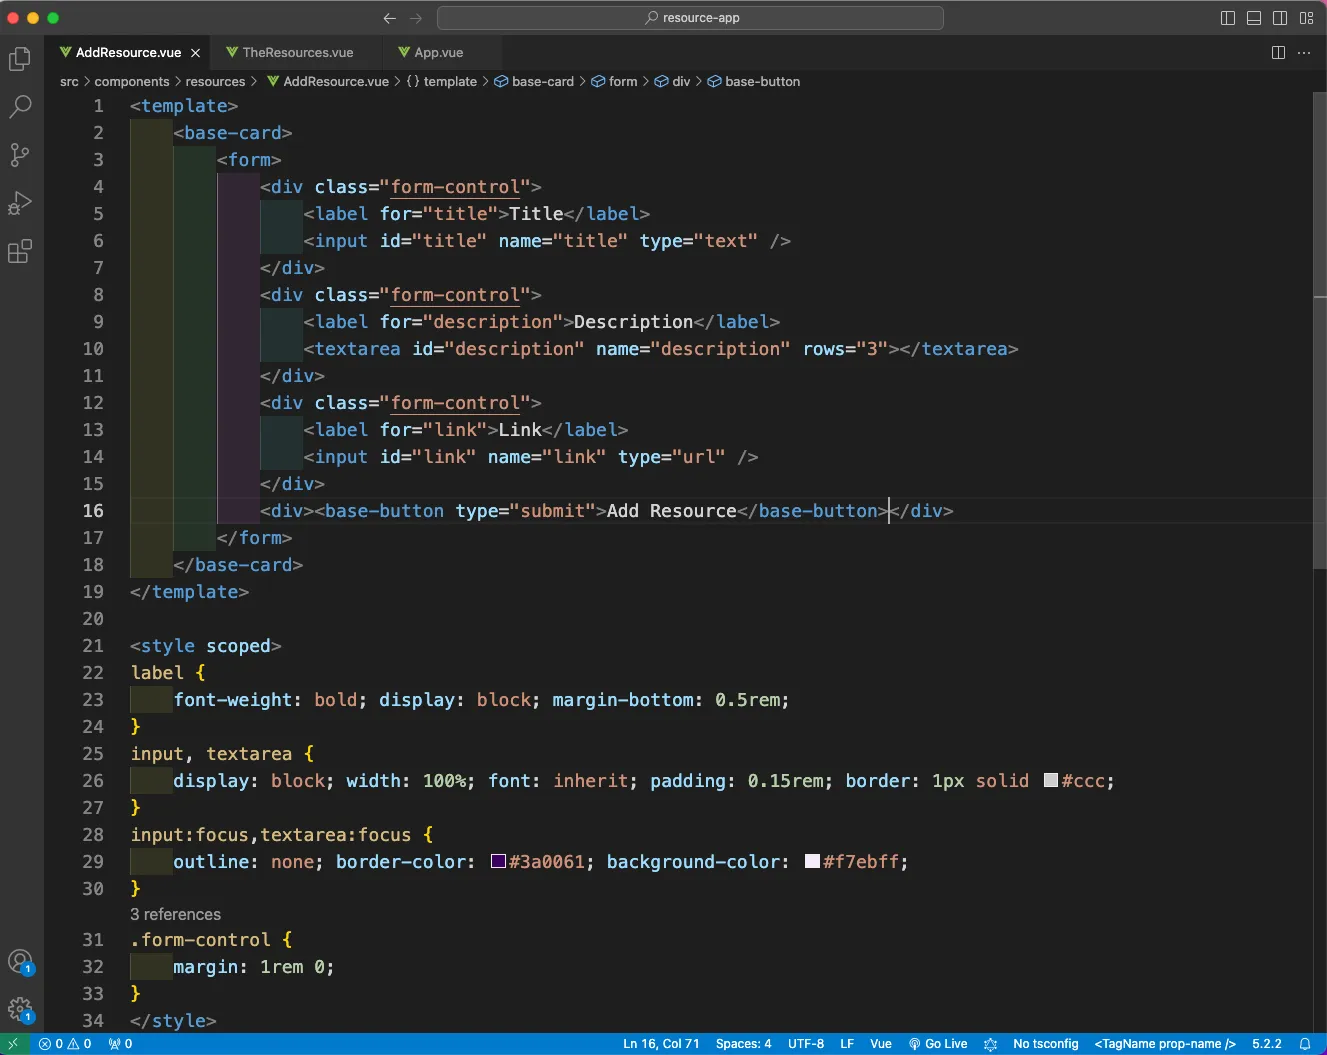
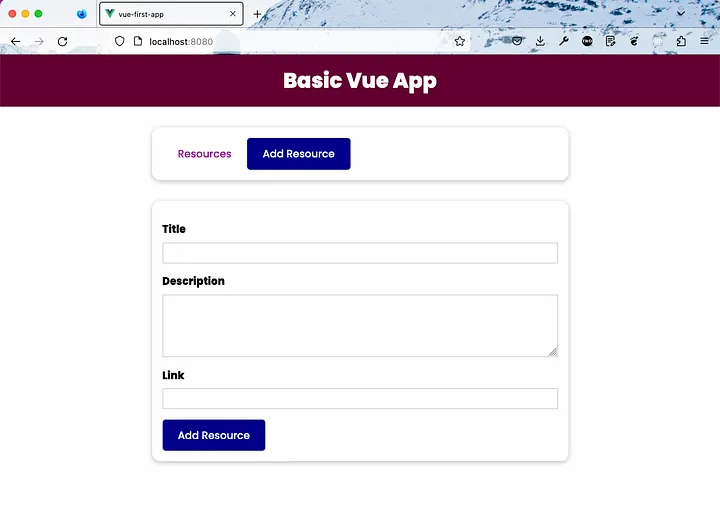
Now, clicking on Add Resource button, will show this nice ooking form.
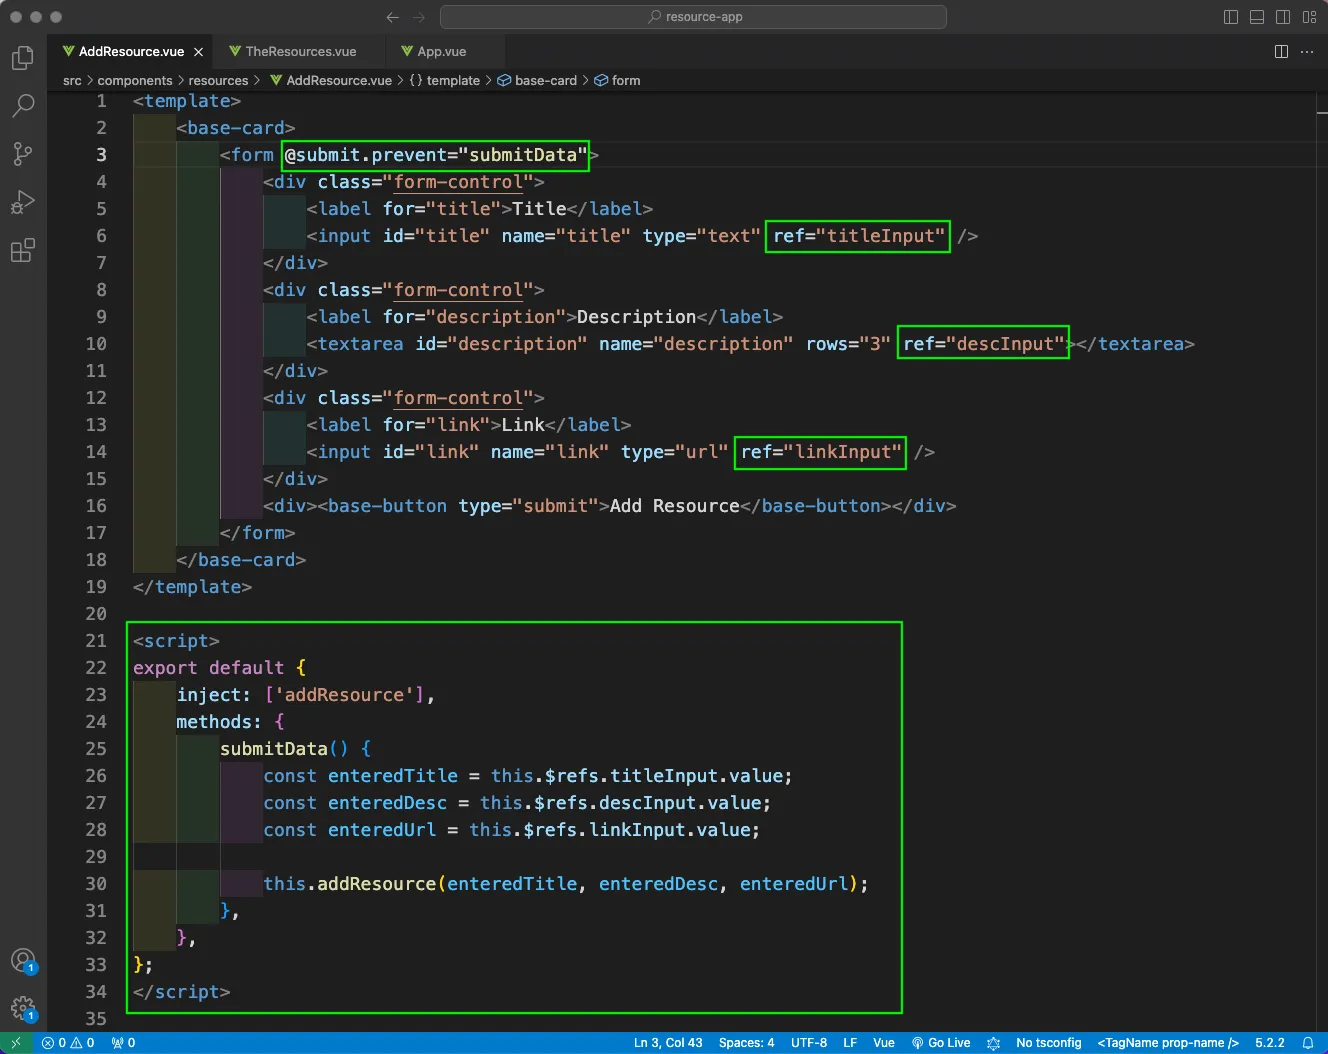
Now, in the AddResource.vue file, we will add refs to each input. The form will also call a submitData function.
In the submitData function, we will use the refs to take the entered values and inject the addResource.
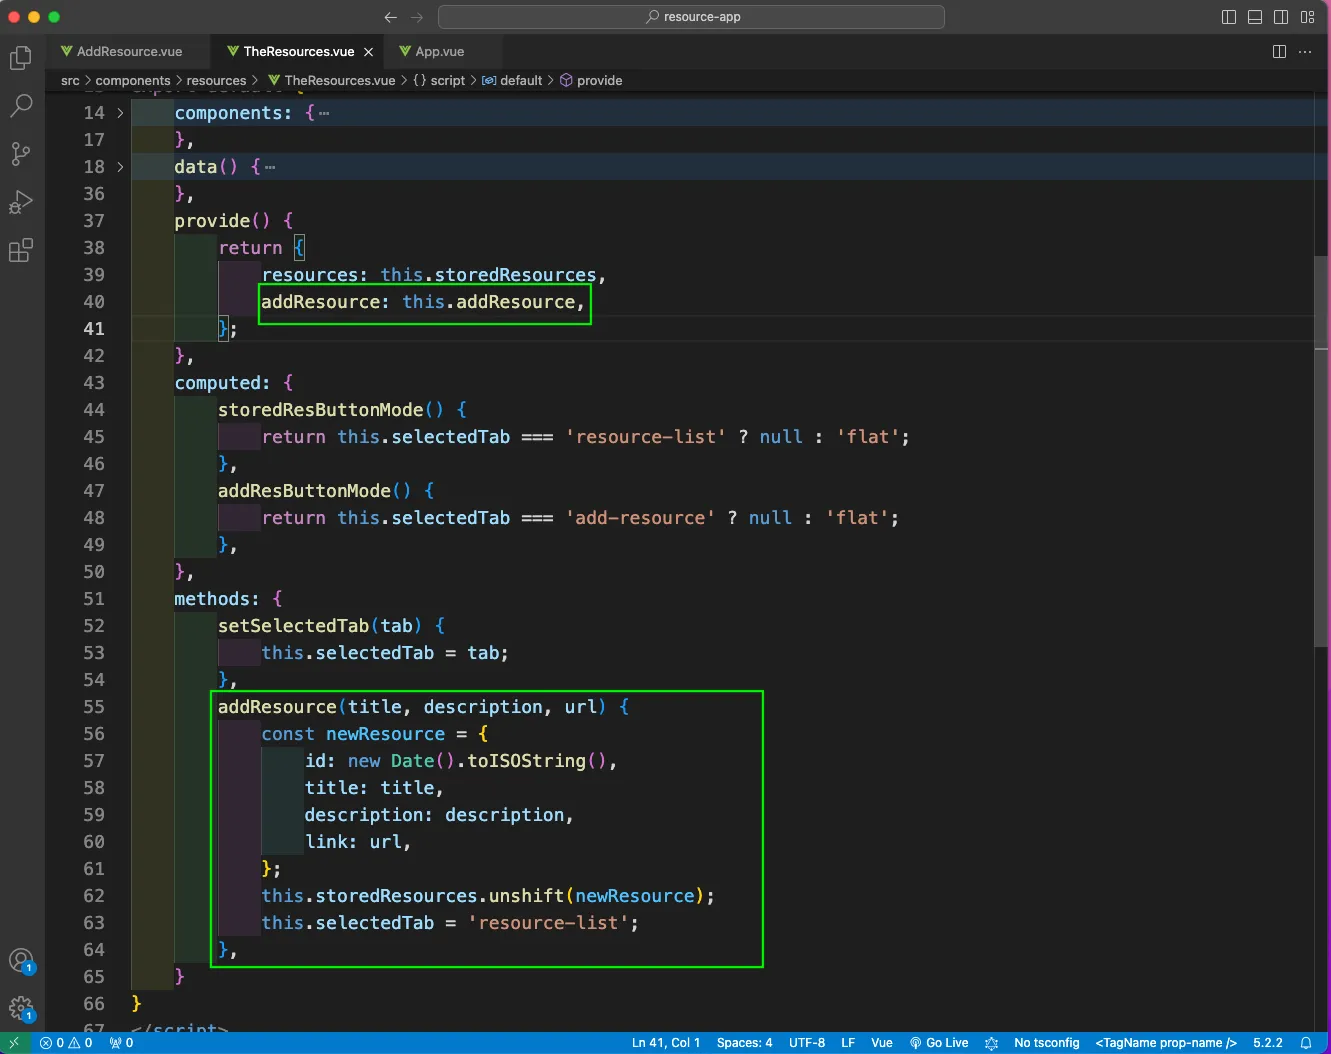
In the TheResources.vue file, we will have the addResource function taking the title, description and url and creating a new resource. Also, we are adding it to the storedResources array at the start. And also making the selectedTab as resource-list.
Now, when we add a resource, it is getting added in the Resources.
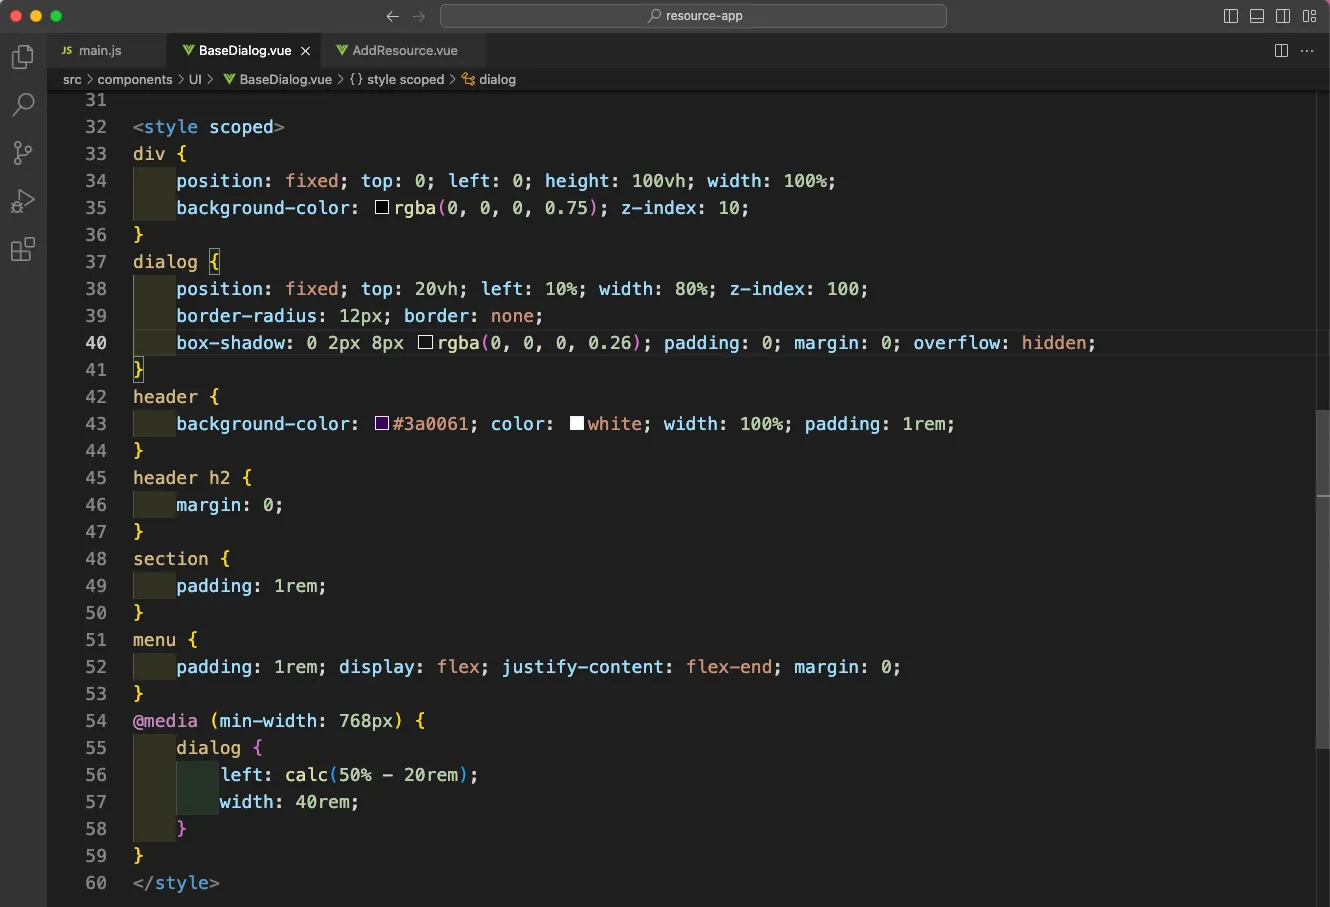
Now, we will create a BaseDialog.vue file inside the UI folder. Here, we will have a dialog which will take three slots with title and close.
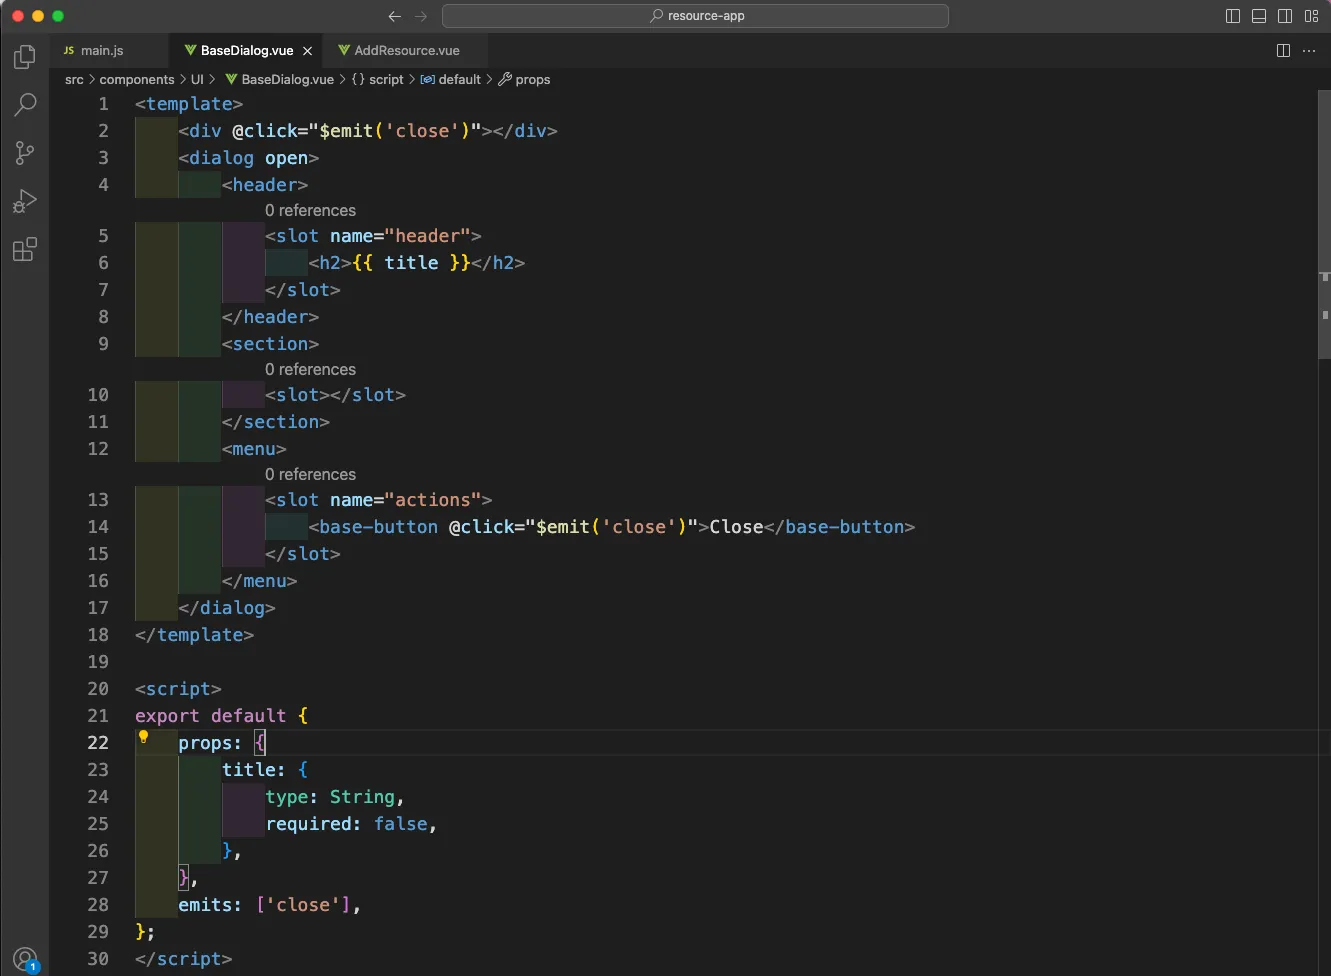
We will also add styles for the same in BaseDialog.vue file.
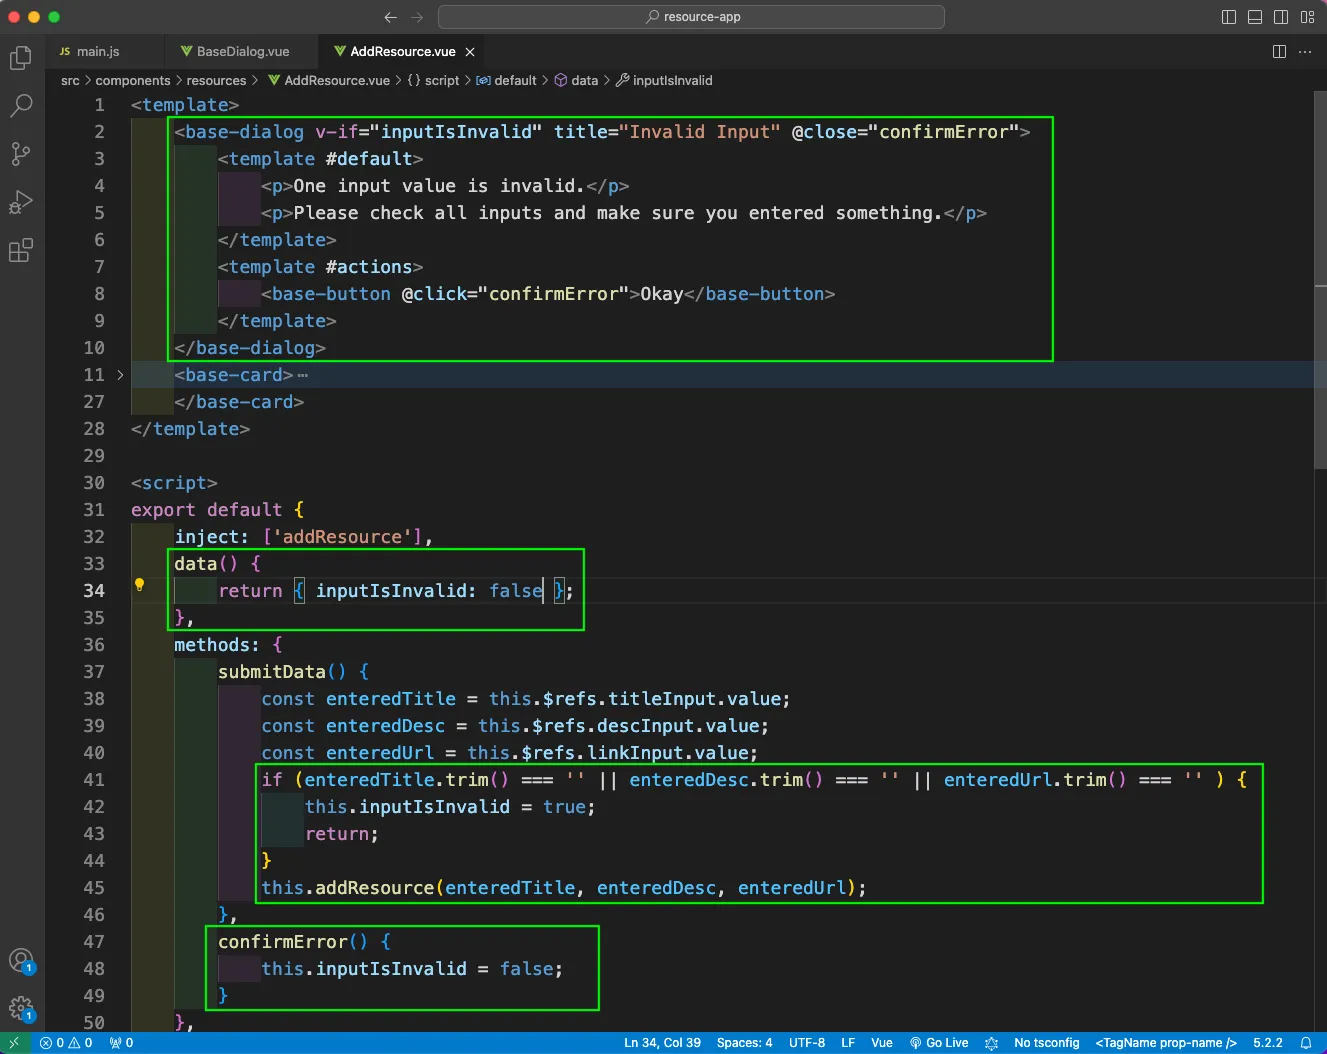
Now, in the AddResource.vue file, we will call the base-dialog component with template passing data and the action.
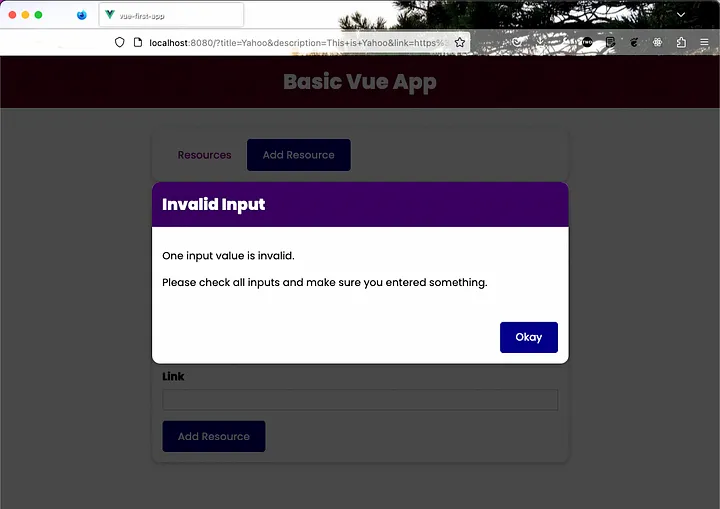
Inside the script, we will have a variable of inputIsInvalid initially set to false. Now, inside the submitData function, if we are not entering any data, we are setting it to true. We also have a confirmError function, setting the inputIsInvalid to false.
We are finally adding the BaseDialog component in the main.js file.
Now, if we are not entering any field, we are getting error in a nice pop-up.
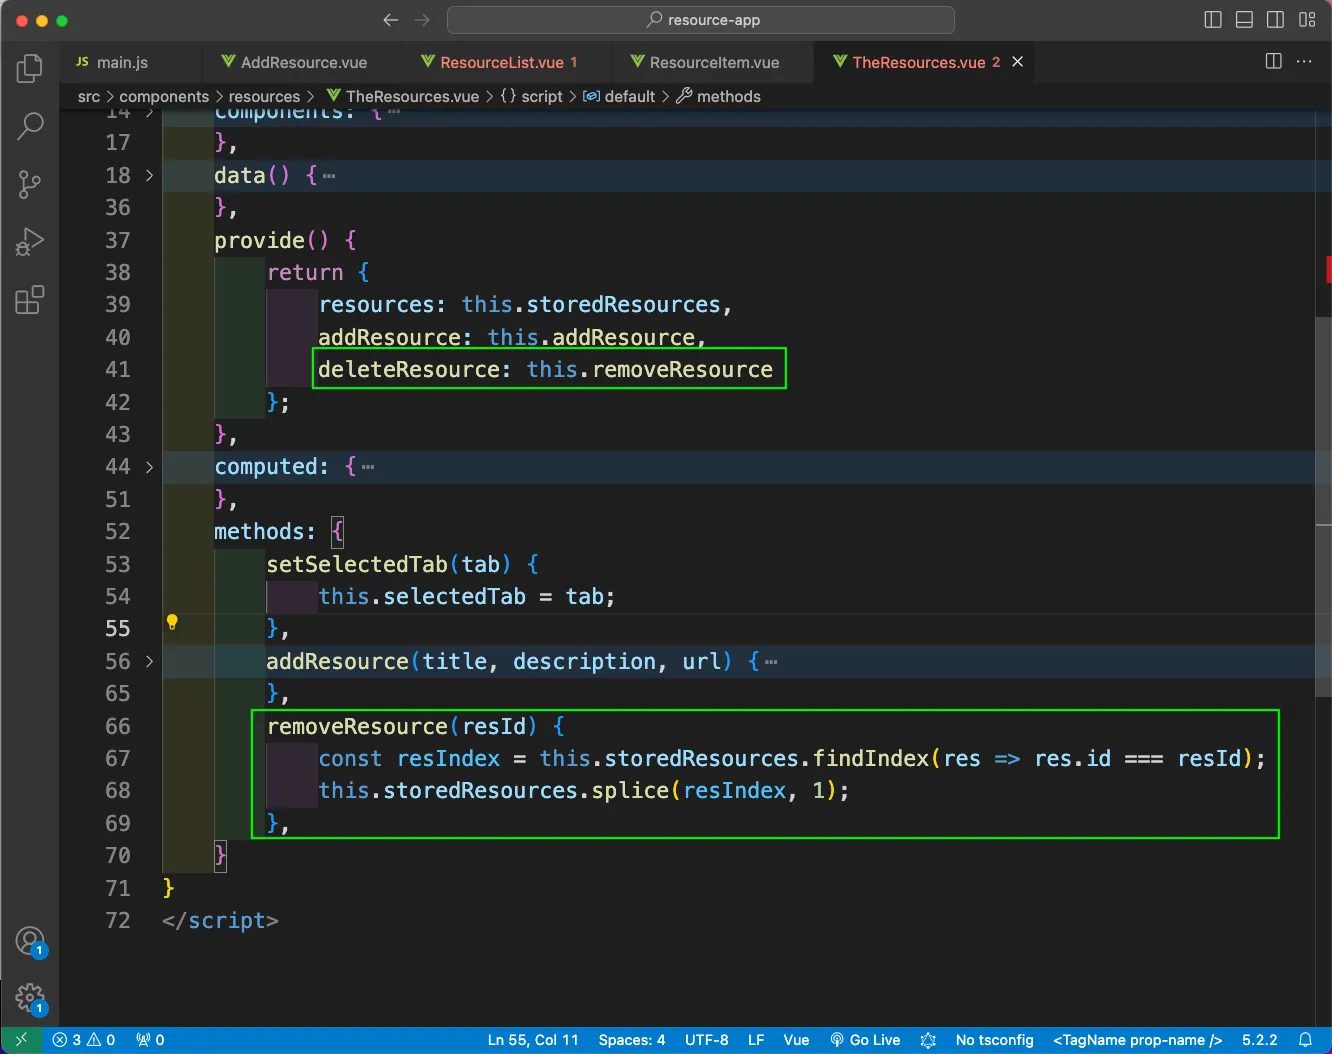
Next, we will add the logic to delete a resource. In the TheResources.vue file, we will add a function of removeResource, which will take the id and remove the resource from that id.
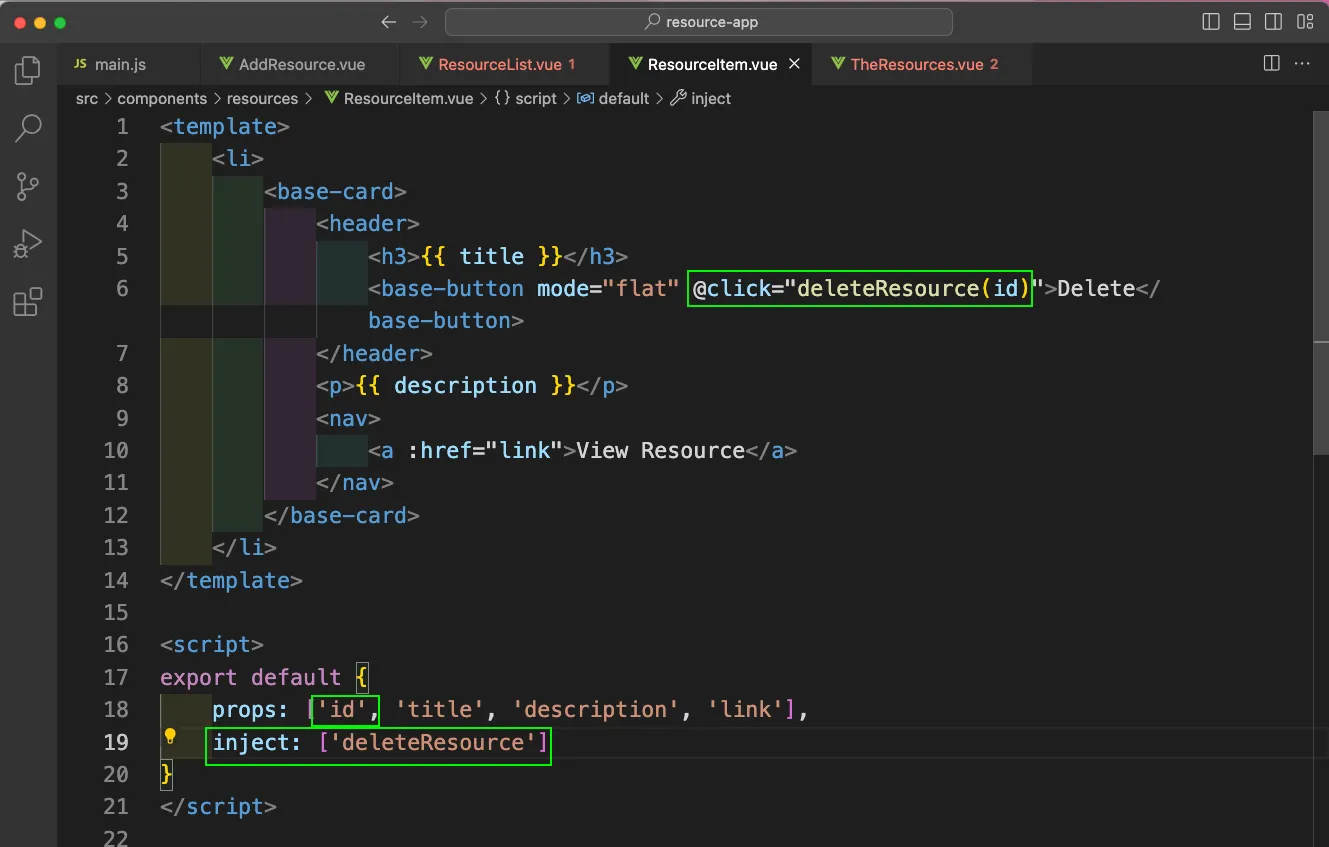
Now, we will inject this deleteResource in the ResourceItem.vue file, where on click of the Delete button will call the deleteResource method with the id.
Back in the ResourceList.vue file, we will also pass the id.

Now, we are even able to delete a file. This completes our small basic project in VueJS. You can find the code for the same here.